Upon creating a camera, follow these basic tips to ensure a realistic camera.
To adjust a camera's attributes, choose View > Select Camera from the panel menu to select the camera and display its Attribute Editor. If the Attribute Editor is hidden, choose View > Camera Attribute Editor. See Camera Attribute Editor.
Set the Focal Length and Camera Aperture values
If you have a camera in real life to match your Maya camera, set the following values to those of your physical camera. Otherwise, if you are creating your own camera, you may want to adjust the Focal Length and leave the Film Back value at its default.
The focal length is the measurement between the optical nodal point on the lens and the sensor. Focal length and angle of view are related, and they both determine how zoomed into the scene your camera is, and thus how close or far away objects appear. Increasing the focal length makes objects appear closer. In addition, it also affects how much objects appear distorted by the perspective effect. For example, a larger focal length may flatten the perspective effect and create a better portrait, while the perspective effect may be more exaggerated at a smaller focal length. For more information regarding these attributes and their relation to each other, see Angle of view (focal length).
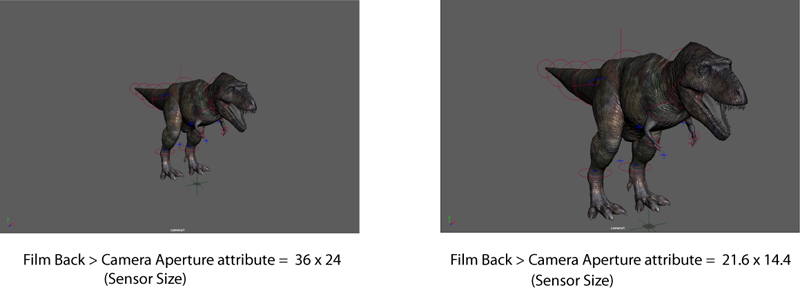
The Film Back > Camera Aperture attribute refers to the portion of the film back that is being exposed. Set this attribute to the sensor size of your camera. You can enter this value in inches or millimeters. The smaller the value, the smaller the angle of view that is captured by the sensor, and thus the closer objects appear without having any perspective exaggeration. The following images illustrate the difference between a sensor size of 36 x 24 versus 21.6 x 14.4 (40% smaller).
Adjust the pivot
The pivot is the equivalent of the nodal point in a real life camera, and the position around which the camera is rotated and transformed.
By default, the pivot point is located at the center of your film plane. Most camera rigs have the nodal point at a different location. Move it a little further back for more parallax and a more realistic effect. See Change the pivot point.
Adjust the pivot before you animate your camera to avoid having to readjust your animation again afterwards.
Display the resolution gate and film gate and adjust your camera as necessary
To display the resolution gate and film gate, enable these options from the View > Camera Settings panel menu or from the Display Options of the camera Attribute Editor.
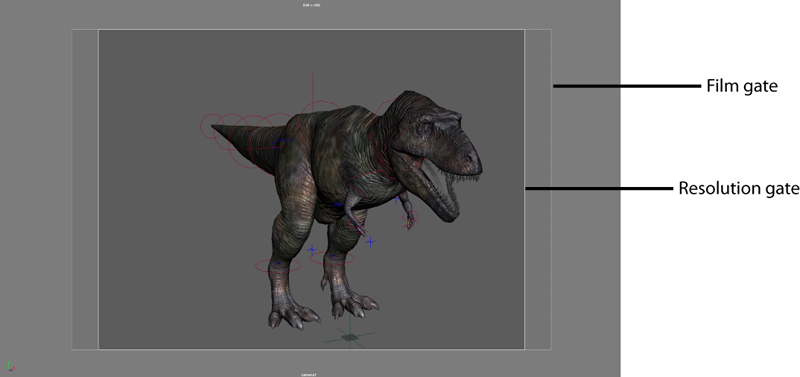
The resolution gate represents the rendering resolution (the region to be rendered). The film gate represents the dimensions of the camera aperture. In this example, the resolution gate is set to an aspect ratio of 4:3 while the film gate is set to an aspect ratio of 16:9. This image demonstrates that the resolution gate can crop the film gate. Display these view guides to ensure that your objects are zoomed or framed as you want in the render output, and that no objects are cropped out of the final rendered image.
See Display film gate, resolution gate, and other view guides.
If you add an image plane to the scene, you can set it to fit the resolution gate by clicking Placement > Fit to Resolution Gate in the image plane Attribute Editor.
You may need to repeat this step if you change the camera aperture after you have created an image plane. See Image plane attributes > Placement.
Enable and adjust depth of field
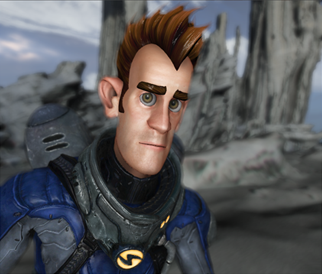
Enable and adjust depth of field so that some objects in the scene are sharply focused while others are blurred or out of focus. With the exception of scenes with landscapes, most scenes include some blurring effect from depth of field.
You can add this effect to your Arnold for Maya renders. To do this, consult the Arnold for Maya User Guide for information on the Arnold camera attributes. You can also add this effect via a compositing workflow. For more information, consult this tutorial: Z Depth AOV.
To adjust depth of field in the viewport, select the object that you want to focus on, and enable the Heads Up Display to view its distance from the camera. Enable Depth of Field in the camera Attribute Editor, and set this distance as your Focus Distance. See Adjust depth of field for a video demonstration.
To change the Focus Distance dynamically in an animated sequence while keeping the same object in focus, use the Distance Tool to measure the distance between the camera and the object, then use this distance to create an expression on the Focus Distance attribute. When setting up the Distance Tool, constrain one locator to the camera, and set the other to the object in focus.
Download this scene for a demonstration of this technique. In this example, the first locator of the distance tool is constrained to the camera, while the second locator is set to the sphere in the middle of the scene. Navigate to the DOF_Camera Attribute Editor and expand the Depth of Field section. An expression is set on the Focus Distance attribute so that it always equals the distance value of the distance tool shape node: DOF_CameraShape.focusDistance=distanceDimensionShape1.distance.