To rotate an object:
- Activate Rotation mode by clicking this icon
 from the
Viewer window Manipulation and Transformation mode tools in the Viewer window.
from the
Viewer window Manipulation and Transformation mode tools in the Viewer window.
- Expand the Rotate menu from the Viewer window Transformation buttons and select a Rotation mode from the Rotate options.
- Select
Rotate if you want to “spin” the object.
Keyboard shortcut: R
- Select Rotate Around if you want the other objects in the selection group rotate to around the manipulation point.
Keyboard shortcut: Shift + R
- If you want to rotate objects incrementally, use the Snap Angle button. See
Snap Rotation.
Note: When in Rotate transformation mode, the reference menu includes the Layer (Additive) option.
- Select
Rotate if you want to “spin” the object.
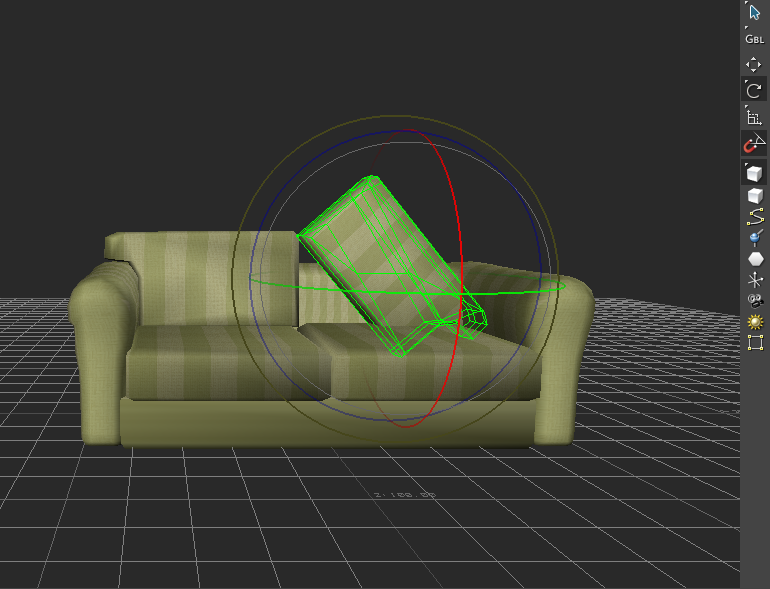
- Select the object’s rotation rings in the Viewer window and drag them or do one of the following:
- Enter precise values in Properties windows
- Double-click a rotation ring and enter a value in the Axis Rotation Degree Delta dialog box that appears.
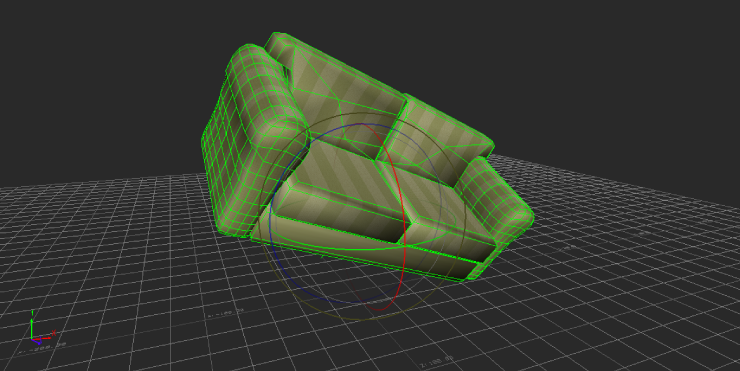
Selected object in the Viewer window displays with Rotation rings for rotating on the X, Y, or Z axis
To snap the rotation of objects at specific increments:
- Select Settings > Preferences from the menu bar.
- In the Preferences window, select the Viewer preferences (A).
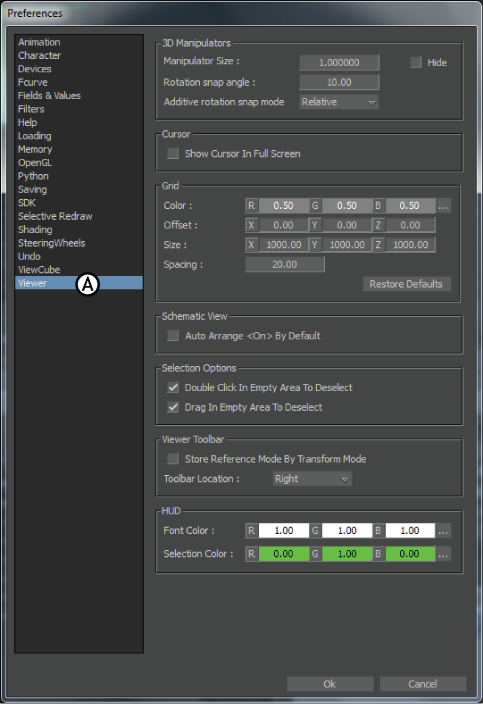
Preferences window A. Viewer preferences
- In the 3D Manipulators area, enter the size of increment (in degrees) in the Rotation snap angle field.
Tip: Right-click the Snap Rotation button to view the last five increments set for the Snap Rotation and to open the Preferences window and set a new increment size.
- Activate the Snap Rotation button in the Viewer toolbar. You can also hold down the M key to activate Snap Rotation mode temporarily.
Viewer window A. Snap Rotation button
If no rotation increment is specified, objects rotate in 10-degree increments by default.
- To return to regular (non-incremental) rotation, disable the Snap Rotation button.