The advanced texture feature allows you to define a specific region of your part that you want to apply the texture too. You can also specify a specific region of the image you want to apply to this region of the part using corner points.
- Select the part.
- Click
Modify >
 Texture & Color Mesh .
- From the toolbar, click
 Add Advanced Texture.
- At the bottom of the context view, browse for a file containing the texture to project on the part.
- Begin clicking on the part to define the region which will contain the applied texture. After your third click, an enclosed shape is created. Each subsequent click adjusts the shape of the enclosed region.
- If necessary, right click a point and choose Delete to remove it or Reset to clear all the points.
- In the context view, drag the blue dots on the grid to define the region of the texture to be applied to the part.
- Use the rotate and mirror buttons to adjust the order in which points are applied to the 2D texture grid. This has the effect of adjusting the orientation of the texture as it appears on the part.
- Click Show Preview to see how the texture is applied to the part.
- Click Add Texture to apply the texture to the part.
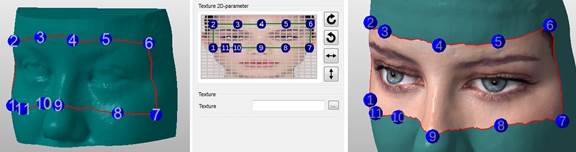
Left: Define the area on the part containing the texture. Middle: Define the area of the texture to be applied to the part. Right: Preview of the advanced texture.
Unlike the texture projection, the advanced texturing wraps the image on the undercuts of the model.
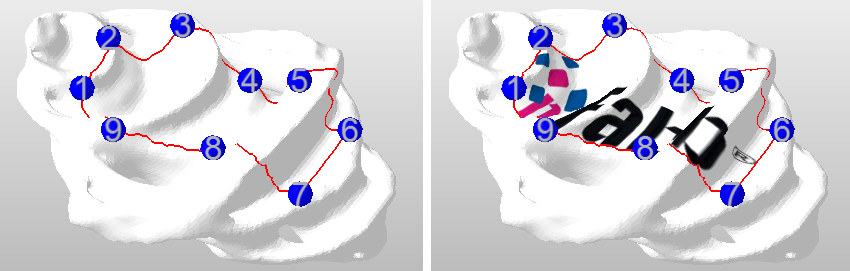
A part textured with the project mode.

A part textured in the advanced mode.