How to use the measurement tools
Before any measurement, make sure to measure against the correct part. You may have overlapping parts after a process that asks whether to keep or discard the original part. To make sure you measure against the correct part or parts, set all other parts to invisible.
|
Example: You create a hollow part using
and, when prompted, choose to keep the original part. Both parts are now present on the platform in
identical position and orientation. You now perform a wall thickness measurement. However, instead of measuring the wall thickness of the hollowed part, the thickness of the solid part at the chosen location is displayed because this part happens to take precedence.
Solution: Select the original, non-hollow part and choose
.
|
Jump to:
- To measure any property
- To measure an angle
- To position labels
- To add text to a label
- To store and recall measurements
- To remove a measurement
- To remove all measurements
To measure any property
Properties such as position, length, and angle are measured by choosing and placing selection primitives, or tools, onto the part surface. The combination of the tools used at the start and (if required) end of the measurement determines the type of property to be measured. As you place the first and, if necessary, the second tool, the measurement is automatically generated and displayed.
- From the main menu, choose .
- In the context view, select the Tools tab.
- Click one of the available selection tools.
- Select the second tool, if necessary.
Most of the tools have a drop-down sub-menu to select the second tool and thus the type of measurement, and any measurement that would not require a second tool, such as measuring the radius of a circle, have that measurement as the last item in their respective sub-menu.
- With the tool or combination selected, perform the measurement in the display.
The results are now displayed on the model using a text label as well as an entry on the Measurements tabsheet in the context view.
TopTo measure an angle
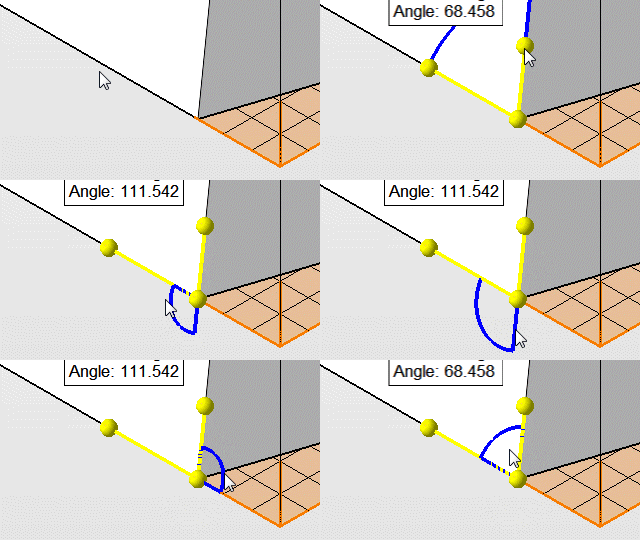
Measuring angles includes measuring adjacent ones. To get these displayed, an additional step is needed. This additional step selects the desired variation of measuring an angle.
- From the main menu, choose .
- In the
context view, select
 3-Point Angle, or
- Click on the part to add measurement endpoints as needed.
- Move the mouse pointer around the vertex of the created angle measurement to switch through the available arcs of angle measurement.

Measuring adjacent angles
- Click to confirm the chosen arc.
To position labels
At any point during or between measurements, click and drag a label to reposition it.
TopTo add text to a label
Up to three lines can be shown in a measurement label. Any lines beyond that only appear in the Measurements tabsheet in the context view.
- Right-click an existing measurement label.
- From its context menu, choose Edit Measurement.
- Type in your text.
Tip: By unchecking Show in label, the text is listed on the Measurements tabsheet.
To store and recall measurements
As you create measurements, they are saved automatically, and you may continue working with the part. This saves and hides any measurements for displaying them later. To display any measurements previously made on a part, click .
Measurements are saved in a FABBPROJECT file, so they remain available the next time you load the project.
TopTo remove a measurement
- Right-click an existing measurement label.
- From its context menu, choose Delete Measurement.
To remove all measurements
To remove all measurements taken, click Reset at the bottom of the context view while measurements are active.
Top Generate Shell
 View
View Hide selected part
 Measure
 Line
Line