This example explains how to assign thickness values to a set of components.
- Click Home tab > Setup panel > Thickness to display the Component Thickness dialog and select the Surfaces tab.
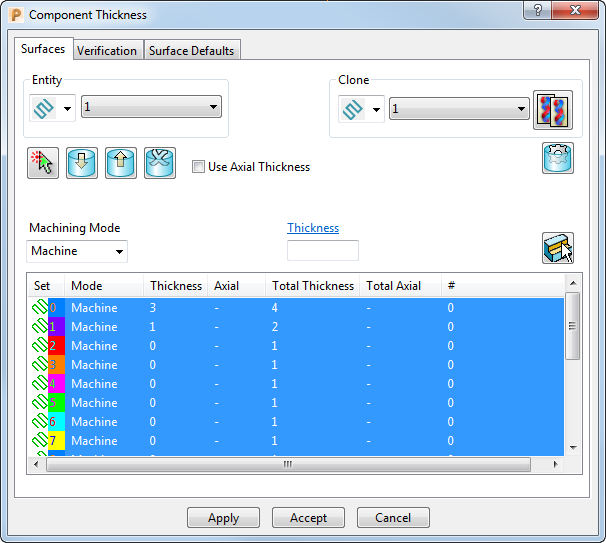
- Select an Entity of either Toolpaths
 or Boundaries
  , depending on whether the component thickness data is to be associated with a toolpath or a boundary.
 - Expand the Filter by Toolpaths or Boundary list and select the particular toolpath or boundary to which the thickness data refers. Alternatively click
 to copy thickness data from an existing toolpath or boundary.
 - Select a set from the thickness list table.
- You can acquire additional components from the graphics area for the set. To do so, select the additional components using the left mouse button and then click
 Acquire Components.
A component can only belong to one set at a time. If you acquire a component that is already acquired by a set, the component is removed from the first set and acquired by the second.
To display all the components of a set in the graphics area, select the set and then click
 Select Components.
- To remove individual components from the selected set, select them in the graphics area and then click
 Remove Components.
 - To remove all the components from the selected set, click
 Remove All Components.
 - To copy in the values from the Surface Defaults tab, click
 Copy in Default Thickness Data.
When you create a new set of thickness data for a toolpath or boundary, the values currently in the Surface Defaults tab are automatically copied into this dialog, but if you change the Surface Defaults they are not updated unless you click
. - To remove individual components from the selected set, select them in the graphics area and then click
- Click
 to bring up the Selection dialog to select components by Model, Colour, or Levels and Sets.
 - Having acquired all the necessary components for a set, specify the Thickness values:
- Select Use Axial Thickness if you want to specify separate Radial and Axial Thickness values. When deselected, you can only enter a single Thickness value.
- Thickness applies the thickness as an offset to the tool in all directions.
- Radial Thickness applies the thickness as an offset to the tool radially. This controls the size of tool used for machining relative to the actual tool.
- Axial Thickness applies the thickness as an offset to the tool in the tool axis direction only. This controls the tip position of the tool used for machining relative to the actual tool.
- Select the Machining Mode for the set.
The option selected here determines the colour displayed in the Mode column below. The default colours are white for Machine, yellow for Collision, and red for Ignore. Click File tab > Options > Customise Colours > Machining Mode and use the Customise Colours dialog to change the colours..
- Repeat from step 4 as required, and review your sets when they are complete:
- The Set column displays either the toolpath
 or the boundary
  icon, depending on the option selected in the Entity list.
 - The Mode column displays the type of machining mode selected for these components.
- The Thickness column displays the thickness (or Radial Thickness) applied to the set's components within this dialog.
- The Axial column displays the Axial Thickness applied to the set's components within this dialog.
- The Total Thickness column displays the total Thickness (or Radial Thickness) applied to the set's components (that is Area Clearance plus Finishing plus Components plus Collision Checking).
- The Total Axial column displays the total Axial Thickness applied to the set's components (that is Area Clearance plus Finishing plus Components plus Collision Checking).
- The Components column displays the number of components selected to have the associated thickness values.
- The Set column displays either the toolpath
- Each set when selected has a colour alongside it. This is the colour that is used to shade the set's components when Thickness Shade
 is selected from the Shading toolbar. If you want to change these colours, click File tab > Options > Customise Colours to display the Customise Colours dialog and select Default Thickness Sets.