You can specify the position of some types of features relative to the active solid using the Solid Feature Relationship dialog. You can create a relationship for the following solid features:
- Solid cut
- Solid boss
- Boolean
- Boolean-boss
- Hole
- Pocket/Protrusion
- Select
 on the appropriate solid feature dialog to display the
Solid Feature Relationship dialog:
on the appropriate solid feature dialog to display the
Solid Feature Relationship dialog:
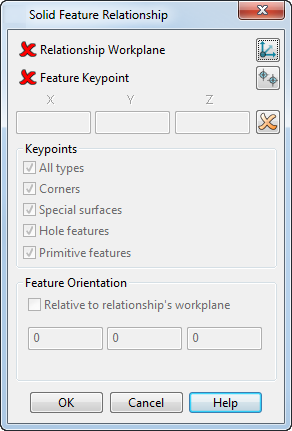
- Use the following options on the dialog to specify the relative positions with respect to the solid:
-
 — Position the relationship workplane.
-
 — Specify the point on the feature to use.
-
 — Enter X, Y and Z values to specify the distance between the two keypoints.
-
 Delete the relationship.
The status of the relationship is indicated on the feature dialog by a
 (no relationship is currently specified) or a
 (a valid relationship is specified).
-
- When you have selected the
Relationship workplane button
, use the following options to specify the keypoint on the solid:
- All types — Select this option to display all key points. Deselect this option to use the other keypoint options to specify the display. Selecting any other keypoint option deselects All types.
- Corners — Select this option to display corner points on the solid.
- Special surfaces — Select this option to display keypoints on special shaped surfaces (plane, cylinder, cone, torus and sphere).
- Hole Features — Select this option to display keypoints of hole features.
- Primitive features — Select this option to display keypoints of primitive features.
- Relative to the relationship's workplane — Select this option to align the feature so that its axes are parallel to the relationship workplane. Deselect this option to make the orientation of the feature independent of the relationship workplane.
- X, Y, Z boxes — Enter the X, Y and Z angles that the feature is twisted around each axis. The twists are applied in the order they are entered. The twist order is indicated by the twist transformation order displayed at the bottom of the dialog when you enter values in the boxes.
- Click OK to accept all changes and close the dialog.