To morph triangles using the curves:
- Select a mesh.
- Click Mesh Tools tab > Triangles panel > Morph using Curves to display the Morph Triangles using Curves dialog:
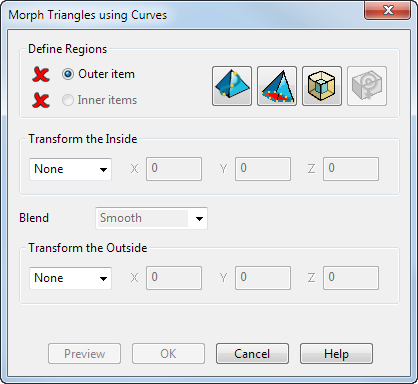
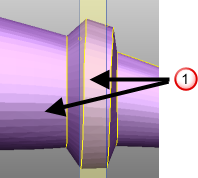
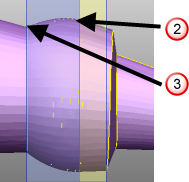
- Select the inner and outer items you want to define the morph by, or, if necessary, use the following buttons to create curves to define the inner and outer regions:
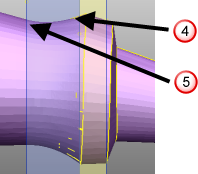
- Click the Snap to Mesh
 button to create a curve that is snapped to the mesh.
 - Click the Mesh Boundary
 button to create a curve at the mesh boundary.
 - With a curve selected, click the Offset
 button to offset the selected curve.
 - Click the Centre of Gravity
 button to add a point at the centre of gravity.
The
 changes to a
  next to the Outer item and Inner items options to indicate that they have been selected.Note: If you create the outer and inner items, they are automatically selected.
 - Click the Snap to Mesh
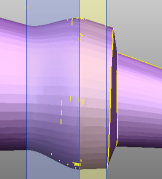
- Choose a Transform the Inside option. Select:
- None for no morphing of the inside region.
- Move to move the inside region. Enter X, Y, and Z values to indicate the amount to move along the axes.
-
Rotate to rotate the inner region. Enter a rotation Angle. Click the Reposition
 button to define a new rotation origin.
 -
Scale to increase or decrease the size of the region by entering a scale Factor. For example, to increase the size of the region by 20% enter a Factor of 1.2. By default, Factor is applied in all directions. Use the Lock
 buttons to suppress scaling in a specific axis.
Click the Reposition
 to define a new position for the scale origin.
 - Offset to define the offset for the region in the Distance box.
- In the Blend list, choose the type of blend you want to use. Select:
-
None to have no blend is between the transformed region and the adjoining regions
 :
:
-
Smooth to create a smooth curve between adjoining transform regions. The curve is tangential at both edges of the blend region:
-
Linear to create a straight-line blend between the two transform regions:

-
Smooth to Sharp to create a smooth to sharp blend between the previous region and the current region. This creates a transition that uses a tangential curve next to the first transform region
 , and a linear blend next to the second transform region
  :
:
-
Sharp to Smooth to create a sharp to smooth blend between the previous region and the current region. This creates a transition that uses a linear blend next to the first transform region
 , and a tangential curve next to the second transform region
  :
:
-
None to have no blend is between the transformed region and the adjoining regions
- Choose a Transform the Outside option: Select:
- None for no morphing of the outside region. This is the default.
- Move to move the outside region. Enter X, Y, and Z values to indicate the amount to move along the axes.
-
Rotate to rotate the outside region. Enter a rotation Angle. Click the Reposition button to define a new rotation origin.
-
Scale to increase or decrease the size of the region by entering a scale Factor. For example, to increase the size of the region by 20% enter a Factor of 1.2. By default, Factor is applied in all directions. Use the Lock buttons to suppress scaling in a specific axis.
Click the Reposition
to define a new position for the scale origin. - Offset to define the offset for the region. Enter an offset Distance.
- Click Preview to view the morph.
- Click OK to morph the region.