Ordinate dimensions are created along an axis of the principal plane of the current workplane. These dimensions measure distances from a common origin. An example is shown below. Notice that no leader line is drawn:
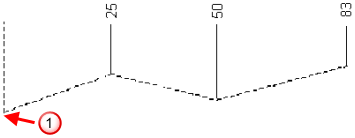
 Origin point
To create an Ordinate dimension:
- Click Annotation tab > Dimension panel > Multiple > Ordinate.
The Dimension toolbar is displayed. This can be used to edit attributes of the new dimensions, such as the annotation text.
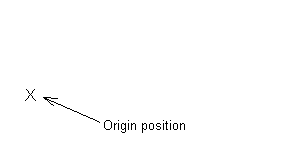
- Click to position the origin of the ordinate dimension:
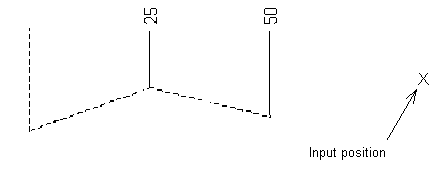
- Click to specify the position you want to dimension.
A rubber-banded line is attached from the base point to the mouse cursor:

- Move the cursor and click to specify the position of the annotation and add the dimension.
A vertical or horizontal dimension is created depending on where you input the annotation text position. Possible horizontal and vertical dimensions are displayed as you move the mouse.
In our example, we input the following text position:

The orientation of this dimension determines that of all the other dimensions in the ordinate dimension in this series.
- Click to specify a position for the next dimension.
A rubber-banded witness line is attached to the mouse cursor. As you move the mouse, it varies:

One end of the witness line remains in line with the text position:

When you input the dimension, the value is displayed:

The text of the new dimension is automatically centred with that of the first dimension.
If you do not want centred text, deselect the Centred Text option on the Drafting > Dimensions > Annotation page of the Options dialog, and click to specify a text position.
If the text of the new dimension is too close to the text of the previous one, its leader line is automatically created with a dog leg.

You can set the type of dog leg on the Drafting > Dimensions > Lines page of the Options dialog.
- Continue clicking to specify positions to complete the dimensions:
With Centred text selected, each new dimension requires only one mouse click.

- To finish creating ordinate dimensions, click
 on the Quick Access toolbar.