Add one or more instances of a tapered wall to the building model.
Tapered walls are placed like a vertical wall. The cross section instance property is set to create a tapered wall. For full instructions for placing a wall, see Place a Wall.
 Video: Create a Tapered Wall
- Open a plan, elevation, section, 3D orthographic or perspective view.
- For architectural walls, navigate to Architecture tab
 Build panelWall drop-down
 (Wall: Structural). For structural walls, navigate to Structure tabStructure panelWall drop-down (Wall: Architectural).
- Select a wall type from the Type Selector. The wall type selected must contain a
variable width layer in order for the tapered cross section value to be available.
If desired, use the Properties palette to adjust instance properties before placing a wall.
- Select Tapered for the wall's cross section parameter.
- On the Properties paletteCross-Section DefinitionCross-Section, select Tapered.
The Override Type Properties, Exterior Angle, and Interior Angle parameters display.
- (Optional) Interior and Exterior angles of tapered walls are set in the type properties of the wall. Select Override Type Properties to enable input for Interior and Exterior Angle instance overrides. Specify the wall's interior and exterior angles between +90° and -90°, where 0° is vertical.
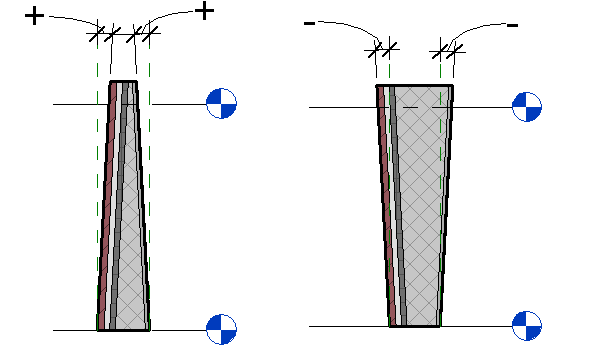 Note: Positive angles will tilt the face's top edge toward the center of the wall. Negative angles will tilt the face's top edge away from the center of the wall. If the angles defined in a tapered wall cause the width of the variable layer to go below 0, the wall will not be able to be created and you will receive an error. The angles will need to be changed, and/or the height of the wall will need to be altered.
 - To exit the Wall tool, click Modify.