Use the Revit Server Administrator to manage folders and central models on Revit Server Hosts and to lock models for administrative activities.
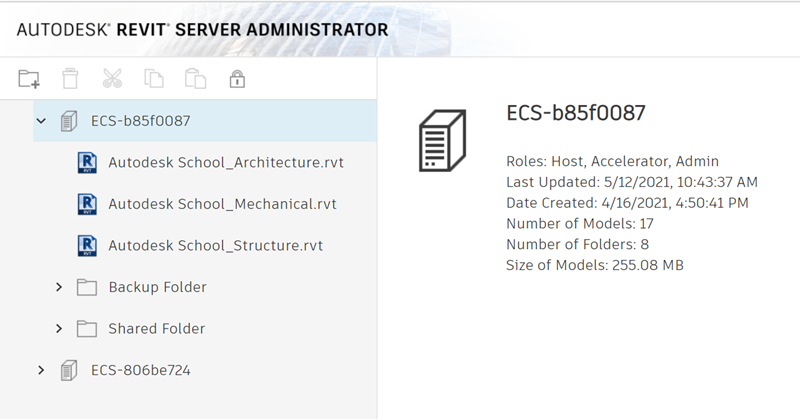
The left pane of the Revit Server Administrator provides an editable tree control, the top level of which displays all Revit Server instances listed in the RSN.ini file on the Revit Server instance where the Revit Server Administrator is running. The right pane displays detailed information about the selected Host and identifies which other roles may be enabled for it.
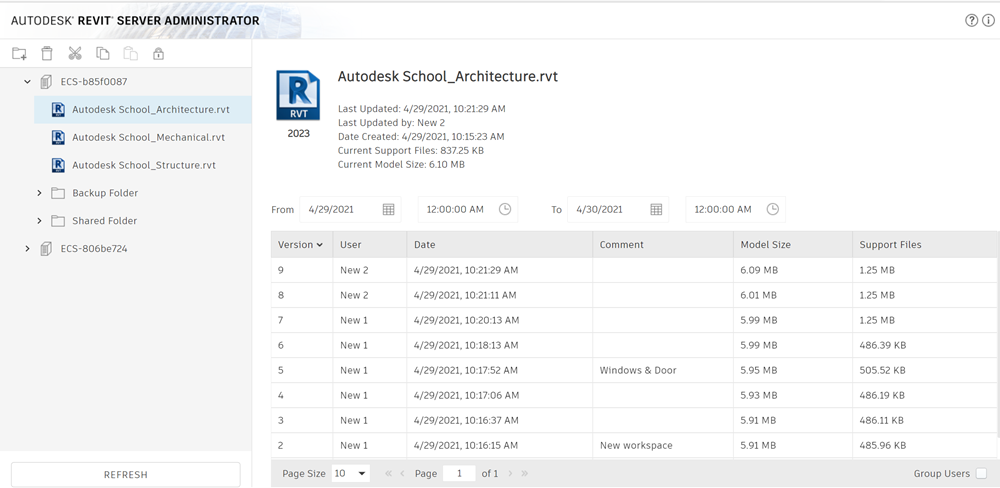
When you select a model in the tree control, the right pane displays a history of the edits that have been submitted, including any comments entered by team members, as shown below. Use the date filter to display items between specified dates.
Locking Models
When performing backup, restoration, or other maintenance operations on a Revit Server Host, you can use administrator-level locks to prevent team members from accessing the models it hosts.
To lock/unlock a Revit Server Host, or any of its folders or individual models, select it in the tree control, and click
 in the toolbar at the top of the dialog. You can also use the command-line utility counterpart of this tool (see
Revit Server Lock Command-Line Utility).
in the toolbar at the top of the dialog. You can also use the command-line utility counterpart of this tool (see
Revit Server Lock Command-Line Utility).
For information about this type of lock and the other types that are used to maintain data integrity in server-based worksharing, see Managing Locks in Revit Server.
Moving Models
Use the Delete
 , Cut
, Cut
 , Copy
 , and Paste
 tools located above the tree control as needed to modify the hierarchy of folders and models for a Revit Server Host, or to move a model from one Host to another (moving folders among Hosts is currently not supported). Changes that you make are reflected in the file structure that is navigated using the Revit Open and Save dialogs.
To move a model from one Revit Server Host to another
- Notify team members of the planned move, and ask them to save and close the model if they are currently working on it.
- Make sure the new Host for the model is listed in the RSN.ini file on Revit application workstations of team members who will need to access the model.
- Select the model in the tree control, and depending on your objective, click either
(Cut) or
(Copy).
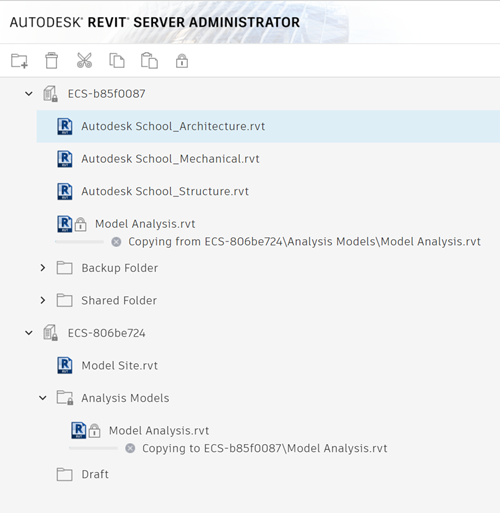
Note: Revit Server identifies central models by a unique GUID. If you cut the model from one Host and paste it to another, it retains the same GUID; however, if you copy the model and paste it to a different Host, it will be assigned a new GUID. If you rename the model before moving it, the same GUID is used, so existing local models are still valid. Note also that model permissions are reset when you rename, move, or copy a model.
- Select the new Revit Server Host in the tree control, and click
(Paste). A temporary "Copying to..." message displays immediately below the name of the model in its original location in the tree control, and a "Copying from..." message displays below the model name in its destination location.
You can click the X at the beginning of either message to cancel the operation while it is in progress. If the operation fails, the X is replaced with a minus (-) symbol, and in most cases you can click the X in either message to clear both of them.