Adjust the location of the model by specifying coordinates for a selected reference in the model.
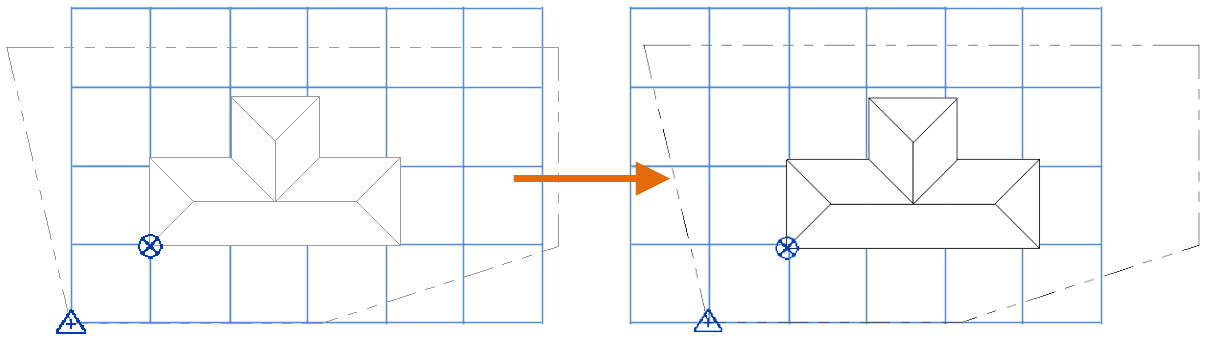
To use the Specify Coordinates at Point tool, you select a reference point in the model and specify a new set of coordinates for it. The entire model, the survey point, and the project base point move, maintaining their proximity to one another. Their coordinates may change to reflect the new location of the model.
Use the Specify Coordinates at Point tool if any of the following is true:
- You have a set of coordinates from a surveyor or a civil engineer for a particular location on the site.
- You use the Report Shared Coordinates tool to identify the coordinates of a reference in the model, and you want to relocate the model using those coordinates.
When using this tool, you can specify values for North/South (northing), East/West (easting), Elevation, and Angle from Project North to True North.
To relocate the model by specifying coordinates
- Optional: Display the project base point and the survey point in the current view.
- Click Manage tab
 Project Location panelCoordinates drop-down
 (Specify Coordinates at Point).
- Place the cursor on a reference point of the model.
A reference point can be the intersection of elements, such as the corner of 2 walls. In some types of views, you can use an edge as a reference.
When the cursor moves over a valid reference point, a blue dot or line displays.

- Click the reference.
A dialog displays the coordinates of the reference. Depending on the type of view and the reference selected, the coordinates may include North/South, East/West, Elevation, and Angle from Project North to True North.
- Enter values for the selected reference.
- Click OK.
- If the survey point is clipped when you specify coordinates at a point, the survey point will be moved to reflect the change.
- If the survey point is unclipped when you specify coordinates at a point, the survey point will not move, but values update to reflect the change.