Provides access to exposure control settings from within Civil View.
Exposure controls are plug-in components that adjust the output levels and color range of a rendering, as if you were adjusting film exposure. Exposure Controls are especially useful for renderings that use radiosity or physically accurate Daylight systems.
If no exposure control is active, you can choose one from the drop-down list that appears at the top of this rollout.
Tips
- If you are using the default scanline renderer, use the Automatic Exposure Control for rendering still images or first-draft renderings. Do not use this exposure control for animations with a moving camera.
- If you are using the default scanline renderer to render an animation with a moving camera, use the Logarithmic Exposure Control. For outdoor scenes that use the Daylight system, turn on the Exterior toggle to prevent overexposure.
Parameters Common to All Exposure Control Rollouts
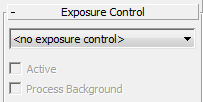
The controls change depending on which exposure control is active, but these are common to all versions of the Civil View Exposure Control rollout.
- [drop-down list]
- Lets you choose which exposure control is active.
- <no exposure control> No exposure control is active.
- Linear Exposure Control
- Logarithmic Exposure Control
- Pseudo Color Exposure Control
- Automatic Exposure Control
- Physical Camera Exposure Control
Note: When you create a Daylight system while the Quicksilver renderer is active, 3ds Max prompts you to add an "Physical Camera Exposure Control" to the scene. If you create a Daylight system while the Scanline renderer is active, it prompts you to add a Logarithmic exposure control. In any of these cases, answer Yes. - Active
- When on, the exposure control is used in rendering. When off, the exposure control is not applied.
- Process Background
- When on, the scene background and environment maps are subjected to exposure control. When off, they are not.
Automatic Exposure Control
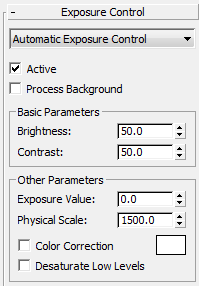
Automatic Exposure Control samples the rendered image and builds a histogram to give good color separation across the entire dynamic range of the rendering. It can enhance some lighting effects that would otherwise be too dim to see.
Basic Parameters group
- Brightness
- Adjusts the brightness of the converted colors. Range = 0 to 200.
- Contrast
- Adjusts the contrast of the converted colors. Range = 0 to 100.
Other Parameters group
- Exposure Value
- Adjusts the overall brightness of the rendering. Negative values make the image darker and positive values make it brighter. . Range = –5.0 to 5.0.
You can think of the exposure value as an exposure compensation setting in a camera that has automatic exposure control.
- Physical Scale
- Sets a physical scale for exposure control to use with lights that are not physically based. The result is an adjustment of the rendering that approximates the eye's response to the scene.
- Color Correction
-
When the checkbox is turned on, color correction shifts all colors so the color displayed in the color swatch appears as white.
Clicking the color swatch displays a Color Selector so you can choose the color to adapt to.
You can use this control to simulate how the eye adjusts to lighting. For example, even when the light in a room has a yellow hue from an incandescent light bulb, we continue to perceive objects that we know to be white, such as printed pages, as white.
Tip: For the best results, use a very pale correction color, such as a pale blue or pale yellow. - Desaturate Low Levels
-
When on, renders dimly lit colors as if the light were too dim for the eye to distinguish between colors. When off, renders even dimly lit colors.
Desaturate Low Levels simulates the eye's response to dim lighting. In dim lighting, the eye does not perceive colors and sees tones of gray instead.
Linear Exposure Control
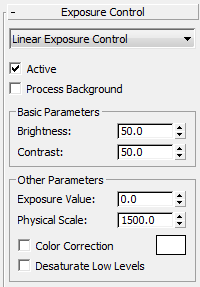
Linear Exposure Control samples the rendered image and uses the average brightness of the scene to map physical values to RGB values. Linear Exposure Control is best used for scenes with a low dynamic range.
The controls for the Linear exposure control are the same as for Automatic exposure control.
Logarithmic Exposure Control
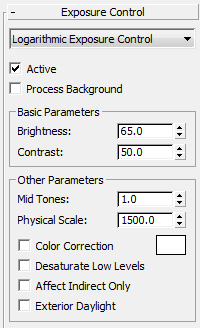
Logarithmic Exposure Control uses brightness, contrast, and whether the scene is outdoors in daylight to map physical values to RGB values. Logarithmic Exposure Control is better for scenes with a high dynamic range.
The controls for the Logarithmic exposure control are the same as for Automatic exposure control, with two additional settings:
- Affect Indirect Only
- When on, Logarithmic Exposure control is applied only to areas of indirect lighting. Default=off.
Turn on this toggle when the primary lighting for your scene comes from standard lights rather than photometric lights. When you use standard lights and turn on Affect Indirect Only, radiosity and exposure control yield results similar to the default scanline renderer. When you use standard lights but leave Affect Indirect Only off, radiosity and exposure control yield results that can be quite different from the default scanline renderer.
- Exterior daylight
- When on, converts colors for an outdoor scene. Default=off.
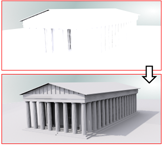
The exterior daylight setting compensates for the extreme intensity of an IES sun light.
Pseudo Color Exposure Control
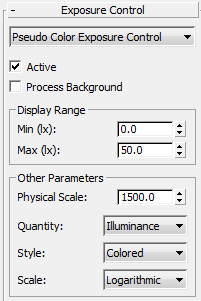
Pseudo Color Exposure Control is actually a lighting analysis tool that provides you with a way to visualize and evaluate the lighting levels in your scene. It maps luminance or illuminance values to pseudo colors that show the brightness of the values being converted.
From darkest to brightest, the rendering shows blue, cyan, green, yellow, orange, and red. (Alternatively, you can choose a grayscale where the brightest values are white and the darkest are black.) The rendering includes the color or grayscale spectrum bar as a legend for the image.
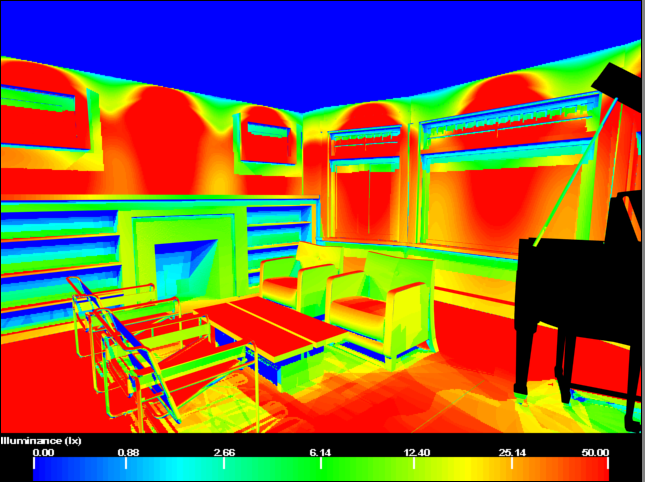
Pseudo color exposure of a scene with radiosity. Areas in red are overlit, areas in blue are underlit, and areas in green have a good lighting level.
Display Range group
- Min[imum] (lx)
- Sets the lowest value to measure and represent in the rendering. Values at this quantity or below it all map to the leftmost display color or grayscale level.
- Max[imum] (lx)
- Sets the highest value to measure and represent in the rendering. Values at this quantity or above it all map to the rightmost display color or grayscale value.
Other Parameters group
- Physical Scale
- Sets a physical scale for exposure control to use with lights that are not physically based. The result is an adjustment of the rendering that approximates the eye's response to the scene.
- Quantity
- Chooses the value being measured:
- Illuminance (The default.) Displays values of light incident on surfaces.
- Luminance Displays values of light reflected off surfaces.
- Style
- Chooses the way to display values:
- Colored (The default,) Shows a spectrum.
- Grey Scale Shows gray tones that range from white to black.
- Scale
- Chooses the technique used to map values:
-
Logarithmic (The default.) Uses a logarithmic scale.
This option is useful when the illumination of the surfaces of interest is low compared to the maximum illumination in the scene.
- Linear Uses a linear scale.
-
Logarithmic (The default.) Uses a logarithmic scale.
Physical Camera Exposure Control
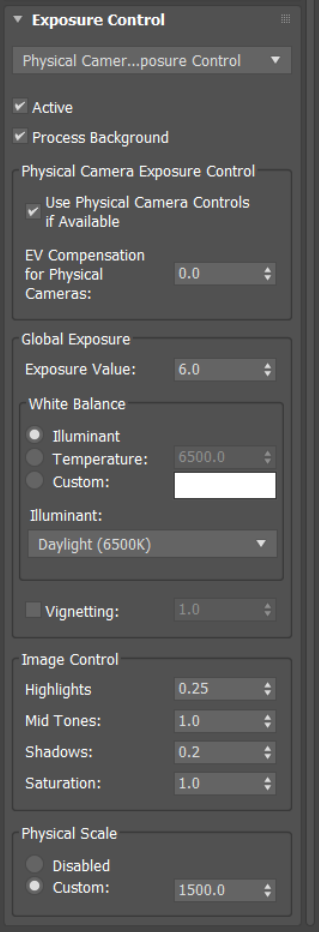
This control sets exposure for Physical Cameras, using an Exposure Value and color-response curve.
This control is a duplicate of the one found under Rendering menu > Environment > Environment and Effects dialog. For more information, see Physical Camera Exposure Control