Create or clear symmetry, add distance, make faces uniform, toggle smooth or translucent modes, or set the Select Through toggle.
Create Symmetry
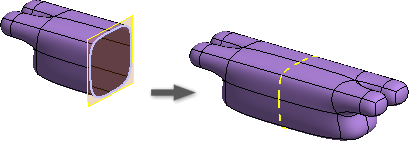
The Symmetry command allows you to make symmetrical components when editing so that you can have more control over your shape. Keep edges and faces on each side symmetrical to simplify the editing process.
You can specify symmetry when you create a freeform body or use the following command after creation.
- Click Freeform tab
 Symmetry panel Symmetry
  .
. - Select a face on the master side and another face on the mirror side.
- Click OK.
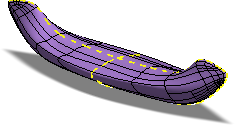
After symmetry is applied, the symmetry zone displays a dashed line and the Freeform edit tools maintain symmetry. Changes on one side of the symmetry zone are reflected on the other side of the symmetry zone.
Clear Symmetry
Use Clear Symmetry to remove all symmetry and allow independent edits to a freeform body.
- Click Freeform tab Symmetry panel Clear Symmetry
 .
. - Select a body to clear all symmetries.
Mirror a body
Use the Mirror command to mirror a body about a plane or planar face.
- Click Freeform tab Symmetry panel Mirror
 .
. - Select a Body.
- Select a plane or planar face to specify the Mirror Plane.
- Optionally, select Weld and specify a tolerance value. If the opposing faces touch and are within the specified tolerance value, they are welded together.
- Click OK to finish.
Mirrored bodies are symmetrical.
Add Distance
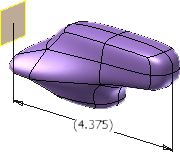
Use this command to add a reference dimension from a selected edge, vertex, or face to a reference plane.
- Click Freeform tab Tools panel Add Distance
 .
. - Select a face, edge, or vertex to measure from.
- Select a face or plane to measure to.
- Drag to locate the reference dimension, and then click to place the dimension and finish the command.
Make Uniform
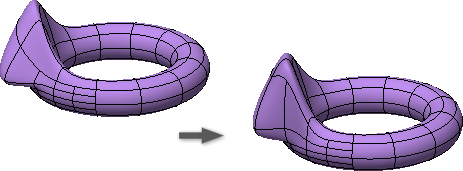
Use this command to remove pinching near star points and make faces as uniform as possible.
- Click Freeform tab Tools panel Make Uniform
 .
. - If multiple bodies exist, select the freeform bodies to smooth.
- Click OK to finish.
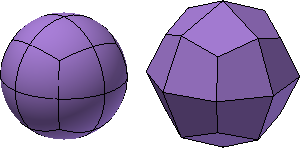
Toggle Smooth Mode
Blocky mode displays the shape using the control points of the freeform body. Smooth mode displays the rounded shape of the freeform body. While using Edit Form, it is good practice to work in Blocky mode. Blocky mode makes it easier to detect modeling problems, such as overlapping edges, which may not be visible in Smooth mode.
- To switch between Smooth mode and Blocky mode, do either of the following:
- Click Freeform tab Tools panel Toggle Smooth
 .
. - In the Edit Form dialog box, click Display.
- Click Freeform tab
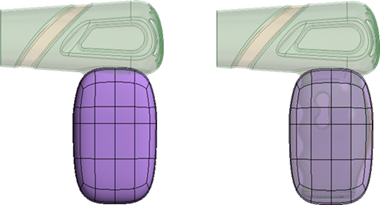
Toggle Translucent Mode
Translucent mode changes the body from opaque to transparent. Use this command to see through the body and view sketches or existing geometry.
- To switch between opaque and transparent mode, do the following:
- Click Freeform tab Tools panel Toggle Translucent
 .
. - Click the command to toggle the display.
- Click Freeform tab
Set the Select Through Toggle
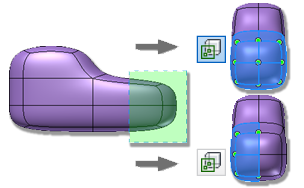
All geometry is selectable when Select Through is enabled. When Select Through is disabled, only geometry facing you in the display is selectable. Setting the toggle to off makes it easy to select the geometry you want without having to remove extra geometry from the selection set.
- Click Freeform tab Tools panel Select Through
 .
. - Enable the toggle to select all geometry. Disable the toggle to select only visible geometry.