Auto-conforming an EDL
You can automatically digitize material using instructions contained in an EDL, and then assemble the digitized events into a cut which appears in the Storyboard and the timeline.
You can batch digitize from an EDL that has been placed in the current scene's Library directory. This directory is located under
To capture from an EDL:
Make sure your EDL file is in the scene's Library directory.
Note:If the file is in the wrong location, it will not show up in the EDL list.Click Editing, and then click Capture.
Select a raster for capture. See Selecting a Raster for Capture.
Click Assemble to access the Assemble window.
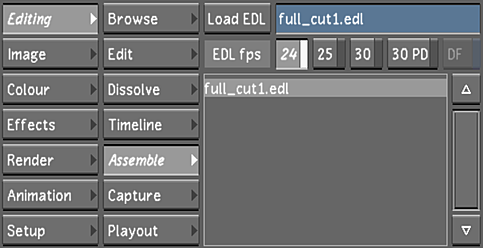
Select an EDL file from the EDL list. Ctrl-click the EDL list to refresh it.
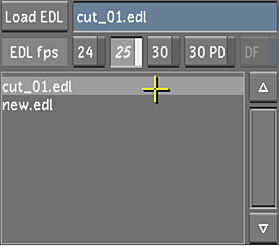
Click Load EDL to display the EDL contents in the Assemble menu.
Select individual events to capture (Ctrl+click), a group of events (Shift+click), or click Select All.
Click Mark for Capture.
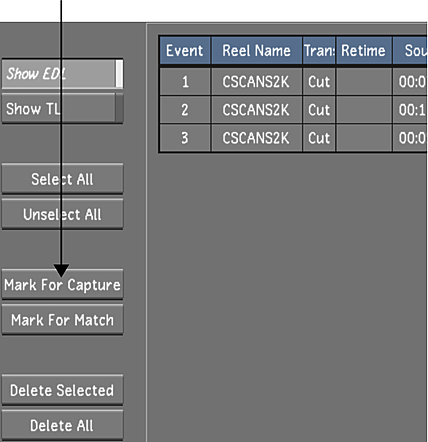
The selected events are marked as Need Capture under the Media column of the EDL events.
Click Capture.
In the Video Capture Format list, select the file format that you want to create during the capture operation. See Capture Menu Options.
In the Naming group, enter values in the Capture and Tape fields. See Capture Menu Options.
Click EDL once, and then confirm the action by clicking EDL a second time.
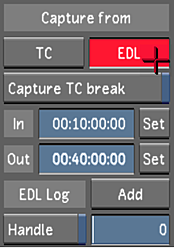
The Capture starts.
When capture is completed, add the new shots to the Library. See Loading Clips to the Library.
Go back to the Assemble menu and assemble the EDL. See Assembling an EDL.
Click Browse to display the Browse menu.
Enter the name for the new cut in the Cut name field.
Click New.
The new cut is saved and named after the captured EDL.