When you create an object using object classification, the new object inherits the basic properties for its object class with default values for those properties. You can change the values as needed.
When you query in objects from a DWG file to a map, any styling information is lost. Since the points are not styled, you cannot see them in your new map. To see the signal points, assign a point style to your map.
Once the signals are visible, you create a signal using the Signals object class.
To assign a point style to your map
- If the ObjectClass.dwg file you created in the previous exercise is not still open, open it. Click

 OpenDrawing.
 - To assign a point style, at the command prompt enter ddptype and press Enter.
- In the Point Style dialog box, select any point style in the second row. You can use the default point size settings.
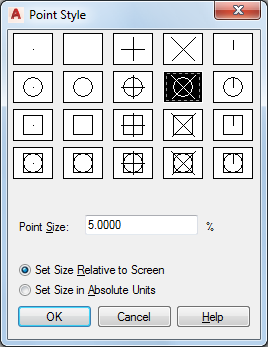
Select a point style for the signals.
- Click OK.
To create a Signals object
- Zoom in until you can see the signal points easily.
- On the Map Explorer tab of the Task Pane, right-click the Signals object class and click Create Classified Object.

Right-click the appropriate object class to create an object in that class.
- Click a position on the map for the point.

- Press Esc to end the creation operation.
- To enter properties for the new Signals object, select the point, right-click it, and click Properties.
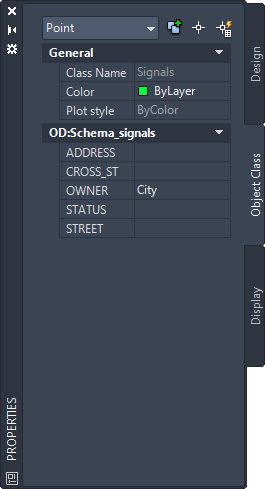
Use the Properties palette to view or change the properties for the new object.
To continue this tutorial, go to Exercise 2: Edit classified objects.