Pose clips are a special form of animation clip that has a duration of 1 frame. A Pose Clip stores all the keyable attributes values from the selected object at the Current Time Marker location.
There are two ways you can use Pose clips to create animation:
- Create new animation with a rigged character
- Edit existing animation files or motion capture data
Note: When creating a Pose Clip from a HumanIK character rig, be sure to include all of the child effectors of the effector you want to create a pose clip for. For example, to create a pose clip for a shoulder effector, you would have to select all the children of the shoulder. See
Animate HumanIK characters in the Time Editor.
Create animation from a rigged character
To create new animation from a rigged character, create pose clips of the character pose every few frames as a kind of 'stop-motion' animation. Then blend these pose clips with Transitions to create lifelike motion. To do this, you need a character with a rig that has no animation that you will pose.
Tip: It is a good idea to create Selection Set for the character that contains the objects to be animated, such as NURBS Curves, Joints, Locators, and so on. (See
Save and re-use a selection for information on creating a quick select set.)
To create animation from Pose clips:
- Pose the character.
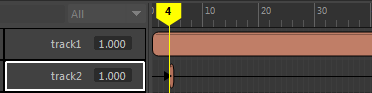
- When you create a pose you want to capture, select an animation track, and all the character's animation controllers.
- With the Track selected, click
Create Pose Clip from Selection
 from the
Time Editor menu bar (or press P) to capture the key timing and pose.
Note:
from the
Time Editor menu bar (or press P) to capture the key timing and pose.
Note:- Make sure that the Current Time Marker is at the exact position in the animation you want to capture as the Pose clip is only 1 frame long.
- For realistic effects, create pose clips every 3 or 4 frames; these will blend naturally.
- If no pose clip appears, it may be because the clip contains no information, check that all the character's animation controllers are selected. Try to select NURBS Curve objects or/and Locator objects.
A Pose clip that captures the values of the Character at current frame is added to a track.
- Position the character again and capture another pose clip. Use Poses that are similar to each other for the best blending interpolation.
 Tip: Keep the original animation track selected. Otherwise, each new Pose clip will be added to a new track.
 - Repeat for any other poses you want to collect.
- Move all the Pose clips to the same track and experiment with creating transitions between them.

- Create a Group clip for all the pose clips with transitions, then use the Time Editor’s tools to perform high level editing (see Combine clips into Group clips)
- Assign different pose clip colors that let you distinguish between different types of poses (for example storytelling poses, in-between poses, contact poses, and so on)
- Create layers on top of the Group clip to further modify the animation in a non-destructive way (See Add Animation Layers to the Time Editor
If you want:
Note: If your Pose clip contains no information, check that all the character's animation controllers are selected. Try
to select NURBS Curve objects or/and Locator objects.
Edit existing animation
This method lets you create pose clip snapshots to create new animation from preexisting animation. You will need a character and an FBX file from MotionBuilder that has animation.
- Open a Character file.
- Drag an FBX file with animation onto an existing animation track.
- Create a new animation track to hold the animation you are going to create next.
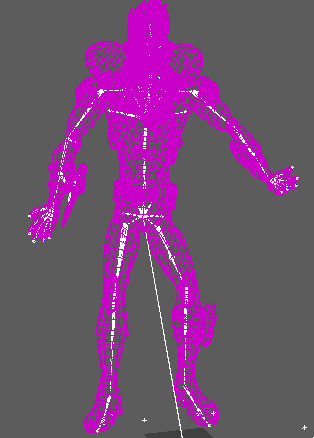
- Scrub through the animation until you reach a pose to capture, and select all the character's animation controllers.
- Select the new Animation Track, and select click
Create Pose Clip from Selection
from the
Time Editor menu bar (or press P) to capture the key timing and pose.
- Create the desired in-between poses and weight poses through pose clips.

Create a Group clip of all the pose clips with transitions, then use the Time Editor tools to perform high-level editing
Note: If your Pose clip contains no information, check that all the character's animation controllers are selected. Try
to select NURBS Curve objects or/and Locator objects.