You can use Clip Layers in the Time Editor to non-destructively modify existing animations.
In this example, you can take an existing animation of a character jumping and change the height of his jump, without altering the original animation file.
Note: You cannot drive animation that has both Animation Layers and Clip Layers as this will create conflicts.

Note: There are special considerations that need to be made if you use a HumanIK rig. See the section about Clip Layers in
Animate HumanIK characters in the Time Editor.
To set a key frame on a Time Editor Clip Layer:
- Select the objects/attributes that you want to change. In this example, the Character's Hips effector will help us add some height to his jump.
 Attributes are selected for keying depending on the selection in the viewport or Channel Box:
- If nothing is selected, all Attributes in the Layer are keyed
- If only objects are selected, all Attributes of these objects in the active Layer are keyed
- If attributes are selected in the Channel Box, only attributes in the active Layer that match the Channel Box selection are keyed
- In the Channel Box, select the Hips Effector Translate Y value and right-click the first clip.
- Select
Create (Additive)
 from the
Time Editor toolbar. An animation layer for the selected attribute is added to the clip.
from the
Time Editor toolbar. An animation layer for the selected attribute is added to the clip.
- Click the Clip Layer icon
 to expand the Clip Layer to see a layer called
Character1_Ctrl_Hips_Effector.Translate.Y.
to expand the Clip Layer to see a layer called
Character1_Ctrl_Hips_Effector.Translate.Y.
- Click the Clip Layer to make it the active layer (make sure it is selected in the Active Layer Field in the
Time Editor toolbar) (You can also right-click the Clip Layer and select
Set as Keyable Layer from the Clip Layer contextual menu.)
Note: The active Clip Layer is defined per Composition. This information is stored in the Maya Scene File. See Scene files.
- Advance the Current Time Marker through the animation until just before the character begins the jump and click the
Set Layer Key button
 on the
Time Editor toolbar. A key is set on the layer clip. Use the Set Zero Key
on the
Time Editor toolbar. A key is set on the layer clip. Use the Set Zero Key
 button if you want to set a Zero key to define the start of the animation. (See Setting Zero Keys in the
Keyframe objects on animation layers topic.)
Note: You can use the standard Maya S hotkey to set a key for normal TRS (translate, rotate, and scale) attributes.
button if you want to set a Zero key to define the start of the animation. (See Setting Zero Keys in the
Keyframe objects on animation layers topic.)
Note: You can use the standard Maya S hotkey to set a key for normal TRS (translate, rotate, and scale) attributes. - Next, move the Current Time Marker to where the character lands, and set a key with the Set Layer Key button.

- Finally, move the Current Time Marker to the highest point of the character's jump and translate his Y-Axis up in the Channel Box some more to create a dramatic leap, and then set a key for this on the layer.

Note:
- Use the Flatten Layers option in the Clip contextual menu to merge multiple animation layers into a single layer.
- You can edit the Clip Layer's Animation Curve directly by opening the Graph Editor. To do this, select the clip layer and click
 to open the Layer curve in the
Graph Editor.
to open the Layer curve in the
Graph Editor.
- If you want to add additional objects to the Clip Layer to refine the animation, with the Clip Layer still active, select the attributes in the Channel box, right-click the Clip Layer and choose Selection > Add Selection from the Layer Clip Contextual menu. Layers are created for each selected attribute
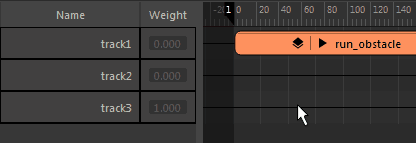
- You can adjust the influence of the Layer by adjusting its weight. See Key Time Editor clip weights.
- The active Clip Layer is defined per Composition and its information is stored in the Maya Scene File.
- You can move keys on a Clip Layer by dragging them.
See Add Animation Layers to the Time Editor for more operations with Clip Layer keys.
