If you have not yet created a guides-based Description, see Create hair or fur with spline curves or Instance primitive and archive geometry.
Add guides to your mesh object
Use the Add or Move Guides tool to place guides on the surface your mesh object. You can use guides to position and shape all primitive types, including archive geometry.
To add guides to your mesh object
- With your guides-based Description selected in the
XGen Editor, select the
Add or Move Guides tool:
 .
.
When you hover the cursor over the selected surface, a circle icon appears, indicating that you can add guides to the mesh.
- Click the surface to place guides.
Guides appear on the surface of the selected mesh.
- (Optional) To increase or decrease the radius of the
Add or Moves Guides tool, press the
B key while dragging.

- Preview the Description. See Preview hair, fur, and instanced geometry.
Shape and scale guides using the Sculpt Guides Tool
Use the Sculpt Guides Tool to shape and scale guides for spline primitives. It cannot be used with other primitive types.
To shape with the Sculpt Guides Tool
- Activate the
Sculpt Guides Tool by clicking this icon
 in the In the XGen Shelf.
- Drag across the guides to shape and pose them.
Note: Some guides outside the current view, such as guides on the back side of mesh objects, can be affected by the Sculpt Guides Tool. Select, and then hide () the guides you do not want affected by the Sculpt Guides Tool.
- In the Tool Settings window that appears, edit the settings to modify how the sculpting tool affects the guides.
- Preview the Description to apply the guide shape to the spline primitives. See
Preview hair, fur, and instanced geometry.
Tip: To create more complex and interesting shapes as you sculpt, you may need to add more control vertices to the guides. See Work with XGen guides.
To scale guides with the Sculpt Guides Tool
- Activate the
Sculpt Guides Tool by clicking this icon
in the In the XGen Shelf.
- In the
Tool Settings window that appears, under
Brush Settings, turn off
Lock Length.
When Lock Length is off, you can change the guide length by sculpting.
- Drag guides to scale them.
- Preview the Description to see the scaled splines. See Preview hair, fur, and instanced geometry.
Shape and scale guides by editing guide CVs
You can modify the shape of XGen guides by selecting, and then editing the guide CVs. You can use also Utilities, such as Guides As Curves, Reshape Guide and Straighten Guide, to edit guide shape.
To shape guides by editing CV's
 -click the guides you want to shape, and select
Guide Control Points from the marking menu that appears.
-click the guides you want to shape, and select
Guide Control Points from the marking menu that appears.
- Maya switches to component-selection mode, which lets you select CVs on the guides.
- Use the Move, Rotate, and
Scale tools to shape the guide.
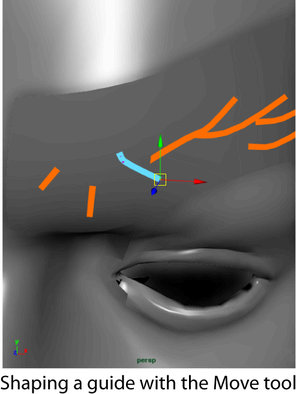
If you have problems getting the shape you want, add control vertices to the guides.
- (optional) To add control vertices to the guides, in the XGen Editor, click the Primitives tab.
- (optional) In the Primitives Attributes section, click Rebuild and increase the CV Count value in the Rebuild Guides window. See Work with XGen guides.
- Return to object-selection mode by
-clicking a guide and selecting
Object Mode from the marking menu that appears.