You can add a vertex color channel to your Stingray PBS ShaderFX network, then paint vertices.
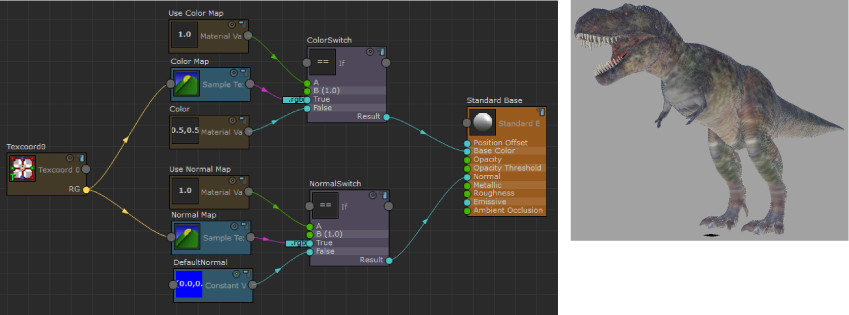
In this example, we first created a Stingray PBS node, then connected a diffuse map and a normal map to its shader graph using the ShaderFX editor. See Create a Stingray Physically Based Shader and Build a Stingray Physically Based Shader using the ShaderFX editor, and Connect maps to a Stingray Physically Based Shader for detailed information on these tasks.
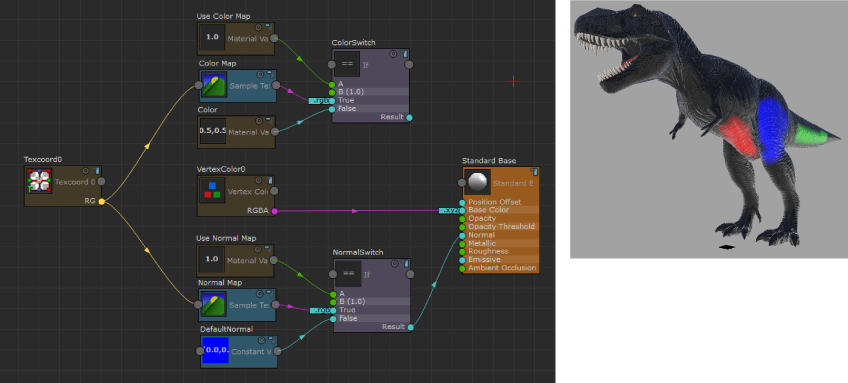
To add a vertex color channel to your Stingray PBS network
- Create a
Vertex Color 0 node (drag and drop from the
Node Browser to the work area) and connect it to the
Base Color attribute of your
Standard Base node.
Your model appears black in the viewport.
- Select your model and select
Mesh Display > Paint Vertex Color Tool >
 (in the
Modeling menu set).
(in the
Modeling menu set).
- Ensure that the
Color value color pot in the
Paint Vertex Color Tool settings is black. Click
Flood to ensure that all vertices start with a vertex color of 0, 0, 0.
This step is only required if you are painting on a object that has not previously had vertex colors applied.
- Select another color from the Color value color pot and paint.
You can now see the painted areas on your model in the viewport.
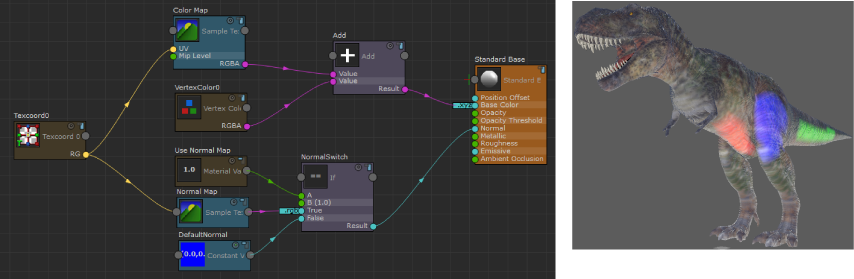
To add your vertex color channel with your base color map
- Create an Add node.
- Delete the Use Color Map, Color Switch and Color nodes.
- Connect the RGBA output of Color Map to the first input of Add.
- Connect the RGBA output of Vertex Color 0 to the second input of Add.
- Connect the Result output of Add to the Base Color of Standard Base.
The Add operation produces a float4 output (RGBA), but the Standard Base node Base Color attribute takes a float3 (xyz) as input. The float4 is converted to float3 automatically.
You can now see the object's color map and the areas you painted on your model in Viewport 2.0.