
Free image plane
Camera image plane
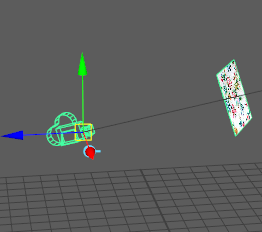
Free image planes
To create a free image plane
-
Select Create > Free Image Plane from the main menu bar.
- In the Attribute Editor, click the folder icon beside the Image Name attribute in the ImagePlaneShape1 tab to browse to the image file that you want to use as your backdrop.
-
Adjust other image plane attributes. For example, enable Use Image Sequence or change the Type drop-down list to Movie to create an animated image plane.
To edit or position a free image plane
- Select it in the scene and move or transform it as you like. See also Editing and aligning free image planes.
To temporarily turn off an image plane background
- In the Attribute Editor > Image Plane Attributes section, set Display Mode to None.
To delete a free image plane
- Select it from the Outliner and press Delete.
Image planes attached to a camera
To create an image plane attached to a camera
- Select the camera to which you want to attach the image plane (View > Select Camera in the panel menu), then do either of the following:
- Select
View > Camera Attribute Editor from the panel menu, then navigate to the
Environment section, and click
Create beside the
Image Plane attribute.
This creates an image plane node, and you can then browse for your image file next to the Image Name attribute.
- Select View > Image Plane > Import Image from the panel menu, and browse to select an image.
- Select
View > Camera Attribute Editor from the panel menu, then navigate to the
Environment section, and click
Create beside the
Image Plane attribute.
To edit an existing image plane
- Select
View > Image Plane > Image Plane Attributes from the panel menu and choose any of the camera’s image planes you want to edit.
Only image planes attached to the current camera are listed. If you do not see the image plane listed, check that you have the correct camera selected.
The selected image plane’s attributes display in the Attribute Editor (unless the Attribute Editor has been hidden).
Tip: Right-click beside
Image Plane in the camera
Attribute Editor to display the list of image planes for your camera.
beside
Image Plane in the camera
Attribute Editor to display the list of image planes for your camera.
To position an image plane
- Do one of the following:
- Use the Placement attributes to position an image plane relative to the camera. See Placement.
- Use the Placement Extras attributes to control which portion of an image file is visible on the image plane. See Placement Extras.
To temporarily turn off an image plane background
- Select View > Image Plane > Image Plane Attributes from the panel menu and choose the image plane that you want to hide.
- In the Attribute Editor > Image Plane Attributes section, set Display Mode to None.
To permanently remove an image plane background
- In Hypershade > Browser > Cameras tab, select the image plane swatch and either press Delete or select Edit > Delete.