You can select View > Image Plane > Image Plane Attributes > <imageplane> from the panel menus to view the attributes for an image plane attached to a camera. For a free image plane, you can select it in the scene, then edit attributes in the Attribute Editor. See also Create, edit, or position an image plane.
- Display
-
Select one of the following options:
- Looking through camera
-
For image planes attached to a camera, select this option so that the image plane only appears in the camera view in which the image plane is connected.
For free image planes, select this option so that the image plane only appears in the selected camera view. When this option is selected, the drop-down list becomes active and lists all cameras in the scene. Select a camera so that the free image plane is only displayed through the selected camera.
- In all views
-
The image plane appears in all views. Display is set to In all views by default.
- Display Mode
-
Controls how the image plane appears in views and in the rendered image. The default setting is RGBA.
- None
-
No display in views or rendered image.
- Outline
-
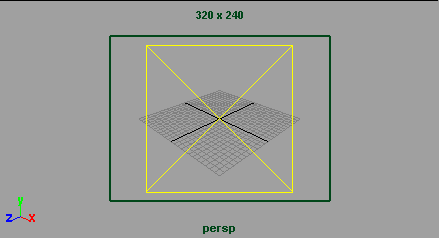
A rectangle with diagonal lines in views; full 24 bit color image and transparency (alpha) in rendered image.
- RGB
-
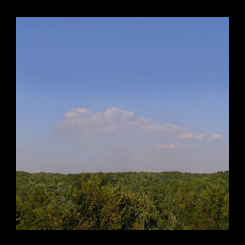
Full 24 bit color image in views; full 24 bit color image and transparency (alpha) in rendered image.
- RGBA
-
Full 24 bit color image and transparency (alpha) in views and rendered image. (If the image file does not contain an alpha channel, set Display Mode to RGB instead of RGBA.)
- Luminance
-
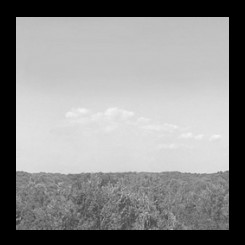
Grayscale image in views; gray-scale image and transparency (alpha) in rendered image.
- Alpha
-
Transparency (alpha) in views and rendered image.
- Color Gain
-
A scaling factor applied to all colors in the image plane. Maya multiplies all colors in the image plane by the Color Gain color. For example, you can color correct an image plane that appears too green by setting the Color Gain color to a shade of blue. The default color is white (no effect).

- Color Offset
-
An offset factor applied to all colors in the image plane. Maya adds the Color Offset color to all colors in the image plane. For example, you can brighten an image plane that appears too dark by dragging the slider to set the Color Offset color to a shade of grey. The default color is black (no effect).
- Alpha Gain
-
A scaling factor applied to the alpha channel (transparency) of the image plane. Maya multiplies all alpha values in the image plane by the Alpha Gain value. The slider range is 0 to 1, but you can type in higher values. The default value is 1 (no effect).
- Type
-
The default setting is Image File. Select from the following:
- Movie
-
If set to Movie, the image plane uses the movie file assigned in the Image Name field.
Note:- While the Image File type can play movie formats supported by IFF, setting the Type to Movie supports high performance (or real time) playback, without IFF.
- This Movie mode is designed for fast reading of movie types and is not meant to support still images. However, if your system supports QuickTime, QuickTime can read some images as a single-frame movie.
- The image plane Type is automatically set to Movie when you playblast shots from the Camera Sequencer. See Playblast camera shots for more information.
- The imagePlane command lets you query information about a movie in use by the image plane.
The following table lists the movie types supported, as well as known issues, on each platform.
Platform: Windows 32-bit Windows 64-bit Mac OS X Linux Movie technology (type) support:
QuickTime, AVI
QuickTime, AVI
QuickTime
QuickTime
Qualified Codec
MPEG4 (Quicktime)
MPEG4 (Quicktime)
MPEG4 (Quicktime)
MPEG4 (Quicktime)
Known issues:
For AVI: Motion JPEG and RGB 565 16-bit color are not supported.
Codec plug-ins developed for DirectPlay or MediaFoundation are not supported.
Motion JPEG and RGB 565 16-bit color are not supported.
Codec plug-ins developed for DirectPlay or MediaFoundation are not supported.
Performance is not real-time on 64-bit systems.
- Image File
-
If set to Image File, the image plane uses the image file assigned to Image Name.
- Texture
-
If set to Texture, the image plane uses the texture assigned to Texture.
- Texture Filter
-
Select Nearest (Unfiltered) for the most accurate result, as well as the result that most resembles the imagePlane from Maya 2012 and below. Select Mipmap Linear or Mipmap Nearest for improved performance over the unfiltered option. Select Bilinear, Mipmap Bilinear and Mipmap Trilinear for the maximum number of mipmapping levels and for the best performance.
- Image Name
-
The path and name of the image file or movie file that the image plane uses when Type is set to Movie or Image File. Image files can be in any supported image file format.
- Use Image Sequence
-
If off (default), the image plane used is the single image file indicated by Image Name (the file name and extension).
If on, the image loaded corresponds to an image from the sequence selected, determined by the Image Number.
- Image Number
-
If Use Image Sequence is on, the default expression of “=frame” is used to synchronize the image sequence with the Time Slider.
In other words, at frame 1 the image with a numeric value of 1 in it will be loaded. At frame 24, the image with a numeric value of 24 in it will be loaded.
By modifying the default expression (or removing it and setting keys) for Image Number, you specify alternate timeline to image sequence number relations. For example, setting a key frame of the last image at the beginning of the timeline and the first image at the end of the timeline will result in reversing the sequence.
Note: If you change the image used in a sequence, the Use Image Sequence option is also disabled as a result, and any keys set on the Image Number attribute are lost. - Frame Offset
-
(Applies when Use Image Sequence is on.) Lets you advance or delay the playback of the image sequence when playing your animations. By default, this value is set to 0, which means that the image sequence plays back at its first frame when the time slider starts playing back.
If you want the image sequence to start playing back at an advanced frame, set Frame Offset to a positive value. For example, when set to 10, the image sequence begins playing at its 10th frame when the time slider starts playing back.
To delay the playback of an image sequence, set Frame Offset to a negative value. For example, when set to -10, the image sequence plays back from its first frame when the Time Slider reaches frame 10.
- Frame In
-
Lets you set the start frame of the associated movie.
Use the Frame In and Frame Out values to trim the length of the movie and play only a specific section.
- Frame Out
-
Lets you set the end frame of the associated movie.
- Frame Cache
-
When Type is set to Image, this attribute controls the number of frames that you want to cache. By default, the number of cache frames is the number of frames that can fit into 10% of the available memory.
When caching image sequences in Viewport 2.0, if you have two sequences, each with a different number of frames, you should set the cache for both sequences to be the same number of frames as that of the timeline.
- Texture
-
The texture the image plane uses when Type is Texture. A texture assigned to an image plane does not display in the views.
- Color Space
-
Allows you to specify the input color space used by the image. When color management is enabled, the color values are automatically transformed from this space to your working color space for rendering.
You can specify the rules for assigning color spaces to new nodes in your Color Management preferences, together with your rendering space and other settings. The available color spaces that you can choose depend on whether you are using an OCIO configuration file or user transforms.
No matter which color space gets assigned by the rules initially, you can always specify a different value here for individual nodes. This is useful, for example, if most of your images are sRGB but you are also using a few images in other color spaces. Once an input color space has been assigned, it does not change unless you change it manually or reapply the color space input rules to the whole scene (see Change existing input color spaces automatically by reapplying rules).
If the input color space specified for a node is not available in your current configuration, its name is displayed in red and the default input color space is used instead. However, the name of the missing color space is preserved in the scene and will be used again if you switch your configuration to one that includes it. Alternatively, you can select an available color space from this list. If there are many image inputs that need to be changed, you can update the rules if necessary and reapply them.
For more information about color management in general, see Color Management.
- Ignore Color Space Input Rules
-
Prevents the Color Space that has been assigned from changing when you reapply the Input Color Space Rules. This is useful when you have manually changed the Color Space and do not want it to be changed if the rules get reapplied, for example, if you have a particular image file that uses a specific color space instead of the one set by the rules.
Placement
Use the Placement attributes to position an image plane relative to the camera.
- Fit
-
Controls the size of the image plane relative to the film gate and resolution gate. You can choose a Fit option from the drop-down list. Best is the default Fit.
See also Display film gate, resolution gate, and other view guides.
Note: Fit is not available if Image Plane is Fixed.
- Fill
-
By default, or if you select Fit to Film Gate, the image plane fills the film gate.
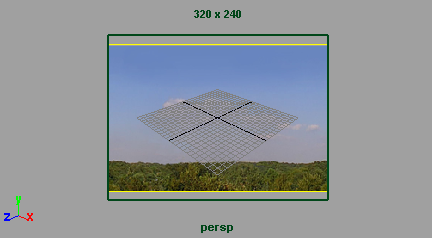
If you select Fit to Resolution Gate, the image plane fills the resolution gate.
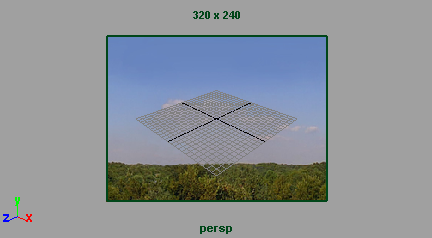
Maya maintains the aspect ratio of the image on the image plane. If the aspect ratios of the image and the film gate (or resolution gate) are different, the image extends beyond the film gate (or resolution gate) and is cropped.
- Best
-
By default, or if you select Fit to Film Gate, the image plane fits horizontally or vertically within the film gate.

If you select Fit to Resolution Gate, the image plane fits horizontally or vertically within the resolution gate.

The aspect ratio of the image on the image plane is maintained. If the aspect ratios of the image and the film gate (or resolution gate) are different, the film gate (or resolution gate) extends beyond the edge of the image.
- Horizontal
-
By default, or if you select Fit to Film Gate, the image plane fits horizontally within the film gate.
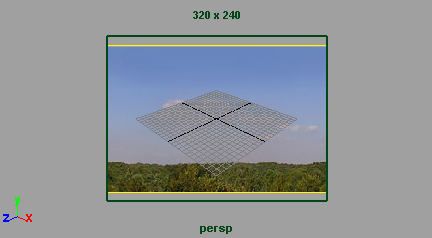
If you select Fit to Resolution Gate, the image plane fits horizontally within the resolution gate.
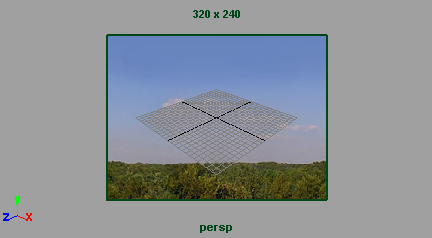
The aspect ratio of the image on the image plane is maintained. If the aspect ratios of the image and the film gate (or resolution gate) are different, the image extends vertically beyond the film gate (or resolution gate) and can be cropped.
- Vertical
-
By default, or if you select Fit to Film Gate, the image plane fits vertically within the film gate.
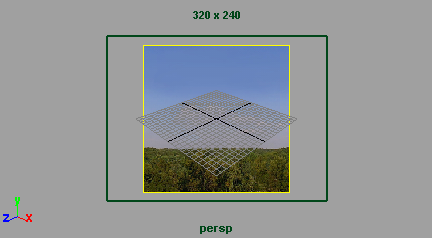
If you select Fit to Resolution Gate, the image plane fits vertically within the resolution gate.
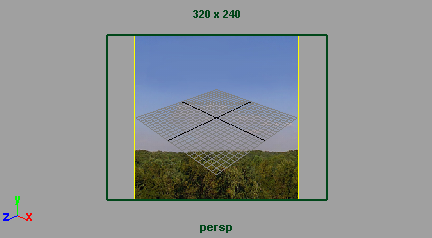
The aspect ratio of the image on the image plane is maintained. If the aspect ratios of the image and the film gate (or resolution gate) are different, the image extends horizontally beyond the film gate (or resolution gate) and can be cropped.
- To Size
-
By default, or if you select Fit to Film Gate, the image plane fills the film gate.
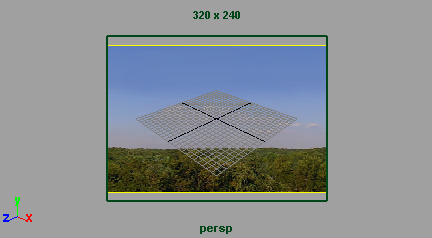
If you select Fit to Resolution Gate, the image plane fills the resolution gate.
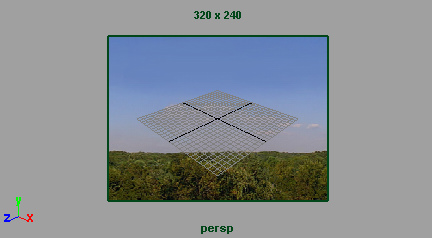
The aspect ratio of the image on the image plane is not maintained. If the aspect ratios of the image and the film gate (or resolution gate) are different, the image stretches to fit within the film gate (or resolution gate).
- Fit to Resolution Gate
-
Scales the image plane so that it is the same size as the resolution gate of the camera. Fit to Resolution Gate has no effect if Image Plane is Fixed.
See also Display film gate, resolution gate, and other view guides.
- Fit to Film Gate
-
Scales the image plane so that it is the same size as the film gate of the camera. Fit to Film Gate has no effect if Image Plane is Fixed.
See also Display film gate, resolution gate, and other view guides.
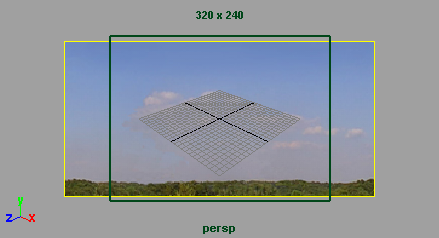
- Size
-
The height and width of the image plane, measured in inches. If the image plane is Fit to Film Gate, the Size of the image plane is the same as the Camera Aperture. Size is not available if Image Plane is Fixed.
- Squeeze Correction
-
Scales the image plane horizontally when Fit is To Size. If the Pixel Aspect Ratio for the scene is different than the pixel aspect ratio of the image plane’s image file, adjust the Squeeze Correction attribute to compensate for any distortion. The default value is 0.
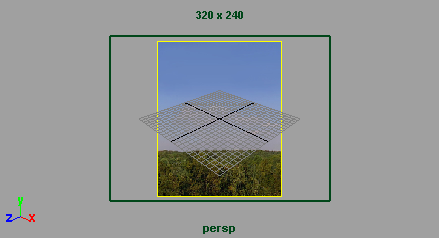
- Offset
-
Offsets the image plane horizontally and vertically relative to the film gate. Offset is not available if Image Plane is Fixed. Offset is measured in millimeters. The default values are both 0.
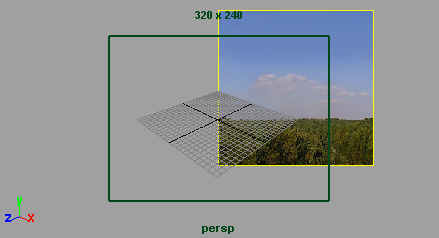
- Depth
-
The distance of the image plane from the camera, measured in the scene’s linear working unit. Depth is not available if Image Plane is Fixed or for free image planes.
- Rotate
- Use this attribute to rotate an image plane that is connected to a camera. For a free image plane, you can rotate the image plane via its transform node.
Placement Extras
The Placement Extras attributes control which portion of an image file is visible on the image plane. If Image Plane is Fixed, the Placement Extras attributes also control the position and size of the image plane.
- Coverage X, Coverage Y
-
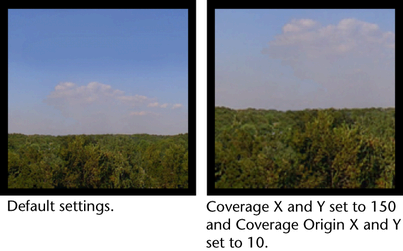
The number of horizontal and vertical pixels of the image file displayed on the image plane. The default values for Coverage X and Coverage Y are the horizontal and vertical resolution of the image file. By decreasing these values, you can limit the portion of the image file that is displayed.
- Coverage Origin X, Coverage Origin Y
-
The horizontal and vertical value of the pixel in the image file displayed in the bottom left corner of the image plane. By changing the Coverage Origin X and Coverage Origin Y values, you can scale and offset the image file on the image plane. The default values are both 0.
The following diagram shows what happens to the image plane placement when you adjust Coverage attributes:
- Image Center
-
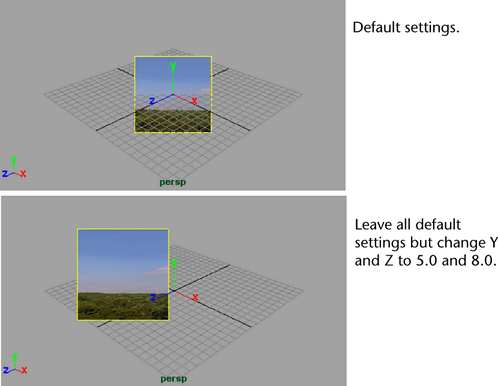
The position of the center of the image plane (measured in the scene’s linear working unit). Center is not available if Image Plane is Attached to Camera.
- Width, Height
-
The width and height of the image plane (measured in the scene’s linear working unit). Width and Height are not available if Image Plane is Attached to Camera.
The following diagram shows what happens to the image plane placement when you adjust center, width, and height attributes:
For free image planes (Create > Free Image Plane), the Width and Height values are both set to 10.0 by default. After an image is attached to the free image plane, the width and height values are set to the original image size divided by 100. For example, an image of size 1600x1200 has a Width of 16 and a Height of 12.
- Maintain Pic Aspect Ratio
-
After attaching an image to a free image plane, enable this option to adjust the size of the image plane while maintaining the aspect ratio of the original image. When enabled, entering a value in either the Width or Height field adjusts the other to maintain the width/height ratio of the source image.
Alternatively, you can disable this option to adjust each field individually.
See Editing and aligning free image planes for more information.
Render Stats
See Render Stats.
Depth
- Use Depth Map
-
Check this option to enable z-depth support of your image plane.
- Composite Depth
-
Indicates that the color information should be composited with the depth information. If this option is off, then no color information is written and only the depth information is included. This is useful if you want to post-composite your result in another software package. A preview of the result will be drawn in the scene view.
- Separate Depth
-
If on, a separate file is used for assigning the depth information.
- Depth File
-
The image file that contains the depth information. If no file is specified in this option, Maya will search for the depth information encoded in the main image file.
- Depth Oversample
-
If on, the depth buffer is oversampled to assign pixel depth values during software rendering. Oversampling helps to reduce aliasing effects that may be introduced using the depth buffer. Oversampling is only used with the software renderer and produces the most optimal results if the depth buffer size is an integral size larger than the image size and the image size is identical to the software render resolutions.
- Depth Bias
-
If on, the z-depth information is offset from the center of the view frustum. The unit for this value is centimeters.
- Depth Scale
-
If on, scales the z-depth information at the center of the view frustum.
Object Display
- Frame Visibility
- By default, a frame displays around image planes. Disable this option to turn off the frame.
For descriptions of the other options in this section, see Display attributes.
The imagePlane node, which was a dependency node before Maya 2013, is now a shape node (in other words, a DAG node). The imagePlane (transform) and imagePlaneShape nodes can be accessed from the Outliner.
In addition, when using the Camera Sequencer to play animation with image planes, you must add the –shapes flag so that the imagePlaneShape node appears in the list. For more information, see Playblast camera shots.