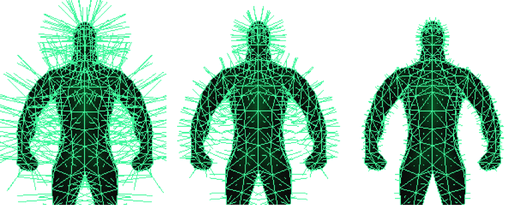
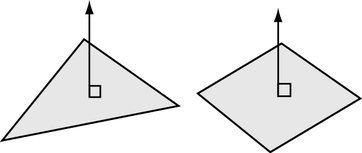
A normal is a theoretical line, perpendicular to the surface of a polygon. In Maya, normals are used to determine the orientation of a polygon face (face normals), or how the edges of faces will visually appear in relation to each other when shaded (vertex normals).

Face normals
The front of a polygon’s face is graphically represented using a vector called the polygon’s normal.

The order of vertices around the face determine the direction of the face (whether a side of the polygon is the front or the back). For example, if you place vertices in a clockwise direction, the face normal points downward. If you place vertices in a counter-clockwise direction, the face normal points upward. See Create a polygon mesh.
This can be important because technically polygons are only visible from the front, though by default Maya automatically makes all polygons double-sided so you can see them from the back. You can turn this double-sided behavior off for meshes.
When you shade or render polygons, the normals determine how light reflects from the surface and the shading that results.
Vertex normals
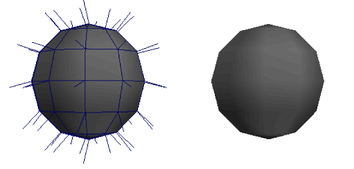
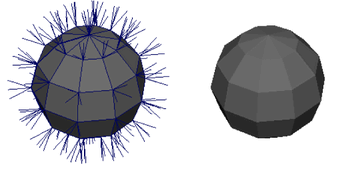
Vertex normals determine the visual softness or hardness between polygon faces. Unlike face normals, they are not intrinsic to the polygon, but rather reflect how Maya renders the polygons in smooth shaded mode.
Vertex normals appear as lines projecting from the vertex, one for each face that shares the vertex.
- When normals for a particular vertex all point in the same direction (called soft or shared vertex normals), there is a soft edge transition between the faces in smooth shaded mode.

- When the vertex normals point in the same directions as their faces (called hard vertex normals), the transition between faces is hard, creating a faceted appearance.

Manipulating vertex normals is the easiest way to soften or harden the appearance of edges (creases) without using additional geometry. You can do this automatically by using the Soften / Harden Edge commands, or by manually manipulating the vertex normals using the Vertex Normal Edit Tool (Mesh Display > Vertex Normal Edit Tool). When the vertex normals for a polygon mesh are manually edited they become locked or frozen. When you unlock a previously locked vertex normal, Maya automatically recalculates the vertex normal for the face based on its default normal calculations.