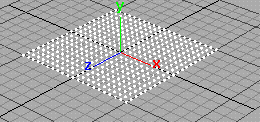
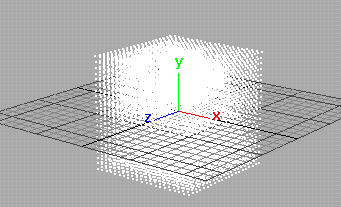
Use the nParticle Tool to create individual nParticles, nParticle grids, and random clusters of nParticles anywhere in the scene and on the surface of objects.
nParticles created using the nParticle Tool are static in the first frame of the simulation, but are animated by Nucleus gravity and by collisions with Nucleus objects. By default, Maya creates a Nucleus node at the same time as the nParticleShade node. You can instead assign the nParticle object to an existing Nucleus solver by selecting it in the ParticleTool window (see Particle Tool Options). Nucleus solvers can also be assign to the nParticle object after it has been created. See Fields/Solvers menu.
Create individual nParticles
- Choose the type of nParticle you want to create by selecting .
See nParticles menu.
- Select
 .
. - Click the positions where you want to place the particles.
- Press
 (Windows and Linux) or
  (Mac OS X).
 This creates a new nParticle object consisting of the nParticles you positioned and a Nucleus node.
Tip: A particle object is not complete until you press (Windows and Linux) or
  (Mac OS X). You cannot use Edit > Undo to undo the entire object until you press
  or
or  .
. If you want to undo individual nParticles before you press
 or
or  , use the
  (Windows and Linux) or
  (Mac OS X) key to remove the nParticles in the reverse order of creation. Alternatively, you can press the
  (Windows and Linux) or
  (Mac OS X) key to go into editing mode, then click any nParticle and press
  or
or  . Press
  or
or  to leave editing mode.
 You can also change the position of one or more nParticles before you press
 or
or  . Press the
  or key then drag the nParticle. Press
  or
or  to complete the nParticle object.
You can place particles directly on the surface of a polygonal, NURBS object, or on a construction plane.
Create a cloud or cluster of nParticles
You can create a cloud or cluster of any number of nParticles in your scene. The nParticles are randomly positioned in the cloud or cluster.
- Choose an nParticle type and access the nParticle Tool settings window (see nParticles menu).
- In the Particle Settings window, set the following:
- Number of particles you want in each cloud or cluster.
This value must be greater than 1.
- Maximum radius of the spherical area, in worldspace units, that each cloud or cluster occupies.
Maya randomly places the particles in this area.
- Number of particles you want in each cloud or cluster.
- Set other Particle Settings as desired. See nParticle Tool Options.
- Click the positions where you want to place each particle cloud or cluster.
- Press
 (Windows and Linux) or
  (Mac OS X) to create the nParticle object
 This creates a new nParticle object, consisting of the particle cloud, and a Nucleus node.
Sketch a continuous curve of nParticles
- In the Particle Settings window, do the following:
- Set Number of particles to 1.
- Turn on Sketch particles.
- Set the Sketch Interval value.
This sets the spacing between particles. A value of 0 gives you nearly a solid line of particles. The higher the value, the more space between the particles.
- Drag the mouse in the workspace to sketch the line of particles.
- Release the mouse button and drag in another location, if desired.
The sketched particles are a single particle object.
- Press
 (Windows and Linux) or
  (Mac OS X).
 This creates a new nParticle object, consisting of the sketched particles, and a Nucleus node.
Place nParticles on the surface of a polygon or NURBS object
You can place individual nParticles, nParticle clusters, or streams of nParticles on the surface of polygon or NURBS objects.
- Select the surface, and then select Modify > Make Live to make the nParticles snap to the surface of the object.
- Choose an nParticle type and access the nParticle Tool settings window.
- Set the desired tool options to create individual nParticles, a cluster of nParticles or a stream of nParticles.
- Click the positions on the surface of the object where you want to place the nParticles.
- Deselect the particle object, then select Modify > Make Not Live.
This deselects the surface as the live object.
Note:To make the particles move with the surface, parent them to the surface. For more information, see Make an object move with a dynamic parent.
Create nParticle grids
To create a 2D grid of particles by clicking in the workspace
- Turn on Create Particle Grid.
- Set the Particle Spacing value.
This sets the spacing (in units) between particles in the grid.
- Turn on Placement with cursor.
- Click to place the lower left corner of the grid; click again to place the top right corner of the grid.
- Press
 (Windows and Linux) or
  (Mac OS X) to create the grid.
To create a 3D grid of particles by clicking in the workspace
- Turn on Create Particle Grid.
- Select Placement with cursor, if it is not already selected.
- Set the Particle Spacing value.
This sets the spacing (in units) between particles in the grid.
- In the perspective view, click the left mouse button at the lower left and upper right corners to specify the X and Z grid dimensions of the base or top of the 3D grid—don’t press
 (Windows and Linux) or
  (Mac OS X) yet.
 - Move the cursor into the front view or side view. Press the
 (Windows and Linux) or
  (Mac OS X) key to enter edit mode.
 - Drag either the left or right point up or down to create the height of the grid. Do not drag both. To constrain placement, hold Shift down as you drag.
- Press
 or
or  .
. 
To create a 2D or 3D grid by entering values
- Turn on Create Particle Grid.
- Set the Particle Spacing value.
- Turn on Placement with text fields.
- For the Minimum Corner, enter the coordinates of the lower left corner. For the Maximum, enter the coordinates of the upper right corner.
- Move the pointer into the workspace and press
 (Windows and Linux) or
  (Mac OS X) to create the grid.