You can control whether grid bubbles display at either end of a grid line.
You can do this graphically for an individual grid line in a view, or for all grid lines of a particular type by changing type properties.

To show or hide individual grid bubbles
- Open a view that displays grid lines.
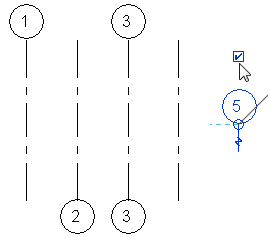
- Select a grid line.
Revit displays a check box near the grid bubble. You may need to zoom in to see it clearly.

- Clear the check box to hide the bubble, or select it to show the bubble.
You can repeat this process to show or hide the bubble at the opposite end of the grid line.
To show or hide grid bubbles using type properties
- Open a view that displays grid lines.
- Select a grid line, and click Modify | Grids tab
 Properties panel
 (Type Properties).
- In the Type Properties dialog, do any of the following:
- To display grid bubbles at the start point of grid lines in a plan view, select Plan View Symbols End 1 (Default).
- To display grid bubbles at the endpoint of grid lines in a plan view, select Plan View Symbols End 2 (Default).
- In views other than plan views (such as elevations and sections), indicate where to display grid bubbles. For Non-Plan View Symbols (Default), select Top, Bottom, Both (top and bottom), or None.
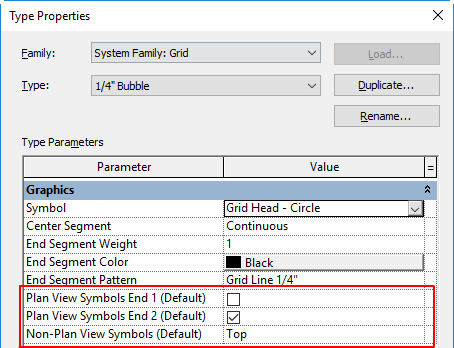
- Click OK.
Revit updates all grid lines of this type in all views.