You can adjust the length of the gap or center segment in an individual grid line.
For example, you may want to adjust the gap so the grid line does not display through the middle of a model element. This feature is available when the grid line uses a grid type for which the Center Segment parameter is Custom or Gap. (See Customizing Grid Lines.)
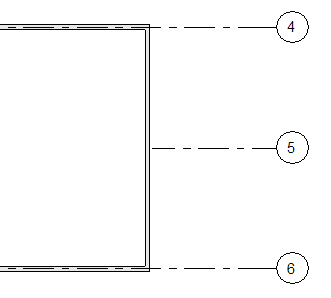
A grid line that has been adjusted to end at the wall
To adjust the center segment of a grid line
- Select the grid line in the view.
Revit displays a blue dot on the grid line. You may need to zoom in to see it clearly.
 Note: If you do not see a blue dot indicating the segment boundary, move the 3D extent for the grid line outward until the dot is visible. In addition, check the setting of the Center Segment parameter. To do this, select the grid line, click Modify | Grids tab
 Properties panel
 (Type Properties). In the Type Properties dialog, change the value for Center Segment to None or Custom.
The default length of the end segments of a grid line is defined by the End Segments Length parameter of the grid type.
- Drag the blue dot along the grid line to the desired position.
The end segment adjusts its length accordingly.