Edit the extents of a truss in a non-plan, perpendicular elevation, section, or 3D view.
You can create new lines, delete existing lines, and use the Trim/Edit tools to adjust the profile, as required. By editing the profile of the truss, you can modify its top and bottom chords to any shape desired.
Note: Not all truss families properly transform into a profile sketch. For the top and bottom chords to conform to the shape of the profile, the layout family's top and bottom chord sketch lines must coincide with the top and bottom reference planes respectively. The curves drawn using Top or Bottom Chord Reference tools in a profile sketch define the transformation of the family's top and bottom reference planes, not the shape of the top or bottom chords.
To edit a truss profile
- Select a truss to edit.
- Click Modify | Structural Trusses tab
 Mode panel
  (Edit Profile).
 - Click Modify | Structural Trusses > Edit Profile tab Draw panel
 (Top Chord) or
  (Bottom Chord).
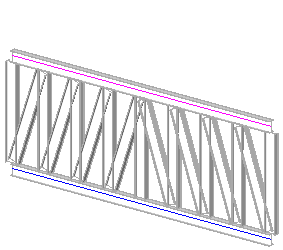
- Select a line tool.
- Sketch the profile to which the truss will constrain.

- Select the old plane profile, and delete it.

- On the ribbon, click
 (Finish Edit Mode).
The truss model shapes itself to fit within the constraints of the new profile. If necessary, you can edit the chords of a truss while it is attached.

If the truss is attached at an edited chord, the profile will be ignored. The attached surface of a structural floor or roof determines the chord geometry. The truss profile shape is not discarded and will display if the truss is later detached.

Tip: Click Modify | Structural Trusses tab Mode panel  (Reset Profile) to re-pin and set truss members back to their default definition. The Reset tool performs the following:
Mode panel - Sets overridden members’ sizes back to the size defined in the Structural Type parameter of the Truss Object type properties.
- Restores deleted members.
- Restores any relocated members to their original locations.
- Re-pins any unpinned elements, restoring overridden instance parameters to their default settings.