Use the leader vertex grips to add, move, and reset leader vertices. You can add as many leader segments as desired.
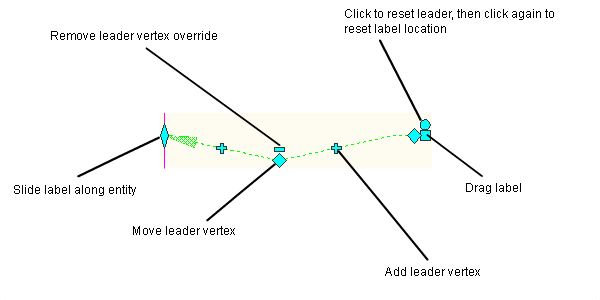
To move a leader vertex
- Click on a dragged label that has at least two leader lines.
- Select the
 grip and select a new vertex location.
To add a leader vertex
- Click on a dragged label and select the
 grip.
grip. - Move the grip to the new location. A vertex is created. Note that new grips display on the resulting leader lines. Use these grips to create additional vertices. Note: If the leader type in label style dragged state is set to spline, an AutoCAD spline fit is made passing through the vertex points.
To remove a leader vertex
- Click on a dragged label that has at least two leader lines.
- Select the
 grip and the adjacent vertex is reset.
To reset leaders
- Click on a dragged label that has at least two leader lines.
- Select the
 grip and the leader line is reset to its original state.
Note: Click the grip a second time to reset the dragged label to its undragged state.