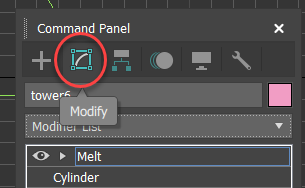
Found in the Command Panel, the Modify panel lets you change geometry parameters.

The Modify panel
- Command panel >
 Modify panel
Each object you add has its own set of creation parameters, which define its geometry and other characteristics, depending on the type of object. Once placed in a scene, objects carry their creation parameters with them. You can change these parameters on the Modify panel.
You also use the Modify panel to assign modifiers to objects and adjust modifier settings. A modifier is typically a tool for reshaping an object. While they can mold the final appearance of an object, modifiers do not change its underlying creation parameters.
You use the Modify panel to:
- Change the creation parameters for existing objects.
- Apply modifiers to adjust the geometry of an object or a set of objects.
- Change the parameters of modifiers and choose their components.
- Delete modifiers.
- Convert a parametric object to an editable object; see Modifier Stack Controls.
The Modify panel stays in view until you access a different command panel. The top section of the panel always contains name and color controls, the Modifier List, the modifier stack and related controls, and optionally the current modifier set buttons. The remaining contents of the panel—various rollouts with options and controls—update when you select an object, giving you access only to what you can modify about that object.
What you can modify depends on whether an object is classed as a geometric primitive like a sphere, or as another kind of object, such as a light or a space warp. Each category has its own range of possibilities. The contents of the Modify panel are always specific to the category as well as to the selected object or active modifier. When you make a change from the Modify panel, you usually see the results in the viewports right away.
You can change or delete modifiers by using the Modifier Stack controls.