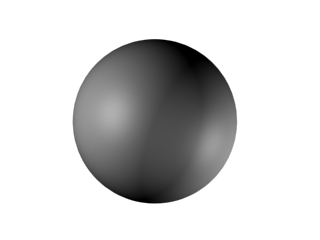
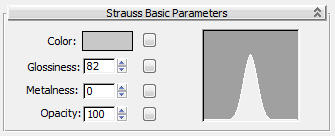
The Strauss shader is for modeling metallic surfaces. It uses a simpler model and has a simpler interface than the Metal shader.

Sample of Strauss shading
Procedures
To change the color of a Strauss material:
- Click the Color swatch.
3ds Max displays the Color Selector.
- In the Color Selector, change the values of the color.
As you change color values, the color also changes in the sample in the sample slot.
To reduce a material's opacity:
- Change Opacity to a value less than 100%.
The material becomes more transparent. A fully transparent object (0% Opacity) is nearly invisible except for the light it reflects: the specular highlights.
To preview transparency in the sample slots, view the sample object against a background. Click the checkered Background button to the right of the sample slots.
Transparent materials render more realistically when you turn on 2-Sided in the material's Shader Basic Parameters Rollout.
To increase or decrease the size and intensity of highlights:
- Change the Glossiness value.
The width of the Highlight curve and the highlights in the preview change. At 0% glossiness, the curve is at its maximum width. At 100% glossiness, the curve is extremely narrow.
Increasing Glossiness also dims the diffuse color.
To make the material appear more metallic:
- Increase the Glossiness value.
The metallic effect requires visible highlights.
- Increase the value of Metalness.
Highlights become more focused, and the (diffuse) color component is dimmed.
Interface

- Color
-
Controls the color of the material. This corresponds to the diffuse color you specify for other kinds of shaders. With the Strauss shader, you control only this color. The shader calculates the ambient and specular color components.
Click the map button to assign a Diffuse Color map. This button is a shortcut: You can also assign a Diffuse Color map on the Maps rollout.
- Glossiness
-
Affects the size and intensity of the specular highlight. As you increase the value, the highlight gets smaller and the material appears shinier. Default=25.
Glossiness also controls the strength of reflection maps assigned to a Strauss material.
Click the map button to use . This button is a shortcut: You can also assign a Glossiness map on the Maps rollout.
- Metalness
-
Changes the metallic appearance of a material. Increasing the Metalness value increases the metallic appearance, with glancing as well as primary highlights. Because a metallic appearance principally depends on highlights, the Metalness value has little effect unless you also increase the Glossiness value. Default=0.
Tip: When you create a metal material, make sure the backlight is on in the sample slot or Preview window.Click the map button to assign a map. This button is a shortcut: You can also assign a Metalness map on the Maps rollout.
- Opacity
-
Sets the opacity/transparency of the material as a percentage. The effect is best previewed against a pattern background in the sample slot. You can control opacity falloff in the Extended Parameters. Default=100.
Click the map button to assign a map to the Opacity component. See Opacity Map. This button is a shortcut: You can also assign an Opacity map on the Maps rollout.
- Highlight graph
-
This curve shows the effect of adjusting the value of Glossiness. As you decrease Glossiness, the curve grows shorter; as you increase it, the curve grows taller.