Use this dialog box to view and change alignment-related settings.
This topic documents settings in all alignment-related Edit Settings dialog boxes (drawing-level, feature-level, and command-level).
- Drawing-level ambient settings are identified by the
 drawing icon.
- Alignment feature settings are listed near the top of this dialog box, after the General property group, and are identified by the
 alignment icon.
- Alignment command settings are identified by the
 command icon.
For general information about drawing, feature, and command settings and their interaction, see About Autodesk Civil 3D Settings.
For information about drawing-level ambient settings, see Ambient Settings Tab (Drawing Settings Dialog Box).
These settings establish the default styles assigned to alignments and alignment-related labels.
 Default Styles
Use these settings to specify the default styles for new alignments.
- Alignment Style
-
Specifies the default alignment style. Click in the Value column, and click
 to select a style in the
Alignment Style dialog box.
- Alignment Label Set
-
Specifies the default alignment label set. Click a cell in the Value column, and click
 to select the label set in the
Alignment Label Set dialog box.
- Offset Profile Style
- Specifies the default profile style to use when creating offset profiles. For more information, see To Create and Modify Dynamic Offset Profiles.
- Marker Style
-
Specifies the display and appearance of points on the alignment. Click in the Value column, and click
 to select a style in the
Marker Style dialog box.
- Line Label Style
-
Specifies the default line label style. Click in the Value column, and click
 to select a style in the
Line Label Style dialog box.
- Curve Label Style
-
Specifies the default curve label style. Click in the Value column, and click
 to select a style in the
Curve Label Style dialog box.
- Spiral Label Style
-
Specifies the default spiral label style. Click in the Value column, and click
 to select a style in the
Spiral Label Style dialog box.
- Station Offset Label Style
-
Specifies the default station offset label style. Click in the Value column, and click
 to select a style in the
Station Offset Label Style dialog box.
- Alignment Label Set
-
Specifies the default alignment label set. Click in the Value column, and click
 to select a style in the
Alignment Label Set dialog box.
- Point of Intersection Label Style
-
Specifies the default point of intersection label style. Click in the Value column, and click
 to select a style in the
Point of Intersection Label Style dialog box.
 Default Name Format
Use these settings to specify the default name formats for new alignments and offset profiles. Click in the
Value column, and click
![]() to make changes in the
Name Template dialog box.
to make changes in the
Name Template dialog box.
 Station Indexing
Use this setting to specify the default station increment.
- Default Station Index Increment
-
Specifies the default value for station increments.
 Superelevation Options
Use these settings to specify defaults for calculating superelevation.
- Rate of Change of Cross Slope (%)
- Specifies the maximum rate of change for the superelevation cross slope. If the rate of change for the superelevation cross slope of an alignment exceeds this value, warning symbols are displayed on the superelevation view of the alignment and in the Superelevation Tabular Editor.
- Number of Lanes - Left
-
Specifies the number of lanes on the left side of the roadway.
- Number of Lanes - Right
-
Specifies the number of lanes on the right side of the roadway.
- Roadway Type
-
Specifies the roadway type as Divided or Undivided.
- Cross Section Shape
-
Specifies the cross sectional shape of the roadway as Planar or Crowned:
- Planar: There is no change in slope between the travel lanes.
- Crowned: When no superelevation is applied, travel lanes slope downward in opposite directions from a common crown point.
- Highside Location (For Undivided Planar Roads)
-
Specifies the default Highside Location for planar roads.
- Left Edge: Specifies that the high side of the roadway is on the left edge on tangent (unsuperelevated) sections when the corridor type is Undivided and the Cross Section Shape is planar.
- Level: The roadway is level (0% slope) on tangent sections.
- Right Edge: Specifies that the high side of the roadway is on the right edge on tangent (unsuperelevated) sections, when the corridor type is Undivided and the Cross Section Shape is planar.
- Normal Lane Width
-
Specifies the lane width or click
 and select a distance in the drawing area.
- Normal Shoulder Width
-
Specifies the typical roadway shoulder width.
- Normal Lane Slope (%)
-
Specifies the % slope of the roadway lanes on tangent (unsuperelevated) tangents. Typical values are -15% to -2.5% for the slope used for roadway lanes when no superelevation is applied.
- Normal Shoulder Slope (%)
-
Specifies the % slope value of the roadway shoulders. This value is only required if either of the shoulder superelevation methods is not set to Default. Default value for a normal shoulder slope is -5%.
- % On Tangent For Tangent-Curve
-
percentage of total transition length that is achieved before the beginning of curve (BC) point in tangent-curve geometry.
- %On Spiral For Spiral-Curve
-
percentage of total transition length that is achieved before the beginning of curve (BC) point in spiral-curve geometry.
- Station Rounding Option
-
Specifies the number of positions for station rounding. Click the Value cell and choose one of the following from the list:
- None: leaves stations as they are specified in the table
- 0.1: rounds to the nearest tenth value of the station
- 1: rounds up to nearest full station value
- 5: rounds up to nearest fifth meter or foot
- 10: rounds up to nearest tenth meter or foot
- Outside Shoulder Superelevation Method
-
Specifies the method that is applied to the outside shoulder during superelevation:
- Default Slopes: Default slopes are retained and shoulders are not superelevated.
- Match Lane Slopes: Shoulder slopes match the slopes applied to the adjacent traveled ways through out the superelevation process.
- Breakover Removal: Shoulders on the outside edge of the curve are adjusted upward to match the Normal Lane Slope (%) before the lane begins to superelevate. The high-side shoulder slope matches the high-side lane slope throughout the superelevation process, and it then rotates downward back to the Normal Shoulder Slope (%) value when the lanes are back to the unsuperelevated condition.
- Inside Shoulder Superelevation Method
-
Specifies the method that is applied to the inside shoulder during superelevation:
- Default Slopes: Default slopes are retained and shoulders are not superelevated.
- Match Lane Slopes: Shoulder slopes match the slopes applied to the adjacent traveled ways through out the superelevation process.
- Breakover Removal: Shoulders on the outside edge of the curve are adjusted upward to match the Normal Lane Slope (%) before the lane begins to superelevate. The high-side shoulder slope matches the high-side lane slope throughout the superelevation process, and it then rotates downward back to the Normal Shoulder Slope (%) value when the lanes are back to the unsuperelevated condition.
- Design Speed Lookup Method
-
Specifies the table lookup rule in cases where the actual design speed does not exactly match the speed specified in the design criteria tables:
- Interpolate: Table values are interpolated to the given speed.
- Use Nearest Higher Speed: Uses the table values that correspond to the next highest design speed found in the table. (Conservative rule)
- Round To Nearest Speed: Uses the table values corresponding to the nearest speed, either higher or lower.
- Radius Lookup Method
-
Specifies the table lookup rule in cases where the actual radius does not exactly match the speed specified in the design criteria tables:
- Interpolate: Interpolates table values for the curve group radius.
- Use Nearest Lower Radius: Uses table values corresponding to the next lowest radius found in the table.(Conservative rule)
- Round To Nearest Radius: Uses table values corresponding to the nearest radius value found in the table.
- Curve Smoothing Length
-
Specifies the default curve smoothing length used in superelevation.
 Cant Options
Use these settings to specify defaults for calculating cant on Rail alignments.
- Equilibrium Cant Formula
-
Specifies the default formula that calculates how much each rail is raised or lowered to compensate lateral forces due to horizontal curvature. The default formula is:
- Metric: 11.8 * V^2/R
- Imperial: 4.01*V^2/R
- Maximum Allowable Cant Deficiency Formula
-
Specifies the default formula that calculates the maximum allowable cant deficiency value to use in cant calculations. The default formula is:
- Metric: 100mm
- Imperial: 4.00in.
- Pivot Method
-
Specifies the default pivot point location for railways:
- Low Side Rail (Default)
- High Side Rail
- Center Baseline
- % on Tangent for Tangent-Curve for Cant
-
Specifies the percentage of total transition length that is achieved before the beginning of curve (BC) point in tangent-curve geometry. The default percentage is 50.00%.
- % on Spiral for Spiral-Curve for Cant
-
Specifies the percentage of total transition length that is achieved before the beginning of curve (BC) point in spiral-curve geometry. The default percentage is 100.00%.
- Maximum Applied Cant on Tangent
-
Specifies the maximum allowable applied cant on a tangent in tangent-curve situations. The default value is:
- Metric: 25mm
- Imperial: 1.00in.
- Station Rounding Option for Cant
-
Specifies the number of positions for station rounding. Click the Value cell and choose one of the following from the list:
- None (default): leaves stations as they are specified in the table
- 0.1: rounds to the nearest tenth value of the station
- 1: rounds up to nearest full station value
- 5: rounds up to nearest fifth meter or foot
- 10: rounds up to nearest tenth meter or foot
- Cant Rounding Options for Equations
-
Specifies the number of positions for rounding the result of the equilibrium cant and maximum applied cant deficiency calculations. This setting does not affect calculations done in the XML file. The default value is 0.000.
- Design Speed Lookup Method for Cant
-
Specifies the table lookup rule in cases where the actual design speed does not exactly match the speed specified in the design criteria tables:
- Interpolate: Table values are interpolated to the given speed.
- Use Nearest Higher Speed(default): Uses the table values that correspond to the next highest design speed found in the table. (Conservative rule)
- Round To Nearest Speed: Uses the table values corresponding to the nearest speed, either higher or lower.
- Radius Lookup Method for Cant
-
Specifies the table lookup rule in cases where the actual radius does not exactly match the speed specified in the design criteria tables:
- Interpolate: Interpolates table values for the curve group radius.
- Use Nearest Lower Radius (default): Uses table values corresponding to the next lowest radius found in the table.(Conservative rule)
- Round To Nearest Radius: Uses table values corresponding to the nearest radius value found in the table.
 Rail Alignment Options
Use these settings to specify default parameters for Rail alignments.
- Track Width
-
Specifies the default distance between the location at which the wheels contact the rails. Track width can also be expressed as the rail gauge minus the rail head width. The default value is:
- Metric: 1.500m
- Imperial: 5.00ft
- Measure Rail Curves Along Chords
-
Specifies whether to calculate alignment length based on curve chord length, and not true geometry length.
- Export Rail Alignment as Center Line Alignment
-
Specifies whether a rail alignment becomes a component road based on the original geometry of the source rail alignment when exported to IMX for use in Autodesk InfraWorks. The default value is No.
- No: Rail alignments are exported to IMX as rail alignments and are brought into InfraWorks as railways. The geometry can lose accuracy.
- Yes: Rail alignments are exported to IMX as centerline alignments and are brought into InfraWorks as component roads. The geometry of the source rail alignments is maintained.
Note: This setting is applicable when using the Export IMX command in Civil 3D and when opening a Civil 3D drawing directly in InfraWorks.
 Degree of Curvature
Use these settings to specify default parameters for measuring alignment geometry using degree of curvature.
- Unit Chord Length
-
Specifies the default chord length when calculating degree of curvature in Rail alignments. This value must be a positive numeral. The default value is:
- Metric: 30.00
- Imperial: 100.00
- Unit Arc Length
-
Specifies the default arc length used when calculating degree of curvature when an alignment is not measured along chords. This value must be a positive numeral. The default value is:
- Metric: 30.00
- Imperial: 100.00
 Linear Transition Around Curves
Use these settings to specify the default settings for how linear transitions around curves are created in widening situations. For more information, see To Work With Setting Defaults for Alignment Widening.
- Number of Segments
-
Specifies how many segments to use when creating linear transitions at curves.
- Transition Segment Type
-
Specifies the type of segments to be used in distributing widening transition linearly around curves. The choices are lines or arcs.
 Automatic Widening Around Curves
Use these settings to specify defaults for the Add Automatic Widening command. For more information, see To Work With Setting Defaults for Alignment Widening.
- Widening to Apply on
-
This value, in combination with the Number of Lanes specified in the Widening Method, specifies the amount of widening to be applied on the left-side and or the right-side offset alignments. If Inside Only is used, then the widening value is increased to match the number of lanes on either side of the road (doubled if the number of lanes on the inside and the outside are the same), and applied on all of the inside offset for the widening. On the outside at these stations, no widening is applied.
- Wheelbase Length
-
Specifies a numeric value for the wheelbase length that is used in the formula for widening around curves. This value is used only when the widening method is through design standards. It is not used when the widening is specified manually.
- Add Automatic Widening At Curves
-
Specifies whether or not to automatically add widening at curves.
- Widening By
-
Specifies the default method for applying the automatic widening - either by using design standards, or manually (by entering values into the Increase in Width and Transition Length fields on the Add Automatic Widening dialog box). When Through Design Standards is the default, the Specify Widening Using Criteria option on the Add Automatic Widening dialog box is selected by default. When Manually is the default, the Specify Widening Manually option is selected.
- Manual Widening Width
-
Specifies the default value for the Increase in Width field on the Add Automatic Widening dialog box.
- Manual Transition Length
-
Specifies the default value for the Transition Length field on the Add Automatic Widening dialog box.
 Criteria-Based Design Options
Use these settings to specify defaults for creating an alignment using design criteria.
- Default Design Speed
-
Specifies the default alignment design speed. Enter a speed in the Value column or click
 and select a design speed in the drawing area.
- Criteria-Based Design Option
-
Specifies whether alignments use design criteria by default. If this option is set to False, the remaining Criteria-Based Design Options are not available.
Note: If the Criteria-Based Design Option is set to False, then the remaining Criteria-Based Design Options are not available. - Use Design Criteria File Option
-
Specifies whether to use a design criteria file by default. If this option is set to True, then the first XML file found in the <install directory>\Data\Corridor Design Standards\<units> directory is used by default.
- Use Design Checks Option
-
Specifies whether to use a design check set by default.
- Default Design Check Set
-
Specifies the default design check set. Click in the Value column, and click
 to select a set in the
Default Design Check Set dialog box.
- Check for Tangency Between Elements
-
Specifies whether to check if any line, curve, or spiral element is not tangent to its previous or next element. If an element is not tangent, then the Warning symbol is displayed in the drawing, in the Alignment Entities vista, and in the Alignment Layout Parameters window.
 Dynamic Alignment Highlight Options
Use these settings to specify highlighting defaults for dynamic offset alignments.
- Offset Region Color & Lineweight
-
Specifies the color and lineweight of the highlighting on a dynamic offset alignment region when it is selected in the Offset Alignment Parameters dialog box.
- Transition Region Color & Lineweight
-
Specifies the color and lineweight of the highlighting on the widening transition segment when it is selected in the Offset Alignment Parameters dialog box.
- Curb Return Fillet Region Color & Lineweight
-
Specifies the color and lineweight of the curb return fillet when it is selected in the Intersection Curb Return Parameters dialog box.
- Parent Alignment Color & Lineweight
-
Specifies the color and lineweight of the parent alignment associated with the dynamic offset alignment, when the primary\secondary roads are selected in the Intersection Offset Parameters dialog box, or incoming and outgoing roads are selected in the Intersection Curb Return Parameters dialog box.
- Parent Alignment Tracker Color & Lineweight
-
Specifies the color and lineweight used to identify the tracker line. The tracker line is a temporary line that identifies the corresponding location on the parent alignment when a location on the offset alignment, intersection offset, or curb return is selected in the associated parameters dialog box.
 Dynamic Offset Alignment Options
Use these settings to specify the default settings for creating new dynamic offset alignments and associated profiles.
- Create Profiles for Offset Alignments
- Specifies whether the option to create offset profiles is selected by default when creating offset alignments. For more information, see To Create and Modify Dynamic Offset Profiles.
- Default Cross Slope
- Specifies the default cross slope to use from the parent profile to the offset profiles.
- From Parent Alignment Start
-
Specifies offset alignments to start from the start of the parent alignment.
- To Parent Alignment End
-
Specifies offset alignments to end at the end of the parent alignment.
- Number of Offsets - Left Side
-
Specifies how many offset alignments to create on the left side of the parent alignment when using the create offset alignment command.
- Number of Offsets - Right Side
-
Specifies how many offset alignments to create on the right side of the parent alignment when using the create offset alignment command.
- Incremental Offset Value – Left Side
-
Specifies the incremental offset value to use when creating offset alignments on the left side of a parent alignment. For example, if a value of 5 is specified when there are 2 offsets on the left side, the first offset is created at 5 (feet or meters, depending on units), and the second offset is created at 10 (feet or meters).
- Incremental Offset Value – Right Side
-
Specifies the incremental offset value to use when creating offset alignments on the right side of a parent alignment. For example, if a value of 5 is specified when there are 2 offsets on the right side, the first offset is created at 5 (feet or meters, depending on units), and the second offset is created at 10 (feet or meters).
 Implied Point of Intersection Options
Use these settings to specify the default settings for implied points of intersection on alignments.
- Implied Point of Intersection Display
-
Specifies the default method by which implied points of intersection are displayed after an alignment is created.
 Constraint Editing Options
Use these settings to specify the default settings for the behavior of the Tangency Constraint (Not Constrained, Constrained by Previous, Constrained by Next, and Constrained on Both Sides) and Parameter Constraint (Radius, Length, Pass Through Point, etc.) while the alignment is edited.
- Always Perform Implied Tangency Constraint Swapping
-
Specifies the default behavior of adjacent subentities when an alignment subentity constraint is changed.
- Lock All Parameter Constraints
-
Specifies whether to lock the Parameter Constraint of every element in the alignment.
 Connected Alignment Parameters
Use these options to specify the default settings when creating connected alignments and profiles.
- Degree of Curvature
- Specifies whether the default degree of curvature when creating connected alignments is less than 180 degrees or greater than 180 degrees.
Note: Circular Fillet and Three Centered Arc curve group types do not support solutions that are greater than 180 degrees.
- Offset In/Offset Out
- Specifies the default offset distances for the new alignment from the connection in and connection out alignments.
- Connection Overlap In/Connection Overlap Out
- Specifies how much overlap to insert at the ends of the connected alignment. This value is used so that a portion of the ends of the new alignment overlaps onto the existing alignments where they join.
Connected Alignment Curve Group Parameters
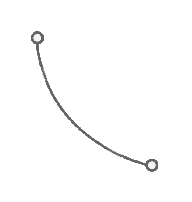
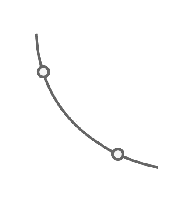
- Curve Group Type
- Specifies what type of curve group to create.
- Circular Fillet
- Spiral-Curve-Spiral
- Reverse Spiral-Spiral-Curve-Spiral

- Reverse Spiral-Curve-Spiral-Spiral
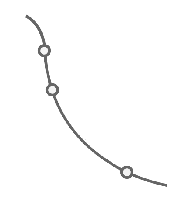
- Reverse Spiral-Spiral-Curve-Spiral-Spiral
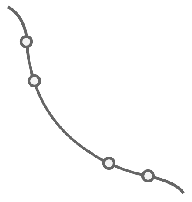
- Three Centered Arc
- Circular Fillet
- Spiral Type
- Specifies the default spiral type to create for curve groups that contain spirals. For more information, see About Spiral Definitions.
- Connected Alignment Curve Radius
- Specifies the default curve radius for the connected alignment.
Note: This radius is used for all curve group types except for three centered arcs. Three centered arcs use the Arc In Radius, Arc Middle Radius, and Arc Out Radius.
- Spiral In Length/Spiral Out Length
- Specifies the default length for the spiral in and spiral out.
- Reverse Spiral In Length/Reverse Spiral Out Length
- Specifies the default length for the reverse spiral in and reverse spiral out.
- Radius 1/Radius 2/Radius 3
- Specifies the default radius for arcs for a three centered arc curve group type.
- Length 1/Length 3
- Specifies the default lengths for the first and third arcs in a three centered arc curve group type.
Connected Profile Parameters
- Profile In Cross Slope/Profile Out Cross Slope
- Specifies the default cross slope for the profile in and profile out.
- Profile In Delta Elevation/Profile Out Delta Elevation
- Specifies the default delta elevation for the profile in and profile out.
- Profile In Offset Type/Profile Out Offset Type
- Specifies the default offset type to use for the profile in and profile out, either cross slope or delta elevation.
Connected Profile Curve Parameters
- Connected Profile Parabola Length
- Specifies the default parabola length used when creating connected profiles that contain vertical curves.
Note: When creating a connected alignment and profile, you can specify to use either parabola length or K value to define the parabolas.
- Connected Profile Parabola K Value
- Specifies the default K value for parabolas when creating connected profiles that contain vertical curves.
- Profile Curve Type
- Specifies the default curve type, either parabola or circular curve.
- Connected Profile Circular Curve Length
- Specifies the default length for the profile circular curve.
- Connected Profile Circular Curve Radius
- Specifies the default radius for the profile circular curve.
- Profile Circular Curve Default Constraint
- Specifies the default constraint to use for defining the profile circular curve, either length or radius.
- Profile Parabola Default Constraint
- Specifies the default constraint to use for defining the profile parabola, either length or K value.