Note: The Scanned Point-Cloud option is available only when creating inspections for CNC and Manual machines.
- Open the group in which you want to create the Point-Cloud item.
- Click Home tab > Create panel > Point-Cloud > Scanned Point-Cloud. The Point Cloud dialog is displayed.
- Edit the item's settings, and then click OK to close the dialog and create the item.
- Play the item. PowerInspect switches to full-screen mode and displays the Point Cloud Tool dialog.
- Use the buttons in the dialog to specify parameters and perform other actions. Click:
 to change the acquisition parameters.
 to reduce the number of acquired points during scanning.
 to reject acquired points below the specified plane during scanning.
 to enable the sound made when the laser probe is near a point.
Note: The button is active only when PowerInspect is connected to a laser-scanner.
to enable the sound made when the laser probe is near a point.
Note: The button is active only when PowerInspect is connected to a laser-scanner. to prevent the CAD view from changing as you create the point cloud.
 to create a new Point Cloud item each time you pause and resume scanning. The button changes to
 .
Note: To select the button by default, select the Commit point clouds on pausing check box in the Full Screen Measurement page of the Options dialog.
.
Note: To select the button by default, select the Commit point clouds on pausing check box in the Full Screen Measurement page of the Options dialog. - Scan the part. Click:
 to delete all points.
 to delete points in the last point cloud.
 to close the dialog without saving the points.
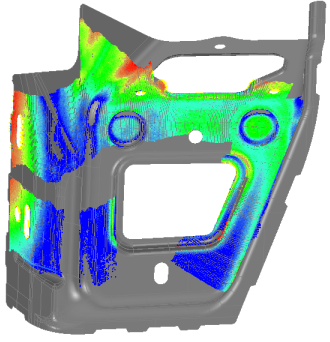
- When you have finished, click
 to save the points and close the dialog. The point cloud is displayed in the CAD view, for example: