This method uses two surfaces to define the morph. This provides more control over the shape of the result than the single point methods. It can be used to make substantial changes to a model, for example to stretch or bend in a controlled manner, or to project one shape onto another. The model being morphed may be as complicated as you like, without causing any problems.
However, you should bear the following important points in mind when working with surfaces.
- Both the surfaces you select must have the same number of laterals and longitudinals.
- The laterals on both selected surfaces must be open or both closed.
- The longitudinals on both surfaces must be open or both closed.
- Keep the surfaces simple.
- Keep the limit curve or surface simple.
- Limit curves or surfaces should not cut the surface that you have chosen as the From surface.
- Avoid discontinuities and sharply curved corners in the surfaces, as they may introduce kinks or ripples into the morphed model.
- As you move over the model, it is important that there is always a unique closest point on the reference surface, and that the closest point does not jump from one place to another. Otherwise the morphed model may contain kinks.
Use the Surface tab of the Morph dialog to select the curve and specify the morph:
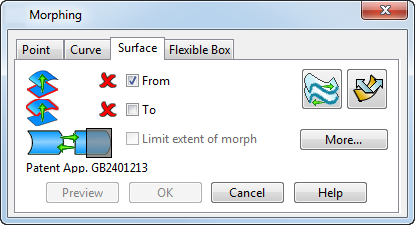
- Select the
From surface to be used in the morphing process
 .
.
- Select the
To
surface to be used
 .
.
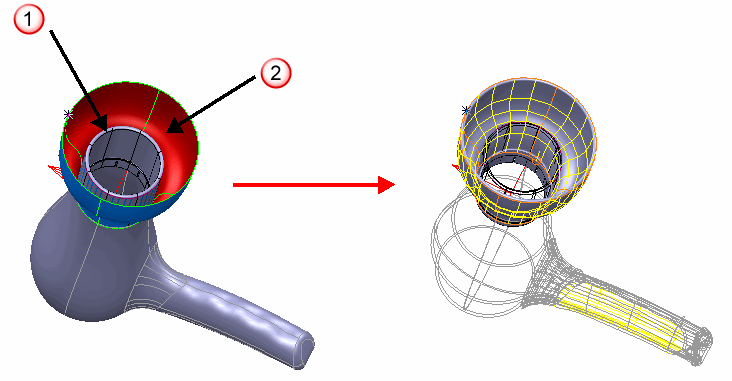
When you have selected valid surfaces, the morph is automatically previewed. The original model is displayed in wireframe and the distorted model is shown in shaded model:
- Select the Limit extent of morph option to morph a localized region of the model, while keeping the rest of the model unchanged.
- Click the
 button to reverse the surface
- Click the
 button to swap the surface longitudinals and laterals
- Select the
More option to display additional options on the dialog relating to the way the morphed region is blended with the rest of the model:
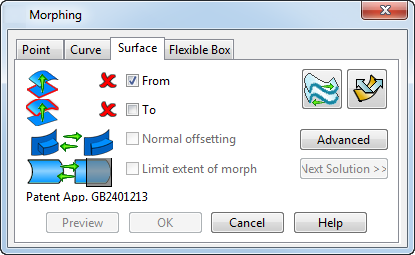
- Select the Normal Offsetting option to bend the surfaces to be morphed to follow the To surface.
- When Limit extent of morph is selected, click the Next Solution button to cycle through the four available types of blend. Step through the available solutions to find the blend that produces the best result for you.
- Click Advanced to display additional options on the dialog to modify the shape of the morph object.
- The model is updated dynamically as you make changes. Click Preview if the model is distorted by a large amount, to ensure the model reflects all the changes.
- Click OK to create the morph.