Motion Paths
Motion Paths lets you preview the path of animated objects. You can adjust motion paths directly in the viewport using transforms, and convert them to and from splines.
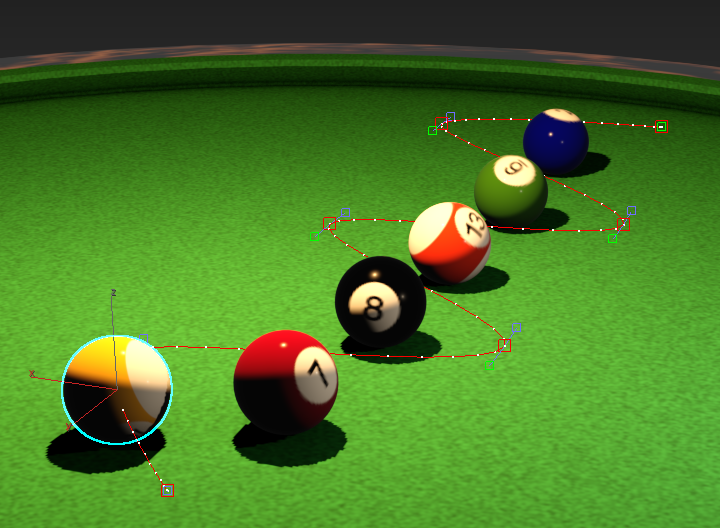
A six-key motion path with its curve adjusted using tangent handles.
Use the motion path controls to:
- Display the 3D path for a selected object’s position tracks.
- Insert and delete keys along the path.
- Change the shape of the path using transforms to move, rotate, and scale keys.
- Adjust the curve of the path by moving the tangent handles attached to each key.
- Use a spline object to create a motion path.
- Convert a path into a spline object.
- Collapse any transform controller into editable keys.
Motion paths are a visualization of the same transform animation data as shown in Track View. Any changes made using motion paths are reflected in Track View and vice versa. You can also display the active subcontroller tangents of Float Lists for Position XYZ controllers in the viewport.
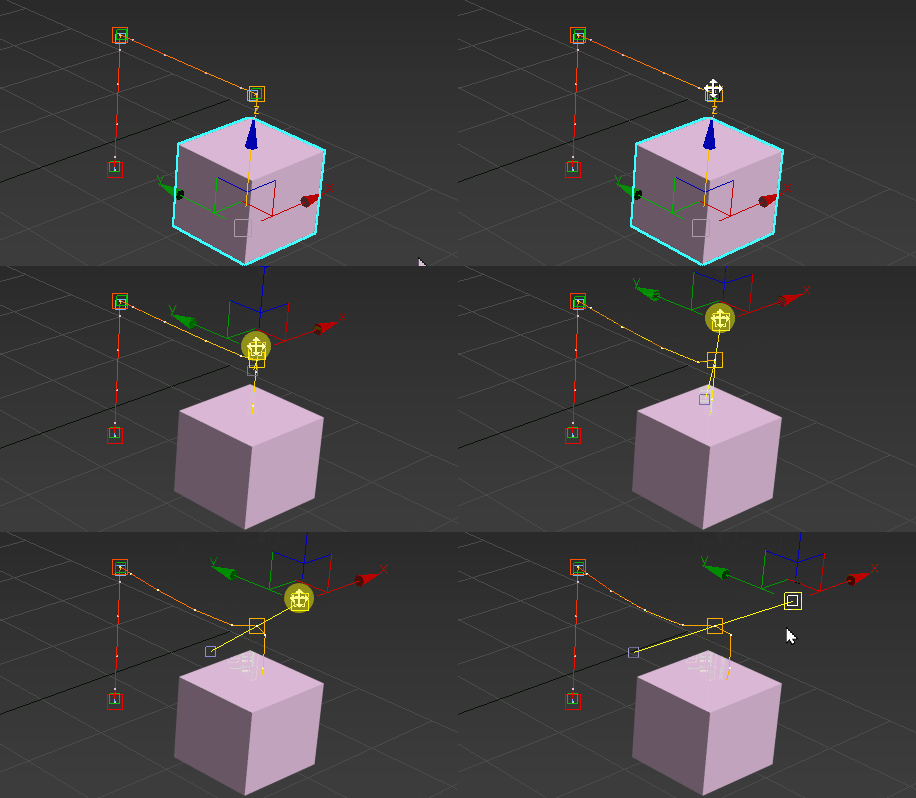
Position XYZ subcontroller tangents
You can also assign motion path functions to keyboard shortcuts and other custom UI items using the Customize User Interface dialog.
To view the motion path of a selected animated object, do one of the following:
Right-click an animated object and, from the Quad menu, enable Show Motion Paths.
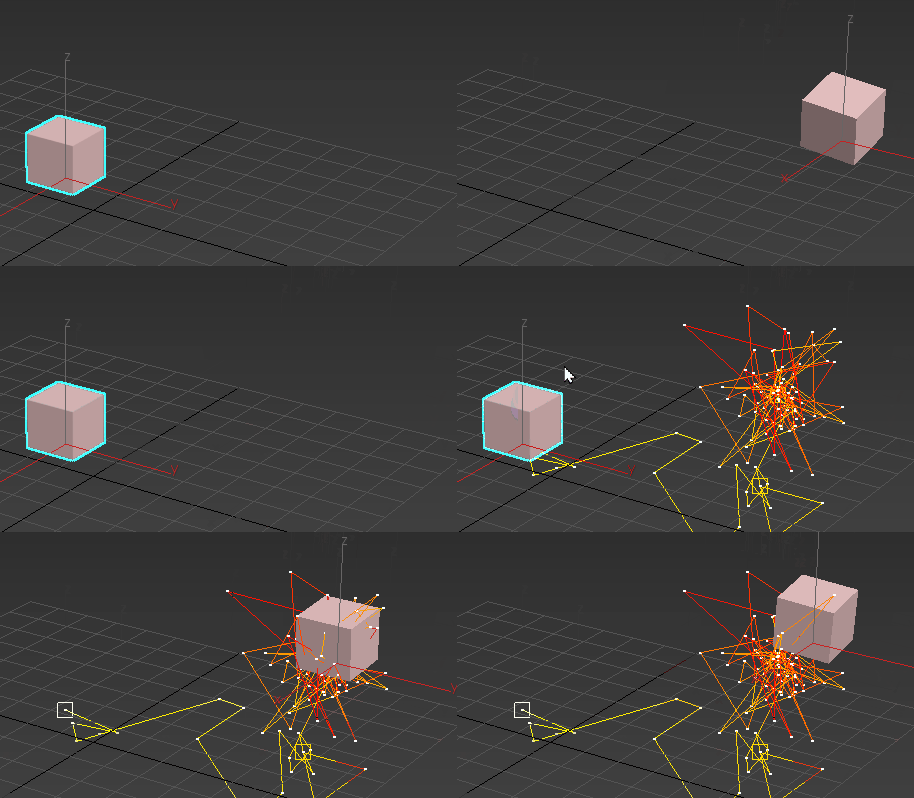
Showing a Motion Path on a cube animated with a Noise Position controller
Tip: When a motion path or animated object is selected, you can right-click in the viewport and use the Tools 2 quadrant of the Quad menu to access various motion path-related options.Enable the Motion Path checkbox in the Display Properties group on the General panel of the Object Properties dialog.
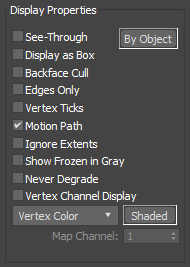
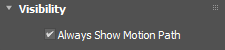
Enable Always Show Motion Path on the Visibility rollout on the Motion panel.
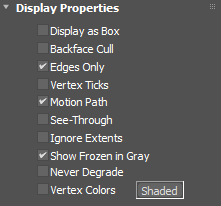
Enable Motion Path on the Display Properties rollout on the Display panel.
Motion paths are sub-objects, which means that you must always be in Sub-Object mode in order to make changes. If you want to work on more than one motion path at once, you must select multiple corresponding objects before entering Sub-Object mode.
Interface
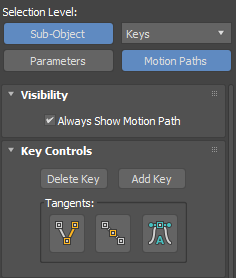
Selection Level
Sub-Object
Enables key editing. Use the Move, Rotate, and Scale transforms to change the location of a key(s) displayed on a motion path.
Key Mode toggle
Enters and exits the Keys sub-object level for direct editing of animation keys via transformation of the motion path keys.
Parameters
Shows the PRS parameters rollout. See the Parameters topic in the Motion Panel Commands section for more information.
Motion Paths
Enable Motion Paths mode, showing the controls and options detailed below.
Visibility rollout
Always Show Motion Path toggle
When enabled, always displays motion paths in the viewport.
Key Controls rollout
Delete Key
Deletes the selected key(s) from the motion path.
Add Key
Adds key(s) to the motion path. This is a modeless tool. When you click this button once, you can then add any number of keys by clicking the motion path line in the viewport one or more times in succession. To exit Add Key mode, click the button again.
K to add a key at the current frame.Tangents
Sets the mode for adjusting Bezier tangents, which are used to change the shape of a motion path through a key. To adjust a tangent, select a transform such as Move or Rotate and then drag the handle.
For more information about working with tangent handles, see Track View: Editing Key Tangents.
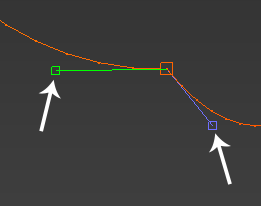
A key with two broken bezier tangent handles
 Break Tangents
Click to break tangent handles on a selected key so they move independently. Broken handles are shown in green (In tangent handles) and blue (Out tangent handles).
 Unify Tangents
Click to unify tangents on a selected key so they move together, maintaining the minimum angles between them. Adjusted unified handles are shown in yellow.
 Set Tangents to Auto
Click to set tangents to Auto which aligns the tangent handles, as calculated by the function curve around the key. Auto handles are shown in light blue.
You can change the various default colors of tangent handles in the Custom User Interface dialog under Colors > Elements > Gizmos.
Display rollout
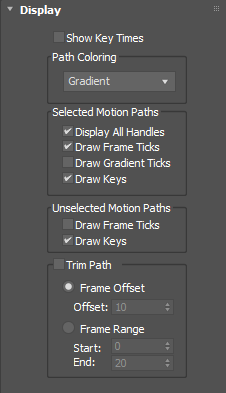
Show Key Times
Displays the specific frame number beside each key in the viewport.
Path Coloring
Sets how the motion path is colored.
Select:
- Gradient to shade the motion path using a gradient. Yellow to red is the default.
- Object Color to draw the motion path according to the color of its parent object.
- Uniform to draw the motion path in a uniform color. Red is the default.
- Velocity to shade the motion path according to its relative velocity. Red shows the highest velocity while blue shows the lowest as default.
You can change the various default colors for displaying motion paths in the Custom User Interface dialog under Colors > Elements > Gizmos.
Selected Motion Paths group
Display All Handles
Display tangents handles for all keys, including unselected ones.
Draw Frame Ticks
Draws white ticks to show the position of the motion path at specific frames.
Draw Gradient Ticks
Draws gradient colored ticks to show the position of the motion path at specific frames.
Draw Keys
Draws keys on selected motion paths.
Unselected Motion Paths group
Draw Frame Ticks
Draws white ticks to show the position of the motion path at specific frames on unselected motion paths.
Draw Keys
Draws keys on unselected motion paths.
Trim Path group
Trim Path toggle
When enabled, trims the display of the motion path.
Frame Offset
Trims the motion path by displaying only a specified number of frames before and after the current frame. For example, enter 100 to display only the portion 100 frames before and 100 frames after the current position on the time slider.
Frame Range
Sets the range of frames to be displayed.
Conversion Tools rollout
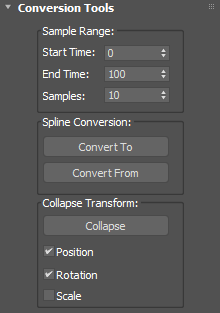
Sample Range group
Start Time/End Time
Specifies the interval for the conversion. When converting from position keyframes to a spline object, this is the time interval for which the motion path will be sampled. If you're converting from a spline object to position keys, this is the interval over which the new keys will be placed.
Samples
Sets the number of samples for the conversion. When converting in either direction, the source is sampled at regular intervals, and keys or control points are created on the target object.
Spline Conversion group
Convert To/Convert From
Converts keyframe position tracks to and from spline objects. This enables you to create a spline motion path for an object and then convert that spline to keyframes for that object's position track in order to do various keyframe-specific functions (such as applying constant velocity to the keys and normalizing the time). Or, you can convert an object's position keyframes into a spline object.
Collapse Transform group
Generates keys based on the current transformation of the selected object. You can apply this for any type of transform controller assigned to an object, but the main purpose of this function is to "collapse" a parametric transform effect, such as one generated by a Path constraint, into standard, editable keys.
Collapse
Collapses the transform of the selected object.
Position, Rotation, Scale
Specifies which transforms you want to collapse.
You must choose at least one checkbox to activate the Collapse button.
Procedures
To display an animated object’s motion path:
Select an object that moves over time.
Right-click the object and choose Show Motion Paths.
Note: If By Layer is selected in the Display properties for the object, choosing this option automatically sets it to By Object.
The motion path is displayed as a line with squares and dots. The squares are keys while the dots mark the position of the object at individual frames.
To add a key to a motion path:
Select an object.
Display the motion path by following the previous steps.
On the Motion panel, click Motion Paths.
Click Sub-Object to activate keys and enable editing.
On the Key Controls rollout, click Add Key.
The button highlights.
Click anywhere along the motion path.
Wherever you click, a key will be added.
Adjust the curve of the motion path using the tangent handles.
Right-click the key and select Key Info from the right-click menu.
In the Key Info dialog, you can change the In and Out values for the in-betweens on either side of the key. This allows you to use the motion path key to create the illusion of hesitation or acceleration.
You can click repeatedly to add many keys in this mode.
To delete a key from a motion path:
- Select a key on a motion path by either clicking the key or using window selection.
- On the Motion panel > Key Controls rollout, be sure Add Key is turned off.
- On the Motion panel > Key Controls rollout, click Delete Key.
To transform keys on a motion path:
- Select one or more objects.
- On the Motion panel, click Motion Paths.
- Click Sub-Object to activate keys and enable editing.
- Select one or more keys and use the transform tools on the Main toolbar to move, rotate, or scale the selected keys and their tangent handles.
To set an object to use a spline as its animation path:
Create or open a scene that contains any object and a spline to use as an animation path.
Select the object and activate Motion Paths mode.
Click Convert From and then select the spline.
The motion path is created from the spline and the object moves to its start point. If you play or scrub the animation at this point, the object moves along the path.
Note: Any existing animation keys for the object will be incorporated at their current locations into the new path. So, for best results, use a non-animated object.