Note: Before making a start on this tutorial, it is important to ensure that the units of measurements shown in
InfoWorks ICM displays are set to metric. For this, select
Options from the
Tools menu and click on the
Units tab. Ensure that default units are set to
Metric (Native).
Before starting make sure that a database is open and that within it there is a model group. We are going to import bridge cross section data from a csv file.
- Make a copy of the basic
River example network created in the
earlier exercise:
- Open the provided transportable database by using the File | Open | Open transportable database menu item.
- Browse for the transportable database. This should be located in the ICM folder after the files have been downloaded and unzipped. Click Open.
- The transportable database opens in an Explorer window.
- Expand the contents of the Model group by clicking on the
 button.
- Right-click on the River example - step 5 completed network and select Copy from the popup menu.
- Back in your current database, right-click on the Model group where you want to place the network and select Paste: River example - step 5 completed (with children).
- The network gets copied inside the Model group of your choice, inside the database.
Tip: The name of the transportable database is IWICM_Examples.icmt. - Rename the copy Adding a bridge by right-clicking on the network object in the Explorer window and selecting Rename. In the Rename InfoWorks network dialog, type in the name of the new network and click on OK.
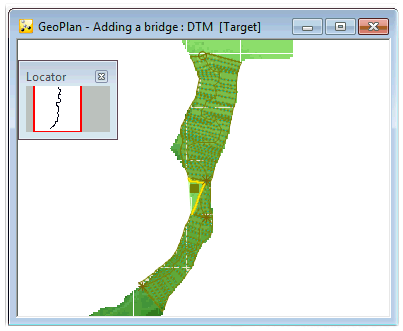
- Drag the Adding a bridge network onto the main window.
- Drag the DTM ground model imported in the earlier exercise onto the main window.
- Select Network | Import | Update from csv files… to import some CSV data.
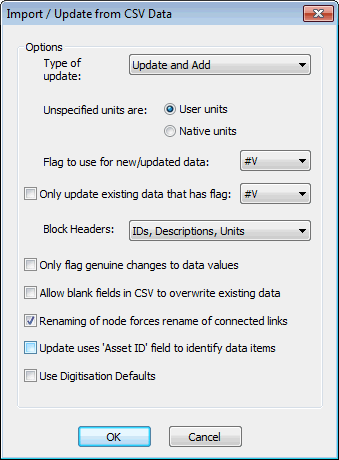
- The Import / Update from CSV Data dialog is displayed.
- Ensure Update and Add is selected in the Type of Update dropdown list and that IDs, Descriptions, Units is selected in the Block Headers dropdown list.
- Click OK.
- In the Select one of more CSV Files to import dialog, browse for the provided bridge.csv file in the Example Data Directory where the tutorial files have been installed and select it.
- Click Open.
- Once the data is imported, click on the Cancel button of the Select one of more CSV Files to import dialog to close it.
- Close the CSV Update message that gets displayed.
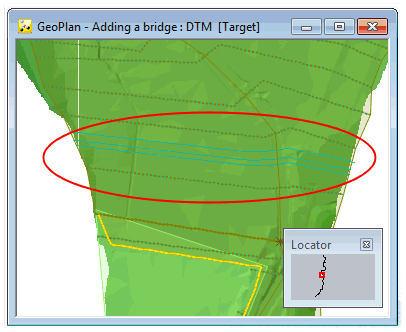
- Zoom in the area above the storage area.
- This process has created three new bridge survey lines just downstream of the storage area. These survey lines represent the bridge faces (front and back) and the bridge deck.
- Every time a version-controlled item, such as the network, has been changed, it is good practice to commit the changes. Changes are stored in your own local copy of the network (in your
Local Working Folder directory) and must be committed to the database so that they become available to other users. Also, committing changes on a regular basis allows you to discard all the changes you have made since the last time you committed the network to the database.
- In the Explorer window, right-hand click on the Adding a bridge network and select Commit changes to database.
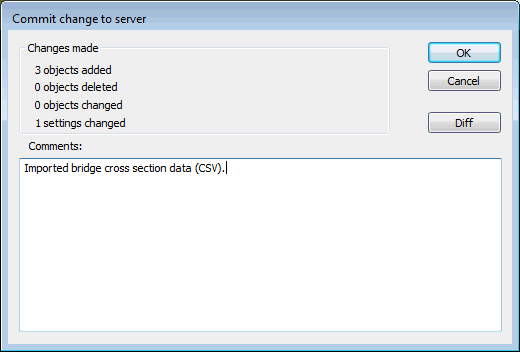
- The Commit change to server dialog is displayed.
- Type in any notes as appropriate.
- Click OK to commit the changes and close the dialog.
- If a message is displayed asking you if you wish to validate the network at the same time as you are committing your changes, click on No for now. We will validate the network at a later stage.
Now that there is some cross sectional data a physical bridge needs to be inserted in InfoWorks ICM.
 Back to Bridge Tutorial
main page.
Back to Bridge Tutorial
main page.