When connecting a model to a Forma scenario, use draft geolocation for early stage design if detailed survey data is not yet available.
Defining a draft geolocation is part of the workflow to connect to a scenario. You are prompted for a draft geolocation if an advanced geolocation is not already defined. To start, click Set draft geolocation.
Search, select, and display
When you first open the Draft Geolocation dialog, a search field displays at the top of a world map.
Do one of the following:
- Enter a latitude and longitude.
- Zoom in on the map to get close to the desired location, and click on the map.
- Enter an address, such as a street, city, or place name. Select a matching location from the drop-down list.
When you specify a location, the map displays that area, and a pin displays.
- Adjust the pin's position by dragging and dropping it .
- To center the map on the pin, click
 in the lower right corner.
- To change the type of map display, click
 in the lower right corner, and select a map view from the list.
Location details
When a location is selected, the dialog displays its details.
Name: Click the default name (such as Geolocation 1) to give this location a more meaningful name.
Latitude: Specify the angular distance north or south of the equator, in degrees (-90° to 90°).
Longitude: Specify the angular distance east or west of the Prime Meridian, in degrees (-180° to 180°).
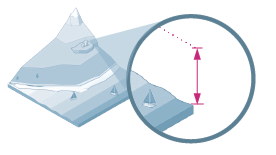
Elevation: For draft geolocation, specify the height of a point relative to sea level.
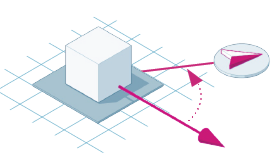
Rotation: Specify the angle that aligns the model's Y-axis (Project North) with Grid North (True North). See About Project North and True North.
Additional settings
Datum: Defines how a Coordinate Reference System (CRS) aligns to the earth, setting the origin, scale, and orientation of the coordinate system. For a draft geolocation, the datum reflects a custom low-distortion CRS.
Unit: Select the linear unit to be used by the Coordinate Reference System. Choose from the drop-down list: Meter (m), International Foot (ft), or US Survey Foot (ftUS).
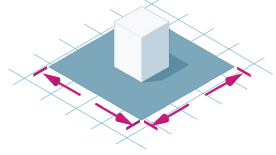
Fit Region: Specify the area where the coordinate system produces accurate coordinates with minimal distortion. Defined by its length and width, it usually covers the whole project site.
Description: Enter information about this location, for your reference.
After defining additional settings, click Continue.
Review
When you click Continue, the dialog displays all draft geolocation information.
To complete the draft geolocation
- Review the information carefully.
- If you need to make any changes, click Edit.
- When done, click Assign.
The draft geolocation is assigned to the model, and the Connect to Scenario workflow resumes.