The properties that define a material are organized into “assets.” Assets are groups of properties that control certain characteristics or behaviors of an object. For example, Revit uses the following asset types to define materials:
- Graphics (Revit only) - These properties control how the material looks in non-rendered views.
- Appearance - These properties control how the material looks in rendered views, Realistic views, or Ray Trace views.
- Physical - These properties are used for structural analysis.
- Thermal (Revit only) - These properties are used for energy analysis.
A material can have up to four assets, one of each type, but cannot have more than one of the same asset type. For example, a material cannot have two physical assets.
If you plan to share materials between Autodesk Inventor or AutoCAD, it is important to understand that Revit is the only Autodesk product that can use all 4 of these asset types. Autodesk Inventor uses physical and appearance assets. AutoCAD uses only appearance. The dialog boxes and controls used by these Autodesk products to manage materials are similar, but not identical. See Sharing Material Libraries for more information.
Material Editor Panel
The right pane of the Material Browser dialog is sometimes referred to as the Material Editor panel, or just the Material Editor. Use the Material Editor panel to review or edit the assets and properties of a material. Only materials in the current project can be edited. When you select a material in a library, the Material Editor panel properties are read-only.
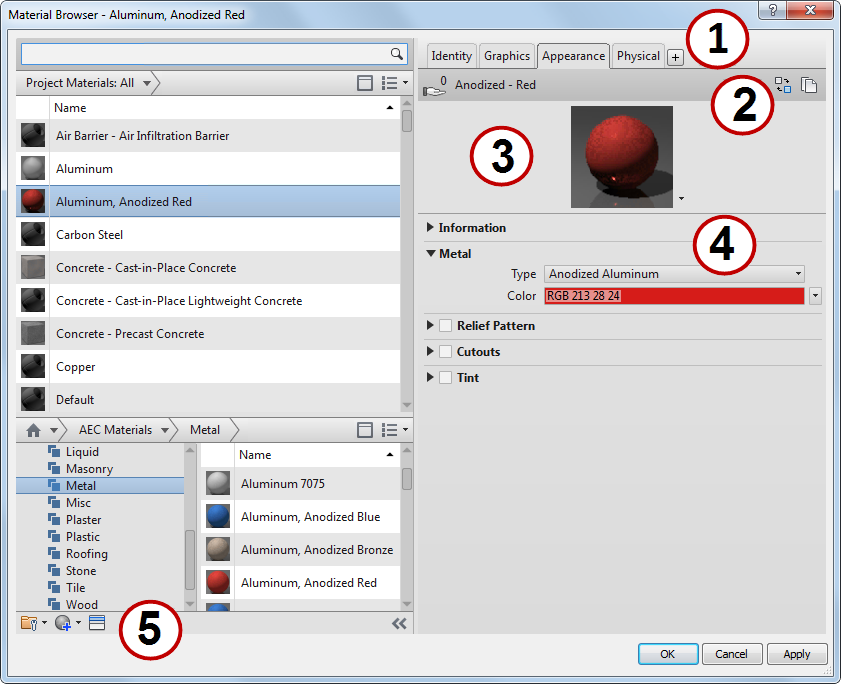
Material Editor Panel
| Region | Function |
|---|---|
| 1 | Asset tabs and Add Asset button  : The asset tabs (for example, Identity, Graphics) let you view and manage information and properties that describe the material. The Add Asset button displays only when you can add an asset to the material. See Adding an Asset to a Material. : The asset tabs (for example, Identity, Graphics) let you view and manage information and properties that describe the material. The Add Asset button displays only when you can add an asset to the material. See Adding an Asset to a Material. The Physical and Thermal tabs display only when these asset types have been added to the material. |
| 2 | For Appearance, Thermal and Physical assets only, the following icon and buttons display along the top of the Material Editor panel:
|
| 3 | Thumbnail (Swatch) options menu: On the Appearance tab, the pull-down menu next to this thumbnail (swatch) image presents a list of options that control the render quality and the appearance of the thumbnail (swatch). |
| 4 | Properties panel: Display and manage detailed properties of the selected asset. The asset name and description are displayed beneath the Information drop-down panel. This example above shows the Metal properties being displayed (expanded) for the "Anodized - Red" Appearance asset. |
| 5 | Material Editor toolbar: These buttons let you create a material, duplicate the current material, and display or close the Asset Browser. If custom parameters are available in the current project, the Custom Parameters button  displays here. For more information, see Specifying Custom Parameters. displays here. For more information, see Specifying Custom Parameters. |
 indicates how many materials in the current project share (use) the selected asset. If the hand displays a zero, the asset is not used by any other materials in the current project. It is only used by the currently selected material.
  replaces the current asset. See
  duplicates the current asset. See
 Viewing and Editing Assets
From the Material Browser dialog, you can access the Asset Browser dialog, which is used to manage, review, and select available assets for materials. Use the Asset Browser to find a new asset to add to a material, or to replace an existing material asset.
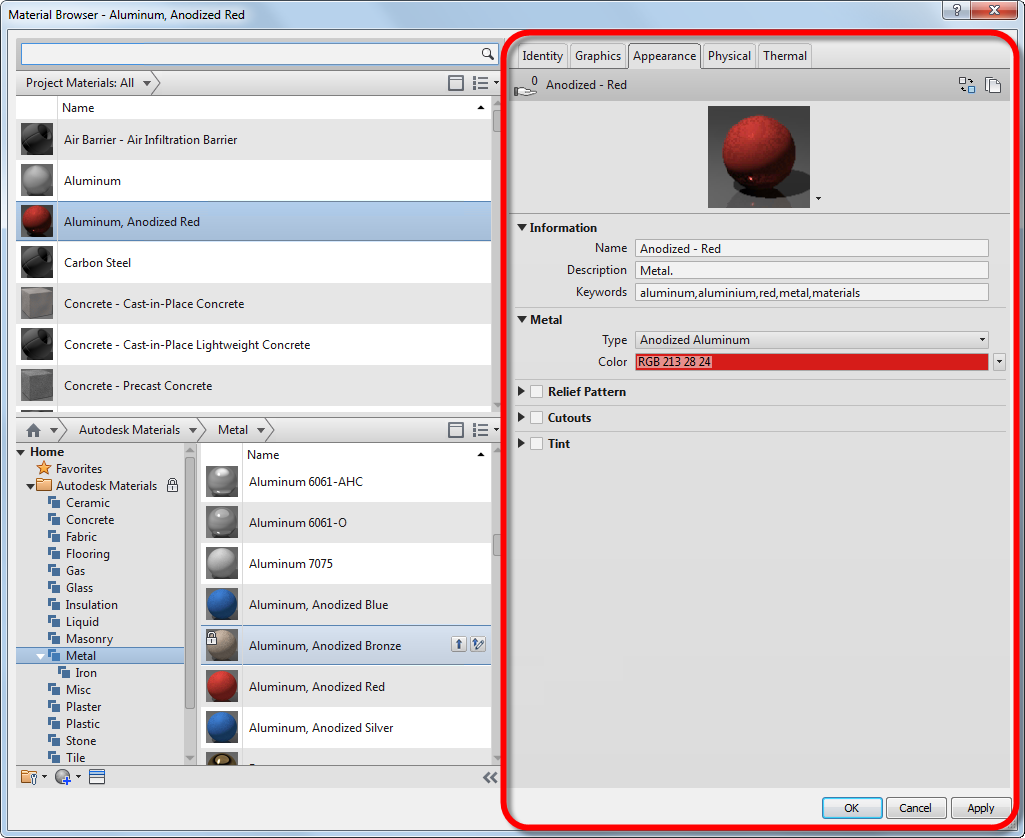
Anodized Aluminum Appearance Asset
For example, you can replace the physical asset for the Bronze, Soft Tin material with a physical asset that represents another metal, such as aluminum or copper. If you do this, the changes in density and other properties result in a material with very different behavior.
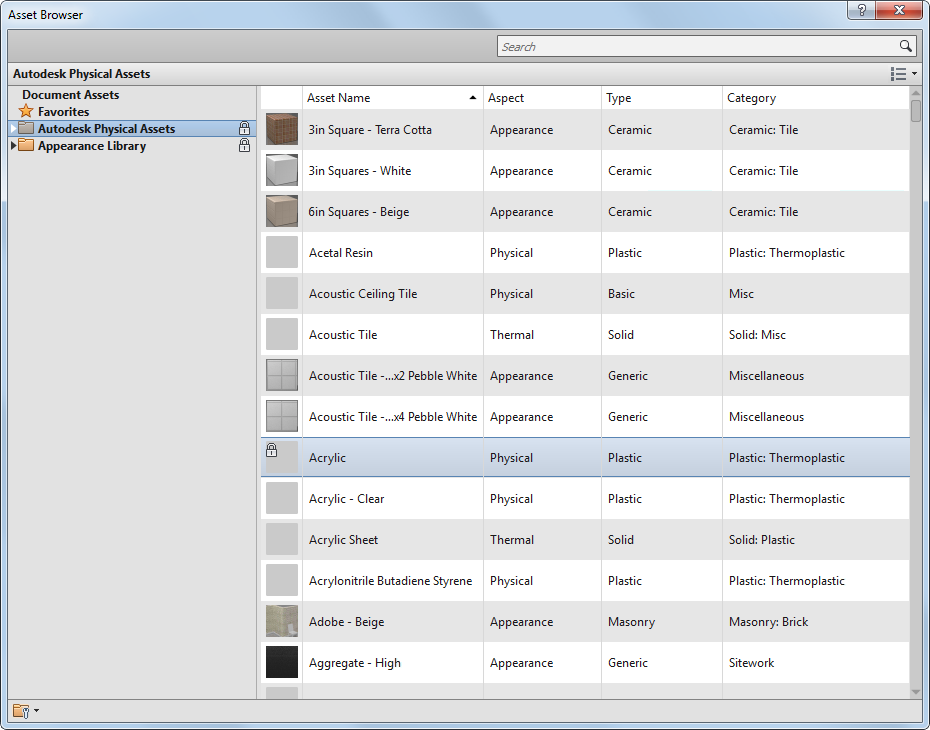
Asset Browser
Replacing an Asset
While editing a material, you can replace an Appearance, Physical or Thermal asset with an asset that you select from the Asset Browser. See Replacing an Asset of a Material.
Duplicating an Asset
While editing a material, you can duplicate an asset as the basis for creating a new one. For example, if you have a Glass material with a Dark Bronze appearance, you can duplicate the Dark Bronze asset to change the color to Green and rename the new asset to Green. See Duplicating an Asset.
Deleting or Removing Assets
Material assets in a project are handled differently than assets in a library. You can remove an asset from a material in a project, or you can remove an asset from an unlocked user library, if you have editing privileges to that user library. You cannot remove or delete assets from materials that exist in locked material libraries, such as the Autodesk Materials library, the AEC Materials library, or any locked user library.
An asset in a library can remain in place (that is, in the library) even if it is not associated with a material. Library assets should be managed carefully, both to eliminate unnecessary assets, and to avoid deleting assets that are still being used in one or more projects. See Removing an Asset from a Material.
For more information, see Editing Material Properties.