Manage Project Members
As a project administrator, you can add account members to a project and manage which activated modules they can access. You can also resend project invitations and remove members from a project.
This topic contains the following sections:
- Add Project Members
- Assign Member Roles
- Add a Company Affiliation
- Control Member Access to Modules
- Resend Project Invitations
- Remove Project Members
- Video: Manage Project Members
- Related permissions
To access the Project Admin module, click the Module Selector 

![]() .
.
The Members tab displays all members of the selected project, their assigned role and company, and the services or modules they have access to.

Add Project Members
Click Add.

In the Add Project Members field, start typing a member's name if that person is already in the account.

Click the member email from the available options on the drop-down menu.
Note: To add a member who is not already in the account, enter that person's email address in the Add Project Members field.Click Select.
Note: The list of added members will display the project member status of someone who was previously added.Repeat steps 2 - 4 to add multiple members to a project at the same time.
Click Add to Project. This generates an email notification to members to activate their membership and access the project.

Assign Member Roles
In the row showing the member's information, click in the field under the Role column.
Assign a member's role for the first time:
- Select a new role from the drop-down menu.
Change an existing role:
- Click close on the role which is being replaced.
- Select a new role from the drop-down menu.
Add a Company Affiliation
To add or edit a member's company affiliation:
For companies that are already in the account, click the field under the Company column and select a company from the available options. These are added to the directory by an account administrator.
For a new company affiliation, click in the field under the Company column and start typing the company name. A message will open below the field indicating that a new company is being created.
 Tip: Click the Companies tab to view all third-party companies associated with the project and how many members are associated with each company.
Control Member Access to Modules
Member access permissions are displayed under the module column headings.

Different icons represent the access level for each member:
 — Administrator access
 — Member access
 — No access
Click an icon to change the access level.
The following video demonstrates how to use member roles to control access to an account or module:
Resend Project Invitations
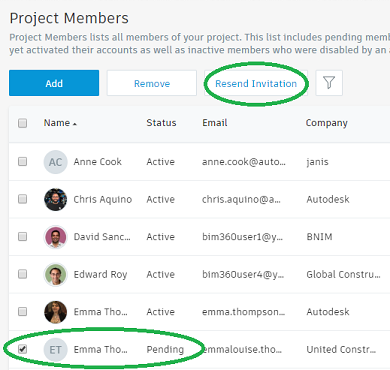
Click the checkbox next to the name of one or more members who are shown as Pending under the Status column. The Resend Invitation option will appear next to the Add and Remove features.
Note: This option does not appear on the default Project Members page or for members with an Active status. Members with an active status can be sent a link to the product, they do not need to be invited again.
Click Resend Invitation.
Remove Project Members
Select the checkbox for one or more members.

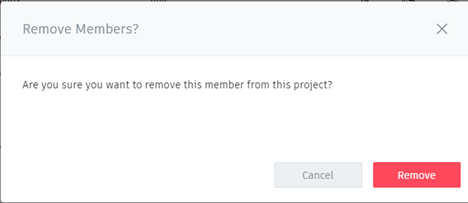
Click Remove.
Video: Manage Project Members
The following video demonstrates how to manage project members:
Account administrators can manage account members, which includes adding people to the member directory so project administrators can add them more easily to projects.
Module Specific Permissions
Permission levels may vary based on module. The following topics have details for the permissions for specific workflows: