After you bring your Character Generator model in Maya, you need to validate your model's skeleton definition and add a Control Rig as the input source for your model before you can animate your model.
This task assumes you have imported or opened your customized character in Maya.
This task also assumes you have Maya open, and that your customized character generated in Character Generator is displayed in the viewport.
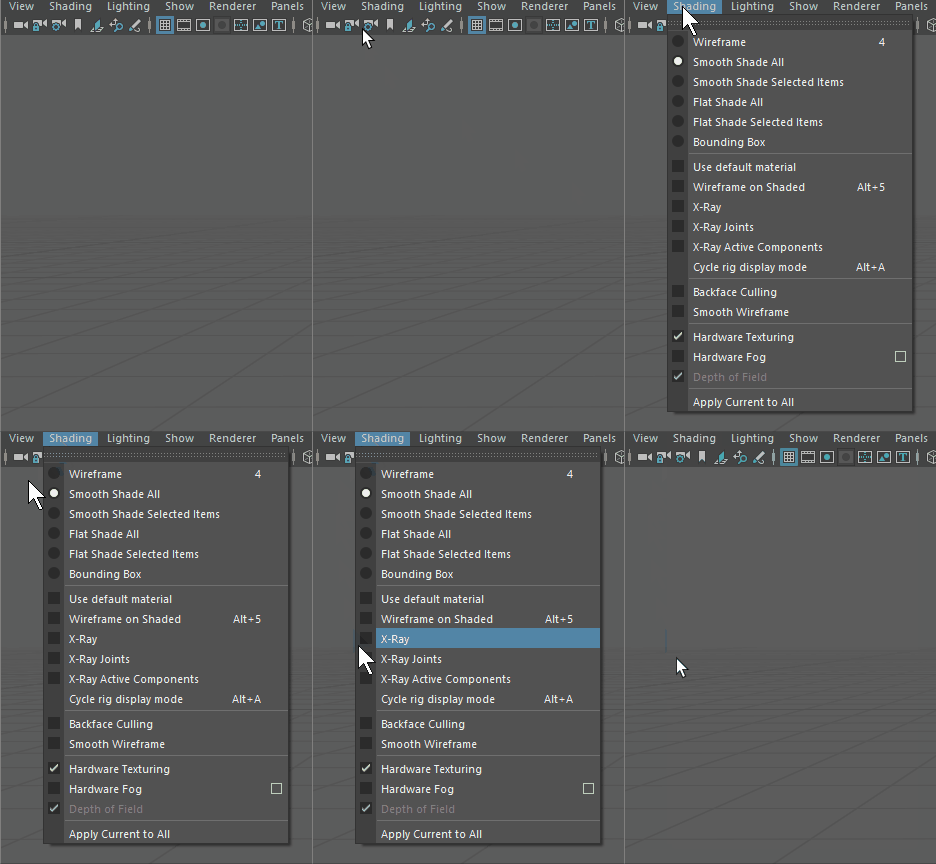
- Go to the Panel toolbar (
 ), select
Shading
  and enable
X-Ray Joints.

A checkmark is shown when the X-Ray Joints Shading is enabled.
Your model's skeleton joints are displayed in the viewport.
- To toggle your character's textures off, go to the Panel toolbar and click
 to toggle the Hardware Texturing display.
- In the menu bar, choose
Window
 Animation Editors
  HumanIK.
The Character Controls display to the right.

- In the
Character Controls, click the
Definition tab.
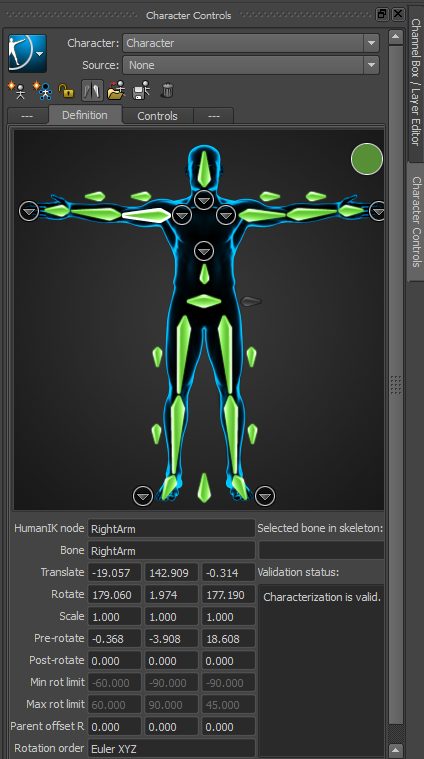
The Character Controls Definition pane displays a character representation of your model.
A green symbol (
 ) indicates the skeleton definition is valid.
A red symbol (
 ) indicates the skeleton definition is not valid. Some required bones may be missing or multiple bones may be out of position.
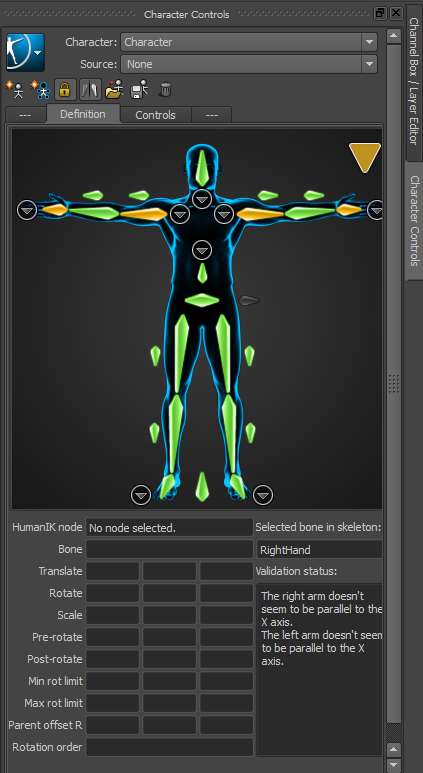
A yellow symbol (
 ) indicates there are issues with the skeleton definition. The issues are described at the bottom right of the
Definition pane, as shown in the following figure.

- If your skeleton definition is valid, proceed to step 7.
- To fix the skeleton definition issues, perform the following:
- In the
Character Controls
Definition tab toolbar (
 ), click
 to unlock the skeleton definition.
- In the Character Controls Definition pane, click a bone that requires to be realigned. The selected bone is highlighted and its values are displayed at the bottom right of the Definition pane.
- In the Panel toolbar, select
View
 and choose
Camera Tools
  Zoom Tool (or Alt + right-drag) to zoom in on the area in the viewport.
- On the left side of the
Maya interface, go to the Tool Box and select the Rotate tool (
 ) or use the keyboard shortcut
e.
- Slightly drag the Rotate manipulator rings around the desired axes until the selected bone is displayed in green in the
Character Controls
Definition pane.
Note: If the bone needs to be repositioned, go to the Tool Box and select the Move tool (
 ) or use the keyboard shortcut
w and drag an arrow to change the position of the selected object along that axis until the selected bone is displayed in green in the
Character Controls
Definition pane.
- If other bones require to be aligned, repeat the required steps from 6.b through 6.e for each bone.
When all bones are aligned, the Character Controls Definition pane shows a valid characterization.

Now that the your character has a valid skeleton definition, you can create a Control rig.
- In the
Character Controls
Definition tab toolbar (
- In the
Character Controls, click the
Source menu.

- Select
Control Rig.
When you select the Control Rig as the Source, you automatically lock the skeleton definition and you create a Control rig.
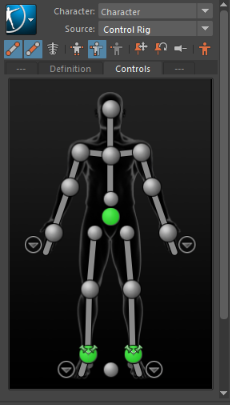
The Controls pane displays the character representation – an image of a biped character and all the effectors you can use to animate a HumanIK Control rig.

Setting the Control Rig as the source sets the (current) character to be driven by a Control rig. Your customized character is now ready to be animated.
