Edit, Publish, and Delete Issues in Model Coordination
Learn how to edit, publish and unpublish, and delete issues created in your project.
Edit issues
From the Issues log, you can edit a single issue or select multiple issues to edit together.
Edit a Single Issue
Open the Issues tool.
Click the relevant issue in the Issues log. The issue details panel opens, displaying the issue details.
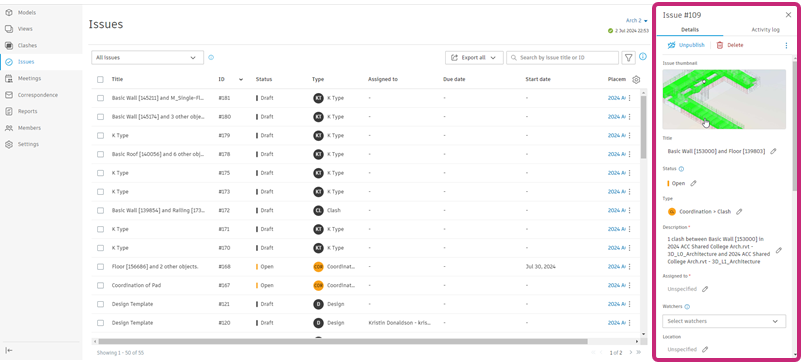
Click in a field to edit the issue as required. You can edit the following details:
Issue thumbnail.
See Edit issue thumbnail to learn more.
Title
Status
Note: Issue status can't be changed from Draft unless all required fields are complete.Type
Note: If you change the issue type you may need to complete different required fields before you can save.Description
Assigned to
Watchers
Location
Location details
Due date
Start date
Placement
Root cause
Any custom fields
References: You can add references to photos, files, RFIs, assets, forms, submittals, or PCOs. See Issue References for more information.
Comments
Note: Required fields are marked with an asterisk, and can't be edited to be left empty.
For clash and design issues, you can also move issue pushpins to a new position. This can include to a different object or model.
Moving an issue pushpin has the following effects:
Updates the issue thumbnail. If markups were added to the thumbnail prior to the pushpin being moved, you will be prompted to update the thumbnail.
Recorded as an activity in the Activity log.
If a pushpin is moved to a different model, that model becomes the primary model and its color will change from green to red.
Note: This color change is reflected in the Issues tab and the issue thumbnail, but is not carried over to the Clashes tab. The models that were previously selected in the Primary model and Clash with drop-down lists are maintained.
Edit Issue Thumbnail
When you create issues, an issue thumbnail is automatically generated from the current display of the issue in the viewer.
To edit a thumbnail from the issue details panel:
In the issue details panel, click the link in the Placement field to open the issue in the viewer in Forma Data Management.
In the issue details panel, click the pencil icon in the bottom left corner of the thumbnail to activate markup mode.
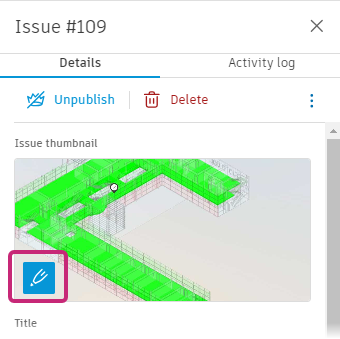
Add markups as needed.
Click Save Thumbnail.
Close Forma Data Management and return to Model Coordination.
See Add Markups to Issue Thumbnails for more information about adding and editing markups on thumbnails in Model Coordination.
Edit Multiple Issues
Open the Issues tool.
Select two or more issues in the Issues log using the checkboxes next to the titles.
Click Edit to open the Edit issues panel.
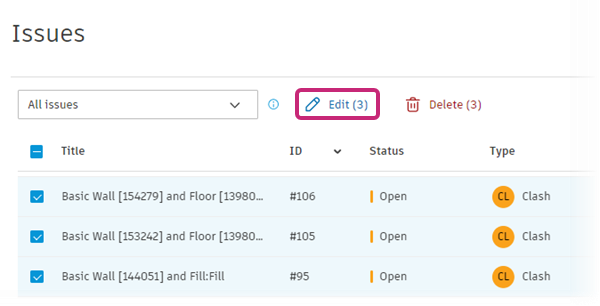
Click in a field to edit the issues as required.
Notes: Required fields are marked with an asterisk, and can't be edited to be left empty.
If you attempt to change the issue type to one with required fields and one or more selected issues do not have the required fields completed, you can't bulk edit the issue type. Instead, edit the issue type for each issue individually.
If you attempt to change the status and any issues are still in Draft with incomplete required fields, you can't bulk edit the status. Instead, edit the status for each issue individually or complete all required fields in each of the selected issues and try again.
Click Save.
Publish and Unpublish Issues
Issues can be published or unpublished directly from the Issues log.
Open the Issues tool.
Click the relevant issue in the Issues log.
Check the top of the issue details panel to see if the issue is already published.
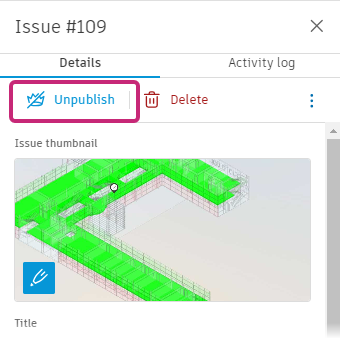
Click Publish or Unpublish and confirm the action in the confirmation dialog.
Published issues are visible to anyone in your project with the correct permissions. If you unpublish an issue, only the issue's creator, assignee, and watchers will be able to view it in the Issues log and on the relevant model.
Delete Issues
Members with View, edit, and assign and Full visibility permission can delete issues they created. Members with Manage issues and Administrator permission can delete all issues in a project. See Issue Permissions to learn more about permissions.
From the Issues log, you can delete a single issue or select multiple issues to delete together.
Delete a Single Issue
Open the Issues tool.
In the Issues log, click the issue that you want to delete.
Tip: You can search and filter for specific issues.Click Delete at the top of the issue details panel.
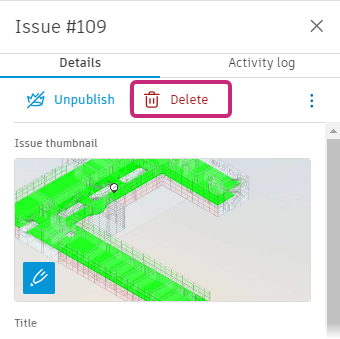
Optionally, add a comment in the Delete issue dialog to communicate the reason or any other details relevant to the issue you're deleting.
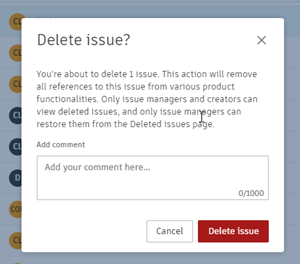
Click Delete issue.
Delete Multiple Issues
Open the Issues tool.
Select two or more issues in the Issues log using the checkboxes next to the titles.
Click Delete at the top of the Issues log.
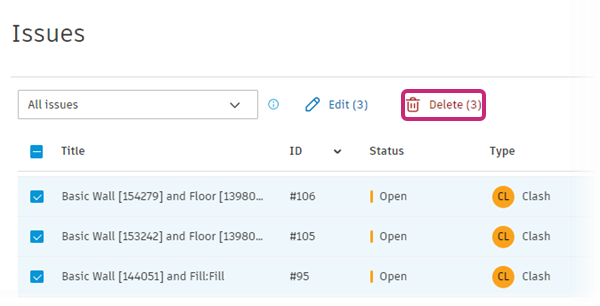
Optionally, add a comment in the Delete issue dialog to communicate the reason or any other details relevant to the issues you're deleting.
Click Delete.