In the Fabrication products, you can configure options that will add fixing holes to certain manufactured parts. This is used primarily by insulated ductwork patterns. To apply these options, you must configure the fixing hole database options in Pattern Switches and Pattern Options. Additionally, since the Fixing Holes option does not display on an item's Takeoff dialog by default, you must customize the Takeoff dialog to include the Fixing Holes option. The steps below describe how to do this.
To add fixing holes:
- In the Database
 Fittings
Pattern Switches, click the Developments tab.
Fittings
Pattern Switches, click the Developments tab.
- Scroll down to the Fixing Holes On All Seams option, and enable or disable this option as needed.
When this options is enabled, fixing holes are applied to the seam of a pattern. For more information, see Pattern Switches.
- In the Database
Fittings
Pattern Options, click the Holes tab.
- Scroll down to the Fixing Holes section and configure the following options.
- Hole Diameter
- Hole Spacing (Shoulder) Distance
- Hole Spacing (Shoulder) Fraction
- Spacing
- Number of Holes
- Hole Inset
- Allow Holes Only One Side
For more information, see Pattern Options.
- To display the Fixing Holes option on the Takeoff dialog for the item, use the Customize Item Takeoff Information dialog, as follows:
- Display the Takeoff dialog for the item.
- Do one of the following:
- In CADmep, click the Customize Item Takeoff Information button, located on the lower left side of the Takeoff dialog.
- In ESTmep or CAMduct, in the top menu bar, click View
Customize.
- On the Customize Item Takeoff (or Customize Quick Takeoff) dialog, click the Item Information tab.
- In the left pane, select Fixing Holes and move it to the right pane by clicking the arrow.
- If desired, change the location of where this option displays on the Takeoff dialog using the up and down arrows.
- Click OK.
Once the Fixing Holes option is displayed on the Takeoff dialog, you can enable or disable this option by clicking the check box, as shown below.
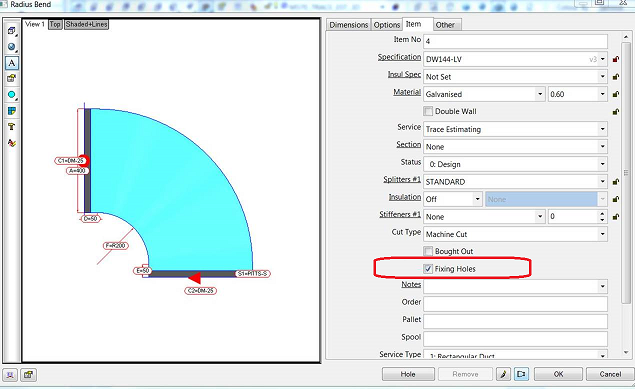
When this option is enabled, Fixing Holes are applied to the item according to the Fixing Holes values specified on the Holes tab in Pattern Options. If this option is not selected, Fixing Holes are not applied to the item. When the Fixing Holes On All Seams option is enabled, fixing holes are applied to all seams.