Activity 2: Explode the assembly
In this activity, you use manual and automatic methods of creating an exploded view. You create each exploded view on a new storyboard so you can refer back to both exploded views in the future.
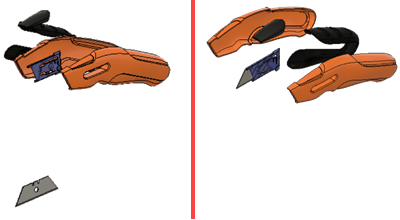
Automated explosion (right), manual explosion (left)
Prerequisites
- Ensure you are in the Animation workspace.
- Ensure the Utility Knife Animation design is open.
Steps
Create a clean storyboard with the title Auto-Explode.
Click
 Storyboard > New Storyboard.
Select Clean as the Storyboard Type.
Click OK.
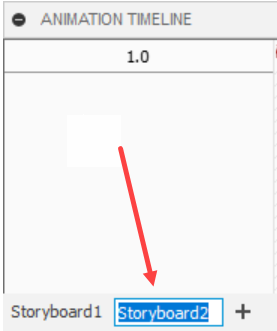
Note: A clean storyboard resets all components to their original home location.Double-click on the storyboard title and rename it to Auto-Explode.
Set up the scene by rotating the part and centering the model on the screen.
Drag the playhead on the timeline into the Scratch Zone.
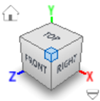
Click the ViewCube in the corner between the Top, Front, and Right faces.
Zoom out so the model is centered on the screen with the knife taking about 10% of the screen.
Drag the playhead out of the Scratch Zone.
Auto-explode all levels of the assembly at 3 seconds on the timeline.
Select the Utility Knife Animation node in the browser under the components node.

Click
 Transform > Auto Explode: All Levels.
Drag the explosion scale slider to the middle.

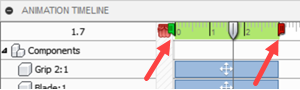
On the timeline drag the green start playhead indicator to time 0 seconds, and drag the red end playhead indicator to time 3 seconds.
Click the green check mark on the Explode mini-toolbar, to finish the explode.
Play the animation.
Drag the playhead back to time 0.
Click
 Animation timeline > Play.Note: The Spacebar can be used as a hotkey to quickly pause/play back the storyboard animation.
Create a clean storyboard with the title Manual-Explode.
- Click Storyboard > New Storyboard.
- Select Clean as the Storyboard Type.
- Click OK.
- Double-click on the storyboard title and rename it to Manual-Explode.
- Click
Set up the scene by rotating the part and centering the model on the screen.
Drag the playhead on the timeline into the Scratch Zone.
Click the ViewCube in the corner between the Top, Front, and Right faces.
Zoom out so the model is centered on the screen with the knife taking about 10% of the screen.
Drag the playhead out of the Scratch Zone.
Manually explode the Grip 2, Left, and Right components over 4 seconds.
Click Transform > Manual Explode.
Drag the playhead to 4 seconds.
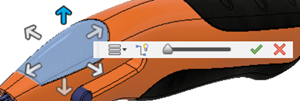
Select the Grip 2:1 component. A mini-toolbar and transform manipulators appear.
Click the up arrow for the positive Y-direction. Refer to the ViewCube for the direction.
Select the Left:1 component and click the positive X-direction arrow.
Select the Right:1 component and click the negative X-direction arrow.
Move the Explosion scale slider back and forth to preview the explosion. Ensure the slider is on the right when done.
Click the green check mark on the mini-toolbar to finish the explosion.
Click
Animation timeline > Play.
Activity 2 summary
In this activity, you used two methods for creating exploded views. The first was an automated method and the second was a manual method.
Automated explosion (right), manual explosion (left)