Generate an Engrave toolpath
On the Manufacture workspace toolbar, click Milling > 2D > Engrave.
The Engrave dialog opens.
On the Tool tab, click Select to pick a tool. If you have not created a tool to use, In the left panel of the dialog, from the Fusion Library, pick a tool from the Sample Tools library.
Tip: Engrave/Chamfer mills with a pointed tip are best suited for Engrave toolpaths. To have a pointed tip on a regular engrave/chamfer tool, edit the tool and then in the Cutter tab, set the tip diameter to equal to zero.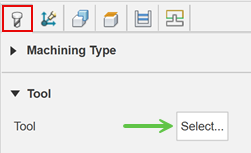
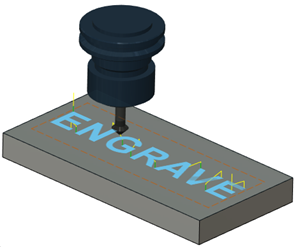
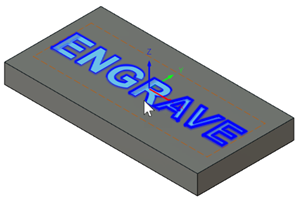
On the Geometry tab, with Contour Selection active, select text, edges, or closed sketch profiles to drive the toolpath.
Optional steps:
On the Passes tab, to determine whether you want sharp corner edges or rounded corner edges, adjust the Sharp Corner Angle parameter.
To reduce the load on the tool by taking lighter cuts, enable the Multiple Depths checkbox.
Click OK.
The toolpath is generated.