Activity 8: Machine the countersinks
In this activity, you use a Drilling strategy to countersink the four holes.

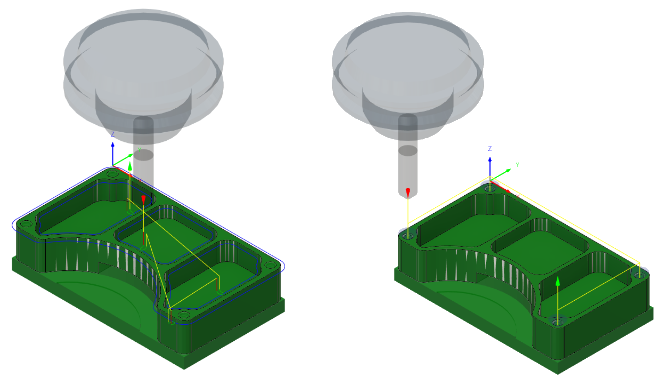
Before, showing the 2D Contour toolpath applied around the chamfers on the top surface of the part (left). After, showing the Drill toolpath applied at the conical faces of the four countersink holes (right).
Prerequisites
- Activity 7 is complete.
Steps
Confirm that the #3 – Ø1/4" 45° chamfer tool is still selected.
On the Manufacture toolbar, Milling tab, select Drilling > Drill
 .
.On the Tool tab
 , confirm the #3 – Ø1/4" 45° chamfer tool is selected.
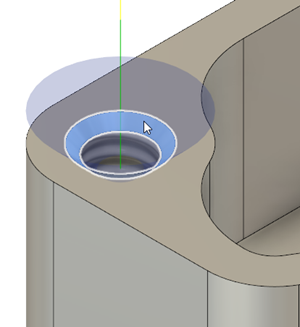
Select the conical faces of the four countersink holes.
In the Drill dialog, select the Geometry tab
 .
.From the Selection Mode drop-down menu, confirm that Selected faces is selected.
Confirm that the Hole Faces button is active.
Select the conical face of one of the countersink holes.

Enable the Select Same Diameter checkbox.
The other three countersinks are automatically selected.
Important: If Select Same Diameter is disabled (grayed out), it is likely that the edge of the cylinder is selected, instead of the face. Be sure to select the cylindrical faces to use this feature.
Set the drilling cycle to Drilling - rapid out and start the calculation.
Select the Cycle tab
 .
.From the Cycle Type drop-down menu, select Drilling – rapid out.
Click OK to create the toolpath.
Activity 8 summary
In this activity, you reused a tool and appled a Drilling strategy at the conical faces of the four countersink holes.

Before, showing the 2D Contour toolpath applied around the chamfers on the top surface of the part (left). After, showing the Drill toolpath applied at the conical faces of the four countersink holes (right).