Activity 1: Create the Setup
In this activity we start by creating the Setup to define the stock boundary and set the X, Y, Z zero work offset position.
A Setup defines a number of general properties for the machining operations, including the Work Coordinate System (WCS), the stock geometry, fixtures and the machinable surfaces. You should always define a Setup. But if you do not create a setup before adding your first operation, a setup with default parameters will be created automatically. However, it may not accurately represent your actual part and stock.
Steps
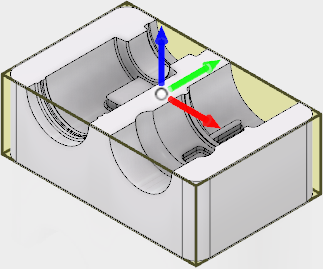
Set the Work Coordinate System (WCS) by defining the location of the Origin.
On the Manufacture toolbar, Milling tab, select Setup > New Setup
 to open the Setup dialog.
From the Origin drop-down list, choose Stock box point to relocate the WCS Origin.
Click the Box point button and select the point (represented by a white dot) at the top, front, left corner of the stock as shown
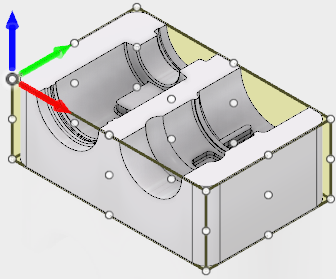
Select the model to machine. If only one model exists on the canvas, it will be selected as the default model to machine. If more than one model exists, you need to select the one to be analyzed for machining. We will select it here as an exercise for more complicated setups.
In the Model group, click the "X" next to the Model button to clear the current selection.
Select the model within the stock, as the machinable part.
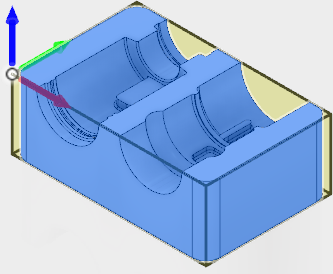
Define the stock boundary. It is important to define the stock to match what will actually be used on the machine. This is because the toolpath strategies analyze the stock area for efficient toolpaths and to avoid possible crashes. It is also important for a more accurate toolpath simulation.
- Click the Stock tab.
- From the Mode drop down menu, select Relative size box.
- From the Stock Offset Mode drop down menu, select Add stock to sides and top-bottom.
- Change Stock Side Offset to: 0 mm
- Change Stock Top Offset to: 1 mm
- Change Stock Bottom Offset to: 1 mm
- Finally, click
 at the bottom of the Setup dialog, or right-click on the canvas and select OK from the marking menu, to exit the setup procedure.
Activity 1 summary
In this activity you defined the Stock area and set the X, Y, Z Work Offset position.