Activity 2: Face the stock
In this activity, you perform a Facing strategy to clear the top face of the stock and ensure that it is completely flat.

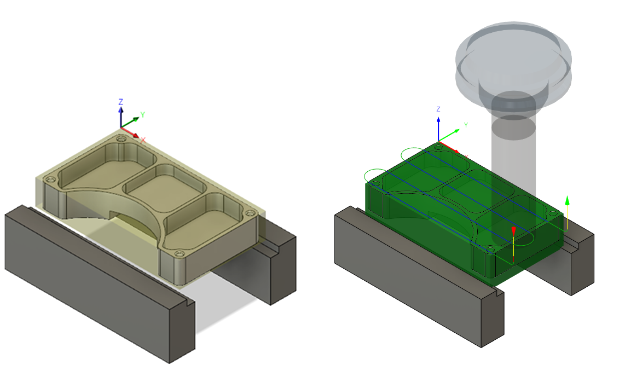
Before, showing the part after creating the Setup (left). After, showing the Face toolpath applied along the top of the part (right).
Prerequisites
- Activity 1 is complete.
Steps
Start a new Facing strategy, and from the 2D Adaptive Milling Tutorial v1 library, select the 2 - Ø3/4" (Flat end mill).
On the Manufacture toolbar, Milling tab, select 2D > Face
 .
.This creates a new facing operation and opens the Face dialog where you can edit the individual parameters controlling the toolpath.
On the Tool tab, click Select to pick a tool
 .
.The tool library stores tools that have already been created, and new ones that you define. The tools for this tutorial are stored in the 2D Adaptive Milling tutorial folder inside the Documents folder.
From the Documents > 2D Adaptive Milling Tutorial v1 list, select 2 - Ø3/4" (Flat end mill).
Click Select to close the Select Tool dialog.
Apply a Face toolpath along the top of the part. Set both the Ramp Feedrate and the Plunge Feedrate to 13.3333, leaving the other values as they are, and start the calculation.
In the Face dialog, set the Ramp Feedrate to 13.3333 in/min.
Set the Plunge Feedrate to 13.3333 in/min.
There is no need to specify any geometry for the machining area. The Face strategy assumes the stock area is the same as the machining area. If you click the Geometry tab, the size of the stock is shown as a yellow outline around the part.
Click OK to start calculating the toolpath.
Activity 2 summary
In this activity, you selected a tool and applied a Face toolpath along the top of the part.

Before, showing the part after creating the Setup (left). After, showing the Face toolpath applied along the top of the part (right).