Activity 2: Using pocket clearing
In this activity, you orient the part with a 3+2 machining setup and use an pocket clearing strategy to create the plus "+" shaped feature.
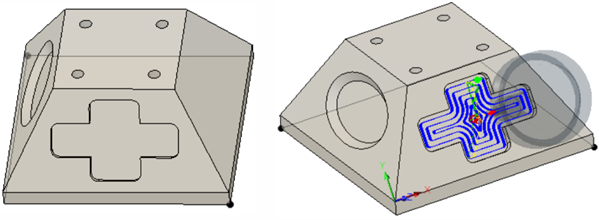
Before machining the part (left), after using pocket clearing (right).
Prerequisites
- Ensure the Tutorial3 model is open.
- Ensure the Workspace is Manufacture.
Steps
On the Manufacture toolbar, Milling tab, select 3D > Adaptive Clearing
 .
.In the Pocket Clearing dialog, set the tool to #4 – Ø5 mm (Flat end mill).
- Select
 , Tool tab, on the pocket dialog, if not already selected.
 - Click the Select button.
- In the Select Tool dialog, in the left panel, scroll to the bottom and select Tutorial Tools (Metric).
- In the list of tools, click the tool #4 – Ø5 mm (Flat end mill).
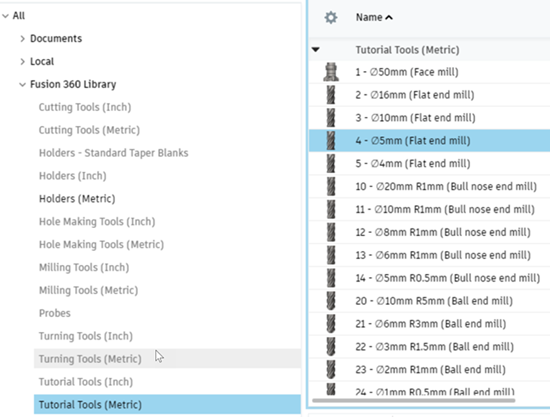
The Tutorial Tools (Metric) library is selected, then the specific tool is selected.
- Select
Click Select to select the tool and close the Select Tool dialog.
Define the orientation and the plus "+" geometry to machine.
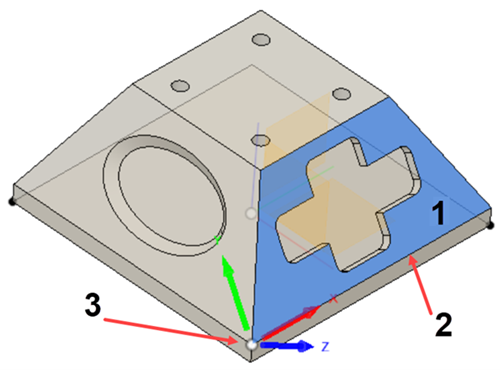
Plane defining the z axis direction (1), edge defining the direction of the X axis (2), corner defining the origin (3).- On the Pocket dialog, select
 , Multi-Axis tab.
 - Check the Tool Orientation box, to expand this group.
- Choose Select Z axis/plane & X axis from the Orientation drop-down menu.
- Ensure the Z Axis button is active and select the face containing the plus, to define a face defining the Z-axis.
- Ensure the X Axis button is active and select the longest edge of the face you just selected. This selection defines the X direction.
- Choose Selected point from the Origin drop-down menu.
- Click the Point button for the Tool Orientation Origin parameter.
- Click the bottom left corner of the trapezoidal plane the ellipse is in to define the new origin.
- On the Pocket dialog, select
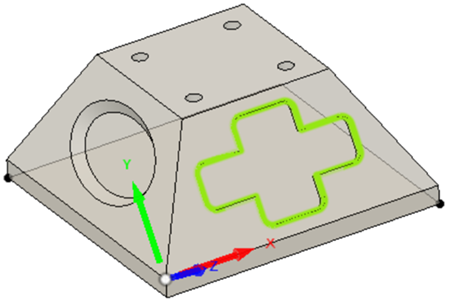
Pick the plus shaped edge as the machining boundary.
- Choose Selection in the Machining boundary perimeter.
- Ensure the Machining boundary selection is active.
- Click on the edge of the Plus shape.
- Click OK on the Pocket dialog to start calculating the tool path.
Before machining the part (left), after using pocket clearing (right).
Activity 2 summary
In this activity, you used a 3+2 machining technique to orient the part so the plane, containing the plus shape, is normal to the machine’s Z-axis. Then, you used pocket clearing to rough cut the plus shaped pocket.