Activity 3: Machine the pocket
In this activity, you use the 2D Pocket strategy to rough out the bulk of material from the cavity containing circular boss.
Prerequisites
- Activity 2 is complete.
Steps
From the 2D Pocket dialog, select the #2 - Ø8 mm flat tool.
On the Manufacture workspace toolbar, click Milling > 2D > 2D Pocket
 .
.The 2D Pocket dialog opens.
Select the Tool tab
 .
.Be sure that #2 - Ø8 mm flat is still the active tool.
Select the geometry for the pocket machining area.
In the 2D Pocket dialog, click the Geometry tab
 .
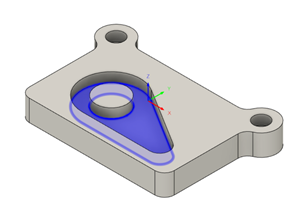
.Select the bottom face of the pocket.
The face will highlight in blue.
 Note: The 2D Pocket strategy machines from the top of the stock to the level of the selected face. This is exactly what is needed in this operation, so there is no need to specify any depth on the Heights tab
 .
.
Creating Multiple Depths and Finishing Stepdowns. Clear Stock to Leave.
Click the Passes tab
 .
.This group of settings controls how the 2D pocket toolpath is calculated. To clear out the pocket, the toolpath is generated in several Z levels, starting from the top of the stock, and going down in steps of 2 mm to the bottom of the pocket.
Select the Multiple Depths checkbox.
Set the Maximum Roughing Stepdown to 2 mm.
Set the Finishing Stepdowns to 1.
Deselect the Stock To Leave checkbox.
Since 2D Pocket is a roughing operation, the default is to leave stock. We do not need an additional finish cut in this example.
Click OK to start the calculation.
Activity 3 summary
In this activity, you set selected a 2D Pocket operation, to take multiple depth cuts and machine the pocket with the circular boss.
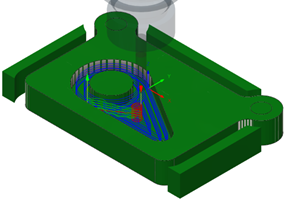
The calculated toolpath with in-process stock is shown below.

The toolpath is shown with a red arrow start, yellow rapid move, green lead-in and lead-out moves, blue cutting moves and a green arrow at the end.