Arrange components for additive manufacturing
Ensure that you have an additive setup with an additive machine selected.
Tip: If you want to define specific areas in the additive machine where printing should be avoided, in the Machine Definition dialog, on the Platform page, upload a.3mffile for the Platform No Build Zone.On the Manufacture workspace toolbar, click Additive > Position > Arrange
 .
.The Additive Arrange dialog opens with the Objects tab selected.
Note: Alternatively, if you want to edit a setup's existing arrangement, in the Browser, right-click the Additive Arrange node and choose Edit.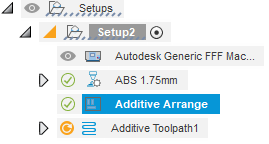
By default, all the components in the setup are automatically selected. The list of components is displayed in the dialog. If you want to change the selection, on the canvas, click the components to select or deselect them.
Select an Arrangement Type to determine how the selected components are arranged in the additive machine’s build volume. Choose:
2D Arrange (True Shape) to place components on a single layer on the build platform.
3D Arrange (Monte Carlo) to use a random sampling algorithm to find an optimal arrangement that minimizes build height.
3D Arrange (True Shape) to optimize placement based on components' true shape for higher packing density.
Note: Usually, 3D Arrange (True Shape) is the preferred option to maximize packing efficiency.
If you selected the Arrangement Type of 2D Arrange (True Shape) or 3D Arrange (True Shape), select a Sorting Type to control how components are prioritized when they cannot all fit in a single setup. Choose:
- Priority to specify individual levels of priority for each component that you want to arrange.
- Volume to automatically sort components based on their volume, from largest to smallest.
- Manual to specify the exact order in which components are arranged. Order them in the components table, from top to bottom.
If you selected the Arrangement Type of 2D Arrange (True Shape) or 3D Arrange (True Shape), choose a Placement option:
Center places the first component in the center of the build platform and subsequent components are placed around it in a circular fashion.
Lower Left Corner places the first component close to the bottom left-corner of the build volume and subsequent components are then placed along the X axis, then the Y axis, and then finally the Z axis.
If you selected the Sorting Type of Priority, in the components table, set the level of Priority for each component. Those with higher priority levels are preferred in the arrangement.
(Optional) If you selected the Arrange Type of 2D Arrange (True Shape) or 3D Arrange (True Shape):
In the Create Copies group, enter a Global Quantity multiplier.
Tip: You can override this global setting for individual components in the Quantity column in the component table.(Optional) To rotate the components during the arrangement process to help improve the packing efficiency, select the Rotation checkbox, then choose options for Global X Rotation, Global Y Rotation, and Global Z Rotation.
Tip: You can override this global setting for individual components in the Rotation column in the component table.(Optional) When more than one of Global X Rotation, Global Y Rotation, or Global Z Rotation has an increment set (for example, 90 deg increments), the Multi-Axis Rotations checkbox is available. Select it to rotate components around more than one axis at the same time. This can result in more orientations and often a higher packing density. Deselect to rotate components around one axis at a time.
Note: The same option is available per component when you set Rotation to Custom for a component and specify increments for more than one axis. In the component dialog, use Multi-Axis Rotations to control whether multi-axis rotations are used for that component.
If you selected the Arrangement Type of 3D Arrange (Monte Carlo), in the Advanced Settings group:
Move the Performance slider to choose between prioritizing speed or accuracy in the arrangement process.
Choose an Initial Rotation option to determine how the components are rotated before the arrangement process begins.
(Optional) To arrange the components based on their current position, select the Start Arranging from Current Positions checkbox.
Choose what to do with Unselected Components. Choose:
Lock Position to keep them in their current position. If an unselected component is within the machine's build volume, the selected components are arranged around it.
Move Outside Build Volume to remove them from the build volume before arranging the selected components.
(Optional) In the Spacing tab, adjust the settings:
- Enter a Platform Clearance to set the distance between the bottom of the components and the build platform.
- Enter a Frame Width to set the distance between the boundary of the arrangement and the edge of the build volume.
- Enter a Ceiling Clearance to set the distance between the top of the components and the top of the build volume.
- Enter an Object Spacing to set the minimum distance between components.
- Enter a Voxel Size to set the smallest unit (voxel) used in spacing calculations. Smaller voxel sizes result in more precise spacing.
(Optional) If you selected the Arrange Type of 2D Arrange (True Shape) or 3D Arrange (True Shape), in the Solver tab, adjust the settings:
To prevent components from interlocking during arrangement, select the Avoid Interlocking checkbox, then select a Method option:
- Bounding Box to use components' outer dimensions to detect interlocking.
- Translational to use translational movement to detect interlocking.
To determine which criteria are applied to the arrangement, in the Arrangement Criteria table, select a criterion to include it or deselect a criterion to ignore it.
Note: Arrangement criteria are applied only if the Rotation checkbox is selected in the Objects tab.
Click OK.
Note: The arrangement process may take several minutes. The length of time can depend on the number of components and the type of arrangement you are using.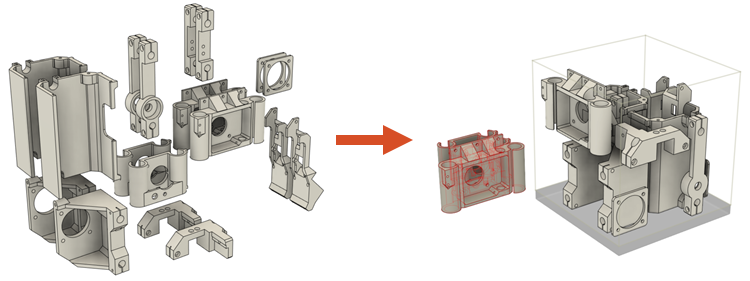
Example of components arranged using 3D Arrange (True Shape).