Set machine angles for tool orientation
Set machine angles for 2D and 3D milling strategies, helping to improve control over the tool orientation. Fusion displays the machine model on the canvas so that you can visualize how the tool interacts with the workpiece and adjust angles effectively.
In the Manufacture workspace, create a milling setup with a machine definition linked to a machine model.
Create a milling operation.
Select the Multi-Axis tab.
If creating a 2D milling operation and Machining Type is available, select 3-Axis.
Select the Tool Orientation checkbox.
Enable machine angles:
For 2D milling operations, select the Machine Angles checkbox.
Note: If the Turn and Tilt Tool Orientation for 2D Strategies checkbox is selected in Preferences > General > Manufacture > Optional Features, the Machine Angles checkbox is replaced with a Select Angles list. In this case, select Machine Angles from the Select Angles list.For 3D milling operations, in the Select Angles list, select Machine Angles.
Enter the desired angles in the A, B, and C Axis input boxes, or use the manipulator on the canvas to set the angles.
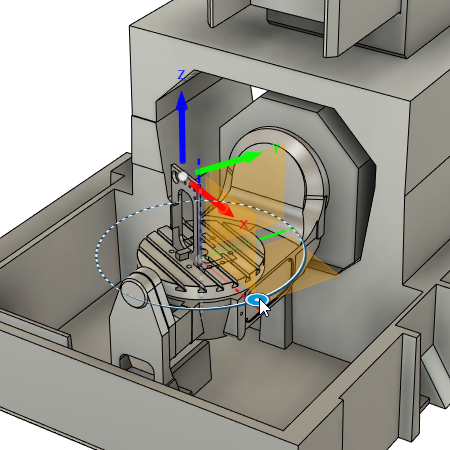
The machine model updates as you change the angle. Ensure that the values are within the range specified in the machine's kinematics.
(Optional) To invert the machine angles, click Switch Orientation.
(Optional) To preview the movements of the machine model, next to Preview Machine, click Open and use the options in the dialog.