Nest Study reference
This feature is part of an extension. Extensions are a flexible way to access additional capabilities in Fusion. Learn more.
This reference topic describes the controls in the Create Nest Study, Edit Nest Study, and Edit Nest dialogs. These dialogs are almost identical. Settings (and any differences) are described here.
- Create Nest Study dialog: Manufacture > Fabrication > Nest > Create Nest Study
- Edit Nest Study dialog: Right-click nest study node in the Browser and click Edit Nest Study
- Edit Nest dialog: Right-click nest node in the Browser and click Edit Nest (described in its own section at the end of this topic)
Study tab
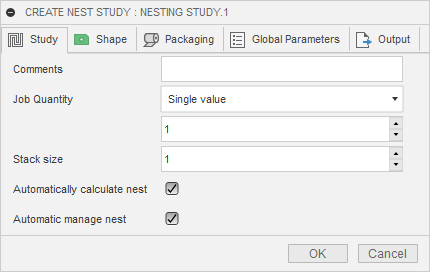
Comments: (Optional) enter relevant information about the study.
Job QTY:
Single Value: Represents the number of complete assemblies you want to produce. For example, if you are creating a table that has four legs and one top, a single value of 1 will produce exactly four legs and one top, a single value of 2 will produce eight legs and two tops, and so on.
Multi-Value: If you have added multiple assemblies to the nest, this enables you to control the quantity of each individual source within the nest. Click Details to open the Job QTY dialog so you can enter quantities for each source.
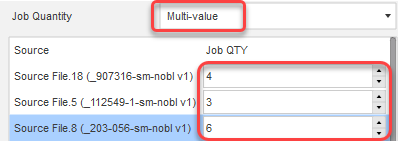
Stack size: The number of duplicate material sheets that will be stacked together for cutting; cuts will be made vertically down through the stack. Stack size is taken into account for the Job QTY value. So if you need eight legs and two tops to make two tables, and each sheet can fit four legs and one top, a stack size of 2 will give you the Job QTY you need.
Automatically Calculate Nest: The nest will be generated as soon as you click OK. Autodesk recommends using this method. If not, the nests will be added to the browser, and each can be generated later when you choose to.
Automatic manage nest: Enables Fusion to modify, create, or delete nests if sources change.
Shape tab
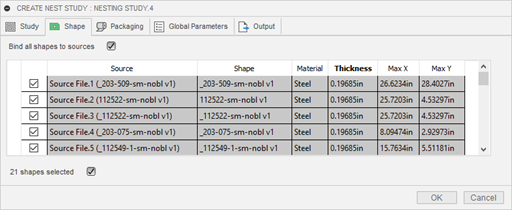
This lists all shapes available for the nest, along with their properties. Select which shapes you want to include in the nest.
- Bind all shapes to sources: Shapes in the nest will automatically be updated if their material or nesting properties are changed.
Packaging tab
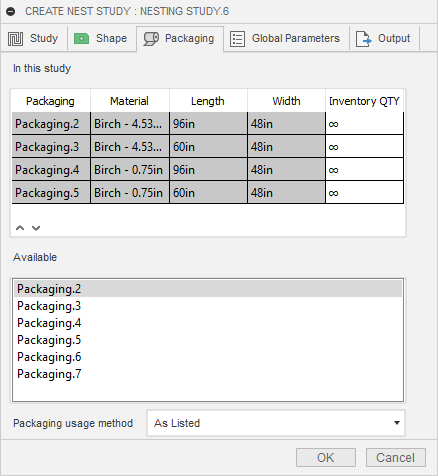
In this study: Lists the default packagings for the materials being used, and the order in which to use them.
Inventory QTY: To set a limit to the number of sheets of a certain packaging type that should be used, enter a value in this column; otherwise, leave it set to Infinite (
 ).
).For example, imagine that you have two packagings listed in the Used panel for the same material. You could enter an amount such as 2 for the first packaging. For the second packaging, you could enter Infinite, so that all remaining inventory for that material is created using the second packaging.
Use the up and down arrows
 to change the order in which packaging is used.
To remove a packaging from the list, right-click it and select Delete.
Available: Lists all available packagings for these materials.
- To add one of these to the In this study list, double-click it.
Packaging usage method: Controls how packaging is used for the nest.
- As Listed: Uses packaging in the order listed. All available quantities for the first packaging listed are used before proceeding to the next packaging.
- Best Mix: Uses the most cost-efficient mix of packaging sizes. This is also the most efficient method for material use.
- Best Size: Picks an optimal packaging size to use. If multiple sheets are needed, they are all of this size.
Global Parameters tab
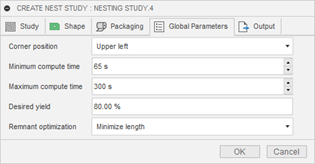
Corner Position: The primary corner where nesting should take place; for example if you select Lower Left, Fusion attempts to nest the shapes in the lower left corner of the sheet as much as possible.
Minimum and Maximum compute time: The minimum and maximum number of seconds to spend trying to arrange shapes on a sheet of material.
Desired yield: If the nest uses this percentage of the sheet, it is deemed as acceptable. Fusion moves on to the next step, even if the maximum compute time has not been reached.
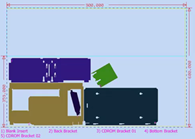
Remnant Optimization: Enables you to nest along either the longer or the wider side of the sheet for better management of material remnants. For example, if you select Minimize width, priority will be given to nesting shapes lengthwise on the sheet, keeping width use to a minimum. Minimize length x width builds the nest out from a corner while trying to keep both length and width to a minimum.
Minimize Width Minimize Length Minimize Length X Width 
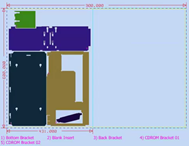
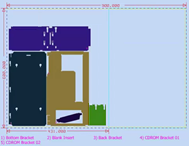
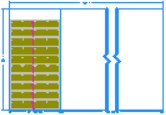
If a remnant length is longer than ten times the sheet length, the remnant area on a sheet will contain a break area (zig zag lines) indicating that the remnant is actually longer than what is displayed.
Output tab
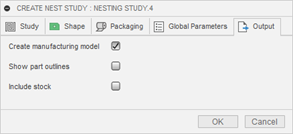
Create manufacturing model: Select this if you plan to create toolpaths and NC code for your nests. This is not necessary if your goal is just to export nest results as DXF files.
Show part outlines: Shows part and manufacturing model outlines in the nest and includes a sketch for each component. This can be helpful for seeing hidden features of a part without having to flip the sheet over. Can result in longer generation times.
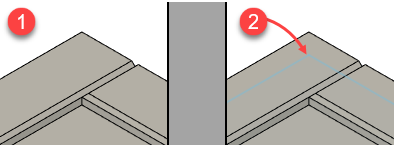
- Part outlines not shown
- Part outlines shown
Include stock: If you are generating a manufacturing model, select this to create a visual representation of stock properties, such as dimensions, as well as include a stock body in the manufacturing model.

Stock not included
Stock included
If you include stock, it is shown as a body and sketch in the browser.
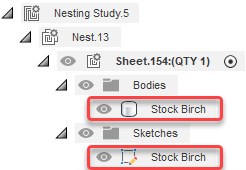
If you select both Create manufacturing model and Include stock, a remnant cut sketch will be created around the parts.
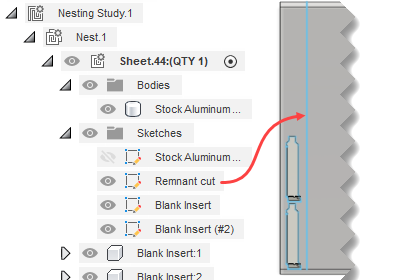
Once you have cut the parts for your nest, you can use the remnant cut sketch to create a cut that separates the remnant from the material that was used to create your parts.
Edit Nest dialog
The Edit Nest dialog has a few minor differences from the Create/Edit Nest Study dialogs.
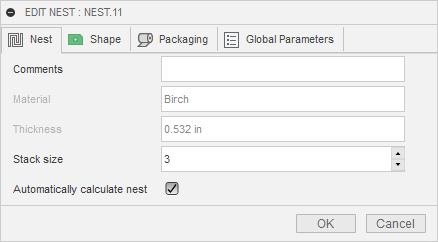
The Study tab is replaced by the Nest tab, which includes read-only fields for material name and thickness for the nest you are editing.
The Shape tab does not include the option to bind shapes to sources
The Global Parameters tab enables you to override material and nest study parameters for this nest.
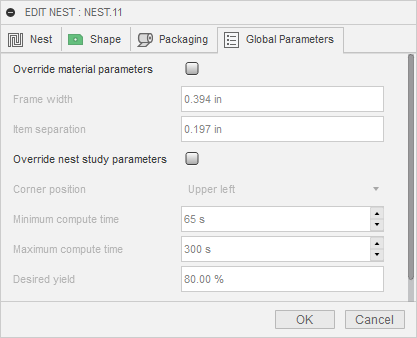
There is no Output tab in the Edit Nest dialog.